
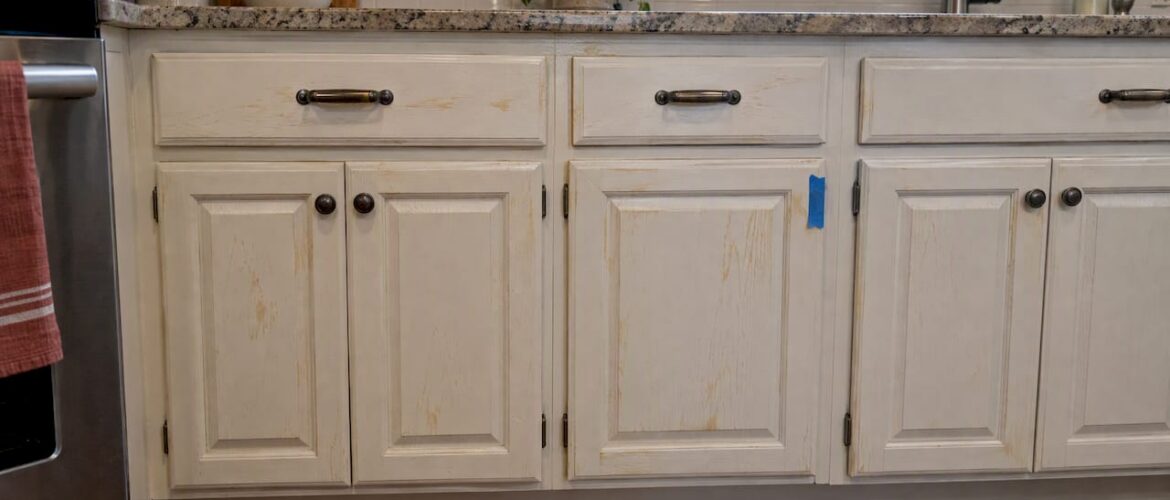
Tannin bleed is stopped or prevented by sealing the wood with a heavy duty stain blocking primer: a shellac based product like Zinsser B-I-N for the toughest woods, or a water based hybrid like KILZ RESTORATION for most jobs. Apply it, let it cure, test a small patch with your topcoat, and only then paint the rest. If stains already show through old paint, you can usually fix them by spot cleaning and spot priming rather than stripping the whole cabinet.
TL;DR:
- Oak, cedar, redwood, walnut, and mahogany carry higher tannin risk; degrease, lightly sand with 150 to 220 grit, and prime every exposed surface.
- Choose shellac primer for heavy bleeders; use a water based hybrid when odor and ventilation matter, and follow the manufacturer’s recoat window.
- Before painting all cabinets, let primer cure, topcoat a hidden test patch, and monitor it for a day; yellowing calls for another primer coat.
- For existing stains, clean with oxalic acid cleaner, rinse, and let the wood dry at least 48 hours before spot sanding and shellac priming.
- If stains return after two full primer coats, strip only the affected area; widespread failures may warrant shop refinishing, typically costing $3,000 to $8,000.
Table of Contents
- What tannin bleed is and which woods and conditions cause it
- Prevent tannin bleed before you paint: step by step prep, primer selection, and testing
- Repairing existing tannin bleed: a minimal, stepwise remediation workflow
- Choosing primers and topcoats for cabinets that resist tannin migration
- Shop level alternative: why a factory finish refinisher can be the better route
- A practical take on getting this right the first time
- Skip the trial and error with a factory-finish refinish
- FAQ
- Sources
What tannin bleed is and which woods and conditions cause it
Tannins are natural compounds found in wood that dissolve in water and migrate upward through paint when moisture reaches them. Once they reach the surface, they leave yellow, brown, or tan discoloration that shows clearest on white or other light colored paint, according to Sherwin-Williams guidance on tannin staining. The stain isn’t dirt or a coating defect. It’s the wood itself pushing color through a film that wasn’t built to stop it.
Some species carry far more tannin than others, and your cabinet wood matters as much as your paint choice:
- Oak and walnut, common in older kitchen cabinets, are both heavy tannin carriers.
- Mahogany holds enough tannin to bleed through multiple coats if left unsealed.
- Cedar and redwood are frequently cited as the most tannin-prone woods used in cabinetry and trim.
Three situations tend to trigger a bleed-through problem. Painting directly over knots or raw, unsealed wood gives tannins a short path to the surface. Painting before wood has fully dried after cleaning or a humid spell traps moisture that later pulls tannins upward. And using a basic wall primer instead of a dedicated stain blocker leaves a film too thin or too porous to hold tannins back. Light colored paint doesn’t cause the bleed, but it makes the wood’s chemistry impossible to hide.
Prevent tannin bleed before you paint: step by step prep, primer selection, and testing
Prevention beats repair, and the sequence matters more than any single product. Skipping a step here is usually what forces a full repaint later.
- Degrease first. Kitchen cabinets collect cooking oil residue that blocks primer adhesion, so wipe every surface with a degreasing cleaner or a diluted trisodium phosphate solution, then rinse and let the wood dry completely.
- Scuff sand the surface. A light pass with 150 to 220 grit sandpaper opens the wood’s pores enough for primer to grip without removing the existing finish.
- Prime every exposed surface. Edges, box interiors, and door backs are often skipped, but tannins migrate from any raw or thinly coated face, not just the ones you see most.
- Choose your primer based on the wood and your schedule. For oak, cedar, redwood, or any wood with a known bleed history, a shellac based primer like Zinsser B-I-N offers the most aggressive stain block available for interior work. For lighter risk situations or when odor and ventilation are concerns, a water based hybrid like KILZ RESTORATION is formulated to perform close to an oil or shellac product.
- Run a test patch. Prime a small, hidden section, let it cure for the manufacturer’s full recoat window, then apply your topcoat over just that patch and watch it for a day before committing to the whole piece.
- Apply a second coat if needed. If any yellowing shows through the test patch, recoat with the same primer before moving forward rather than switching products mid-project.
Manufacturer-reported dry and recoat windows matter here. Zinsser B-I-N technical data lists a fast touch-dry time and a recoat window of about 45 minutes, while KILZ RESTORATION’s product guidance specifies waiting until the primer is fully dry before recoating. Respecting these windows, rather than rushing the topcoat on, is part of what lets the primer actually lock the stain in place.
If you’re working on cabinets with existing stain damage rather than bare wood, our guide to painting over stained cabinets without stripping walks through adapting this same sequence for a repaint.
Repairing existing tannin bleed: a minimal, stepwise remediation workflow
When tannin stains already show through painted cabinets, the fastest fix is almost never a full strip and repaint. Start small and only escalate if the stain keeps winning.
Begin by cleaning the stained area with an oxalic acid wood cleaner or a dedicated tannin remover, following Behr Pro’s recommended approach of cleaning first, rinsing thoroughly, and allowing the wood to dry for at least 48 hours before any primer touches it. Skipping the dry time is the single most common reason a repair fails within weeks.
Once dry, work through these steps:
- Spot sand just the stained area to break the old paint film and expose a clean edge for the new primer to bond to.
- Spot prime with a shellac based product, since it seals tannins faster and more reliably than a general purpose primer on a small, already-compromised area.
- Let the primer cure fully, then test with your topcoat on that same spot before touching the rest of the door or panel.
- If the stain reappears after two full primer coats, strip back to bare wood in that area and start the full prevention sequence from scratch.
Pro Tip: Feather the edges of your spot repair with a slightly damp foam roller before the topcoat sets, so the new paint blends into the surrounding sheen instead of leaving a visible patch.
Lap lines and visible patches usually come from uneven pressure or drying time mismatches between the repaired spot and the surrounding paint, not from the primer itself. Keeping your roller or brush strokes consistent across the whole panel, rather than just the repaired section, hides the repair far more effectively. If drips show up during this blending stage, our notes on preventing and fixing drips on cabinet paint cover how to catch them before they cure.
Choosing primers and topcoats for cabinets that resist tannin migration
Not every stain blocking primer behaves the same way, and picking the wrong one for your timeline or ventilation setup slows the whole project down.
- Zinsser B-I-N is a shellac based primer built for heavy stain blocking, with fast dry and recoat times that make it practical for a weekend project, though its alcohol base means you’ll want strong ventilation while applying it.
- KILZ RESTORATION is a water based hybrid formulated to approach oil or shellac level performance with easier cleanup and lower odor, which suits homeowners working in an occupied kitchen.
- Both manufacturers recommend a test patch and, if bleeding continues, a second coat or a longer dry time before topcoating, per KILZ’s own application guidance.
For the topcoat itself, semi-gloss or satin sheens are the standard choice for cabinet doors and boxes. A higher sheen reflects more light evenly across the surface, which makes any faint residual discoloration far less noticeable than it would be under a flat finish, and it also wipes clean more easily in daily kitchen use. If you’re also deciding on paint chemistry and VOC content, our breakdown of low-VOC cabinet paint options covers topcoats that pair well with both primers above. For interior cabinet faces specifically, avoiding a glossy interior sheen that shows every tool mark is worth a look at our guide to painting cabinet interiors before you commit to a finish.
Shop level alternative: why a factory finish refinisher can be the better route
A controlled spray environment limits tannin problems in ways that brush and roller work can’t always match. Our factory-finish process relies on multiple thin, even layers applied in a dust-controlled setting, with full prep and primer cure time built into the schedule rather than compressed into a weekend.
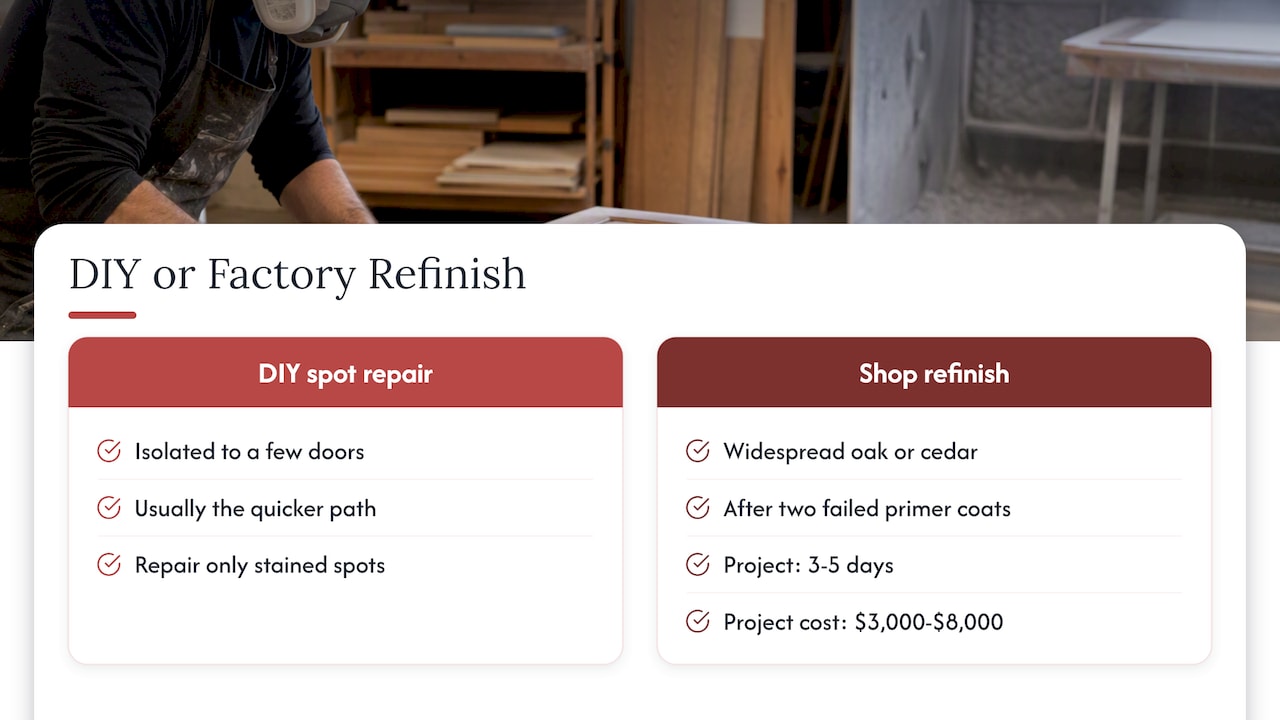
We complete most cabinet refinishing projects in 3 to 5 days, with full project costs typically ranging from $3,000 to $8,000 depending on scope. If your tannin bleed is isolated to a few doors, a DIY spot repair is usually the quicker path. If it’s widespread across oak or cedar cabinetry, or if you’ve already tried two primer coats without success, a shop-based refinish resets the surface with professional spray equipment and controlled cure times.
A practical take on getting this right the first time
Most tannin bleed problems trace back to one of three shortcuts: skipping the degrease step, rushing past the recoat window, or skipping the test patch because the rest of the job looked fine. Fix those three habits and almost every cabinet, regardless of wood species, holds its finish.
Before you paint a full set of cabinets, run through this:
- Degrease every surface, including edges and interiors.
- Confirm the wood is fully dry, not just dry to the touch.
- Match your primer to the wood: shellac for oak, cedar, redwood, or known bleeders.
- Respect the manufacturer’s recoat window instead of rushing ahead.
- Test a hidden patch with your actual topcoat before committing.
- Recoat immediately if the test patch shows any yellowing.
— Jesse
Skip the trial and error with a factory-finish refinish
If a DIY fix doesn’t look right the first time, or if your cabinets cover a large kitchen where testing every panel isn’t practical, a professional refinish gets you a tannin-free, durable finish without the guesswork of matching primers to wood species yourself. Our team at Cabinet Refinishing Denver handles prep, priming, and multiple spray coats in a controlled shop environment, typically finishing a full kitchen in 3 to 5 days.

| What you get | Detail |
|---|---|
| Typical turnaround | 3 to 5 days |
| Typical project cost | $3,000 to $8,000 |
| Process | Factory-finish spray application |
See how the process works in our step-by-step cabinet painting walkthrough, or reach out through our cabinet painting and staining services page to get a quote for your kitchen.
FAQ
Can I stain over already stained cabinets?
Yes, but the existing stain or tannin discoloration needs to be sealed first with a shellac based or heavy duty stain blocking primer, or it will bleed through the new stain or paint. Clean and dry the wood fully before applying any new primer or topcoat.
What is tannin bleed on wood?
Tannin bleed happens when natural tannins inside wood dissolve in moisture and migrate up through paint, leaving yellow, brown, or tan discoloration, as described in Sherwin-Williams’ tannin guidance. It shows up most visibly on light colored paint and is common on oak, cedar, redwood, mahogany, and walnut.
What is the best finish for inside kitchen cabinet boxes?
Satin or semi-gloss finishes are generally preferred for cabinet interiors because they resist moisture and wipe clean easily while also making any residual discoloration less noticeable than a flat sheen would. A stain blocking primer underneath still matters more than sheen choice when tannin is a known risk.
How do I stop tannins from coming through paint?
Seal the wood first with a heavy duty primer such as shellac based Zinsser B-I-N or water based KILZ RESTORATION, following the manufacturer’s recoat window before topcoating. Always test a small patch with your actual topcoat first, since Behr Pro notes that even proper prep doesn’t guarantee a bleed won’t reappear on certain wood.
What color works best for cabinet doors prone to tannin staining?
Lighter colors show tannin discoloration more easily, so many homeowners choose a well-sealed white or pale tone only after confirming a test patch holds, while mid-tone colors offer more forgiveness if a faint stain persists. Finish choice and sheen also affect how visible any residual tannin looks, a point covered in this guide on choosing interior door colors.
Sources
- How to Fix Paint Tannin | Sherwin-Williams
- PERFORMANCE CHARACTERISTICS (Zinsser B-I-N technical data) | Rust-Oleum
- KILZ RESTORATION® Interior Primer | KILZ®
- Tannin Staining – Paint Problem Solver | Behr Pro