
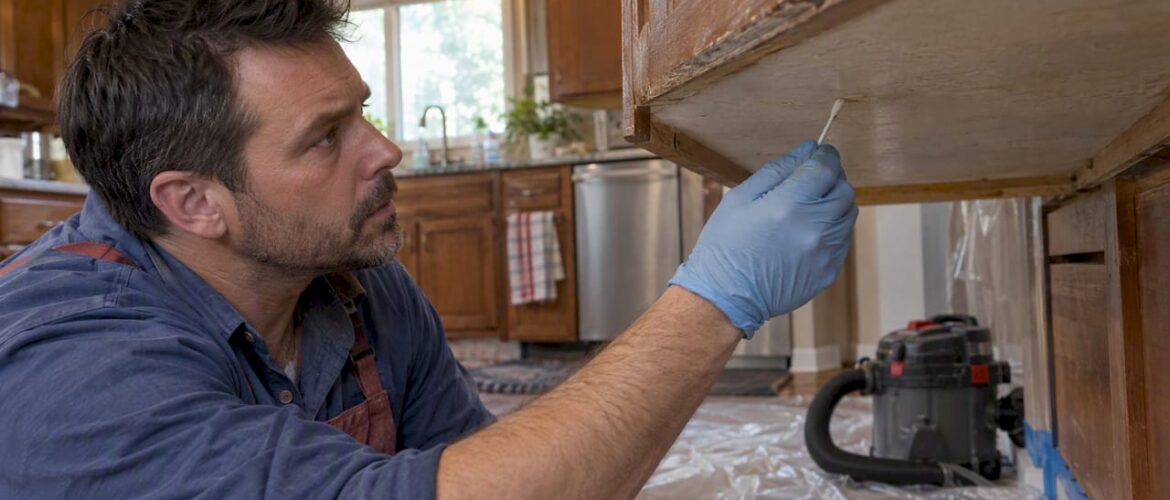
Paint the underside of a cabinet when it’s visible, under a light fixture, or sitting above a range or sink where grease and steam collect. When the underside is tucked away and never seen, finishing becomes optional, though sealing raw edges is still worth doing. Homes built before 1978 need a lead check first, and whatever route you choose, surface prep decides whether the finish actually holds.
TL;DR:
- For homes built before 1978, test for lead or presume it is present; avoid dry sanding and use containment, wet methods, and HEPA cleanup.
- Degrease thoroughly, let the surface dry, scuff sand, and prime appropriately; grease left behind is the leading cause of poor paint adhesion.
- Choose waterborne alkyd or urethane modified cabinet enamel over wall paint; use semi gloss near cooking areas and match primer to the surface.
- Consider a thin plywood or MDF underside panel when steam exposure is heavy, wiring needs concealing, or disturbing old paint poses a concern.
Table of Contents
- When and why to finish the underside
- Safety and prep first: lead paint rules and degreasing
- Which paints and finishes to use on undersides
- Step-by-step workflow for painting cabinet undersides
- Alternative: applied underside panels instead of painting
- Pro refinisher perspective on undersides and factory finishes
- My take on undersides and homeowner tradeoffs
- How we can help with your cabinet refinishing project
- FAQ
- Sources
When and why to finish the underside
The decision usually comes down to what you can see and what the cabinet is exposed to. Open shelving, glass-front uppers, and under-cabinet lighting all put the underside on display, and an unfinished panel looks unfinished the moment a light turns on. Beyond looks, undersides near a range or sink pick up grease and steam that raw wood or old varnish can’t shrug off, making cleanup harder and inviting moisture damage over time.
Run through a short checklist before deciding:
- Can you see the underside from normal standing height or from the dining table?
- Is it mounted over a stove, sink, or anywhere steam collects?
- Does it have task lighting that will highlight scuffs or bare wood?
If you answered yes to any of these, plan on finishing it. If not, you can skip the topcoat and still protect the panel by sealing the edges.
Safety and prep first: lead paint rules and degreasing
Before anything touches sandpaper, figure out what you’re dealing with. If your home was built before 1978, the existing paint may contain lead, and the EPA’s lead-safe renovation guidance recommends testing or simply presuming lead is present and working accordingly. That means containment: plastic sheeting under the work area, a HEPA vacuum for cleanup, and wet methods instead of dry sanding whenever you’re disturbing old paint.
A few practices are flatly off the table. The EPA’s RRP guidance calls out open-flame burning, high-heat guns above 1,100°F, and dry sanding or scraping without HEPA filtration as prohibited when lead paint is a possibility, because each one throws fine lead dust into the air you’re breathing.
Once safety is settled, degreasing comes next:
- Wipe the underside down with a degreaser strong enough to cut cooking residue, similar to a TSP-equivalent cleaner.
- Let the surface dry completely before touching it again; trapped moisture under paint causes peeling later.
- Scuff-sand with a fine grit to knock down the sheen and give the next coat something to grip.
Even surfaces that look clean often carry a thin film of grease, and that film is the single biggest reason DIY paint jobs fail to adhere. Skipping this step is the fastest way to end up repainting in a year.
For households with small children nearby during a refinishing project, our guidance on refinishing safely around kids covers how to keep dust and fumes contained while work is underway.
Which paints and finishes to use on undersides
Not every paint can handle grease, steam, and the occasional bumped head. Waterborne alkyds and urethane-modified enamels hold up better than standard wall paint because they cure to a harder, more chemical-resistant film. Products built specifically for cabinetry, like Insl-X Cabinet Coat, are formulated for adhesion on difficult surfaces and resist staining and scuffing better than general-purpose paint.
Sheen matters too:
- Semi-gloss or high-gloss finishes clean up faster than satin or flat, which matters directly under a range.
- A lighter, higher-gloss underside reflects more light from under-cabinet fixtures back onto the counter.
- Flat finishes trap grease in their texture and are harder to wipe clean over time.
Primer choice depends on what’s already there. Raw wood needs a stain-blocking primer to prevent tannin bleed-through, while previously varnished or stained surfaces benefit from a bonding primer that grips glossy film. For broader guidance on choosing a paint family for the whole cabinet set, our guide to the best cabinet paints walks through the options in more depth. Sheen choice also affects adjacent surfaces like doors and trim, and this breakdown of interior sheen options is a useful reference if you’re coordinating finishes across a room.
Step-by-step workflow for painting cabinet undersides
Gather your supplies before you start: a degreaser, scuff pads or 220-grit sandpaper, tack cloths, a stain-blocking or bonding primer, cabinet-grade enamel, a quality brush or HVLP sprayer, a respirator rated for fine particulates, and a HEPA vacuum if you’re working in an older home.
- Clean the underside thoroughly with degreaser and let it dry fully.
- Scuff-sand to remove sheen and smooth any rough spots.
- Wipe with a tack cloth to pull off dust before priming.
- Apply primer in a thin, even coat and let it cure per the label.
- Apply the first topcoat in thin layers rather than one heavy pass.
- Let it dry to the touch, then apply a second coat for durability.
- Allow full cure time, often longer than the touch-dry window, before reinstalling anything.
Spraying gives the smoothest, most factory-like result and is worth renting equipment for if you’re doing a full kitchen’s worth of panels. Brushing works fine for a single cabinet or tight corners, just load the brush lightly and tip off in one direction to avoid visible strokes.
Pro Tip: Thin coats that fully cure beat one thick coat every time, since heavy paint stays soft longer and is far more likely to stick to the surface below it.
Cure time is where most DIY projects go wrong. Reinstalling hardware or letting a painted surface rest against another painted surface before it’s fully cured causes blocking, where the two surfaces fuse together. Our guide to avoiding blocking in painted cabinets covers how to prevent that specific headache, and the same cure-time patience applies to undersides.
Alternative: applied underside panels instead of painting
Rather than painting in place, some cabinetmakers attach a thin panel, typically 1/4 inch plywood or MDF, directly to the underside. This hides seams between cabinet runs, gives a clean factory look, and makes it easier to route wiring for under-cabinet lighting without exposed cords.
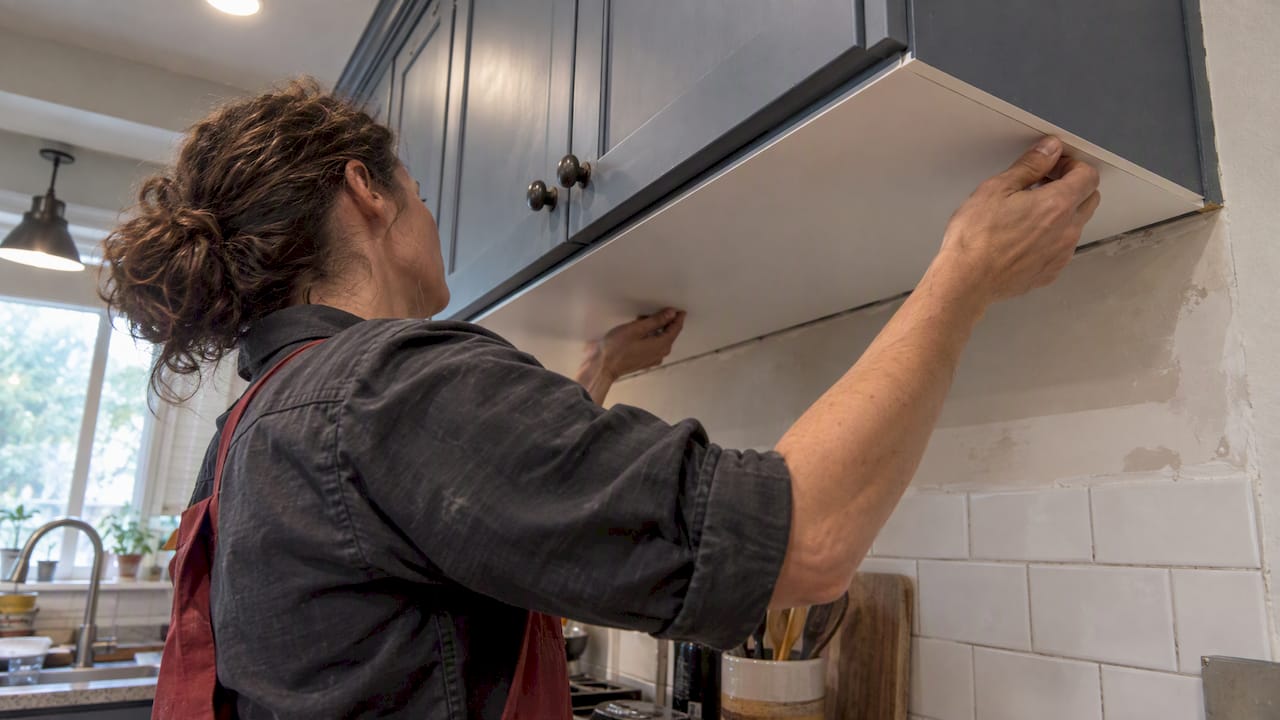
The install is straightforward in concept: measure the opening, cut the panel to fit, scribe it against any wall irregularities, attach it with adhesive or small fasteners, and finish the exposed edge with edge banding or thin molding. The panel itself can be painted on-site or finished ahead of time in a shop setting, as cabinetmaking guidance on finished undersides notes is common practice, especially when lighting is part of the design.
This route makes the most sense when steam exposure is heavy, you want a finished look without the drying time of on-site paint, or you’d rather avoid disturbing old paint altogether in an older home.
Pro refinisher perspective on undersides and factory finishes
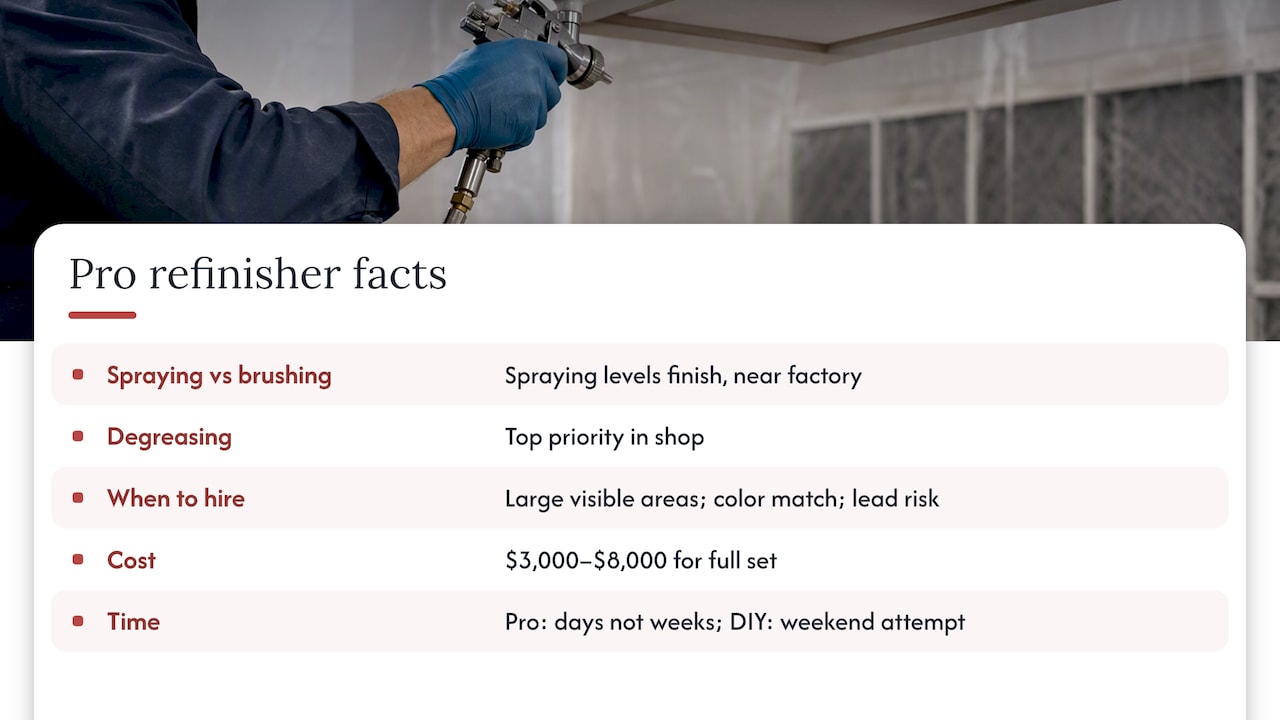
In our shop, degreasing gets more attention than almost any other step, because grease is invisible until a topcoat starts lifting six months later. We favor spraying over brushing whenever the setup allows it, since a sprayed finish levels out without brush marks and holds up closer to a true factory finish standard, which calls for interior exposed surfaces to carry at least one coat free of imperfections.
Hiring a pro makes the most sense for large visible areas, color matching across an entire kitchen, homes where lead is a real possibility, or when a shop-applied finish is worth the cost over a weekend DIY attempt. Refinishing a full set of cabinets typically runs $3,000 to $8,000, well below the cost of replacement, with most projects wrapped in days rather than weeks.
My take on undersides and homeowner tradeoffs
Finish what you can see, seal the edges on what you can’t, and don’t skip the degreasing step no matter which route you pick. Paint brand matters less than most people think; prep is what separates a finish that lasts from one that peels. If lead is even a possibility in your home, that’s the one spot where hiring a certified pro is worth the extra cost.
— Jesse
How we can help with your cabinet refinishing project
When the underside work is part of a bigger kitchen refresh, or you’d rather skip the dust and drying time altogether, we handle the whole job with a shop-based, factory-finish spray process that most weekend painters can’t replicate at home. Projects typically wrap in 3 to 5 days instead of dragging out over weekends.

Reach out when any of these apply to your project:
- You’re working in a pre-1978 home and want lead concerns handled professionally.
- The undersides, along with the rest of the kitchen, need a consistent, durable finish.
- You’d rather have a done-in-days result than an open-ended weekend project.
Get a quote through our cabinet painting and refinishing services page and see what a factory finish looks like in your own kitchen.
FAQ
Are you supposed to paint the underside of cabinets?
Paint it when it’s visible, lit, or exposed to grease and steam, such as above a range or sink. When it’s fully hidden from view, painting is optional, though sealing the raw edges still helps prevent moisture damage.
How do you finish the underside of cabinets?
Degrease the surface fully, scuff-sand it, prime with a bonding or stain-blocking primer depending on the existing material, then apply two thin coats of a cabinet-grade enamel with full cure time between coats. Spraying gives the smoothest result, while brushing works for single panels or tight spots.
Should you paint the insides of cabinets?
Interior painting is a matter of preference rather than necessity, though it does improve cleanability and matches the exterior finish. If you do paint interiors, watch cure times closely, since doors and shelves can stick together if closed before the paint fully hardens.
What are common mistakes when painting kitchen cabinets?
The most common mistake is inadequate degreasing, which leaves an invisible film that keeps paint from bonding properly. Other frequent errors include skipping primer, applying one thick coat instead of several thin ones, and closing doors or drawers before the finish has fully cured, which causes surfaces to stick together.
Sources
- Lead-Safe Renovations for DIYers | US EPA
- KCMA A161.1 Cabinet Manufacturer’s Association standard
- Whether to Finish the Undersides of Upper Cabinets | WoodWeb
- Insl-X Cabinet Coat | Benjamin Moore