
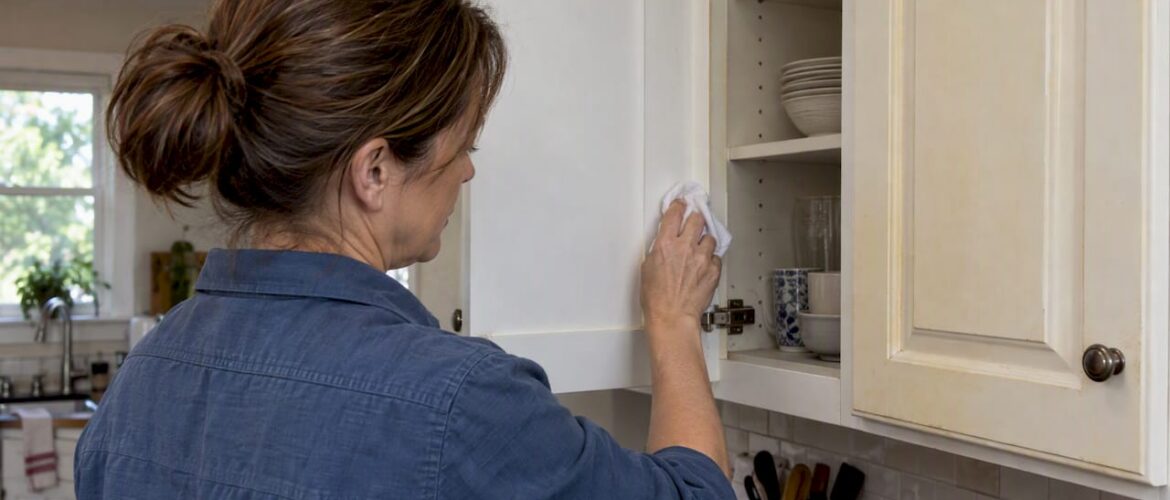
Most yellowing you see near a stove is removable grease film, not a ruined finish. A gentle soap-and-water test on a hidden spot will usually tell you which problem you have within a few minutes. If that test restores a clean white patch, a progressive cleaning routine will likely handle the rest. If the yellow cast stays even after careful cleaning, the finish itself has ambered and no amount of scrubbing will bring the white back.
TL;DR:
- Test a cabinet spot with warm water and dish soap for 15 to 20 seconds; whitening signals grease, while persistent yellowing points to ambering.
- Start with dish soap, then try baking soda paste; use equal parts vinegar and water only on compatible finishes, since acidity can dull glossy lacquer.
- Run an outdoor venting range hood while cooking and for 10 to 20 minutes afterward, wipe stove adjacent cabinets weekly, and clean cabinet tops monthly.
- For finish ambering, professional refinishing uses surface prep and a nonyellowing topcoat; the refinisher reports $3,000 to $8,000 and 3 to 5 day projects.
Table of Contents
- Common causes of white cabinet yellowing
- How to tell surface residue from finish ambering
- Step-by-step cleaning protocol for yellowed cabinets
- Prevention and maintenance routines to reduce re-yellowing
- When cleaning won’t restore the cabinets
- A pro perspective on when refinishing makes sense
- Restoring yellowed cabinets with professional refinishing
- FAQ
- Sources
Common causes of white cabinet yellowing
Airborne grease is the most frequent culprit. Frying, searing, and other high-heat cooking release oil particles that drift through the kitchen and settle on cabinet surfaces, where they polymerize into a thin, sticky film over time. This buildup is especially heavy on cabinets flanking the stove and on the undersides of upper cabinets.
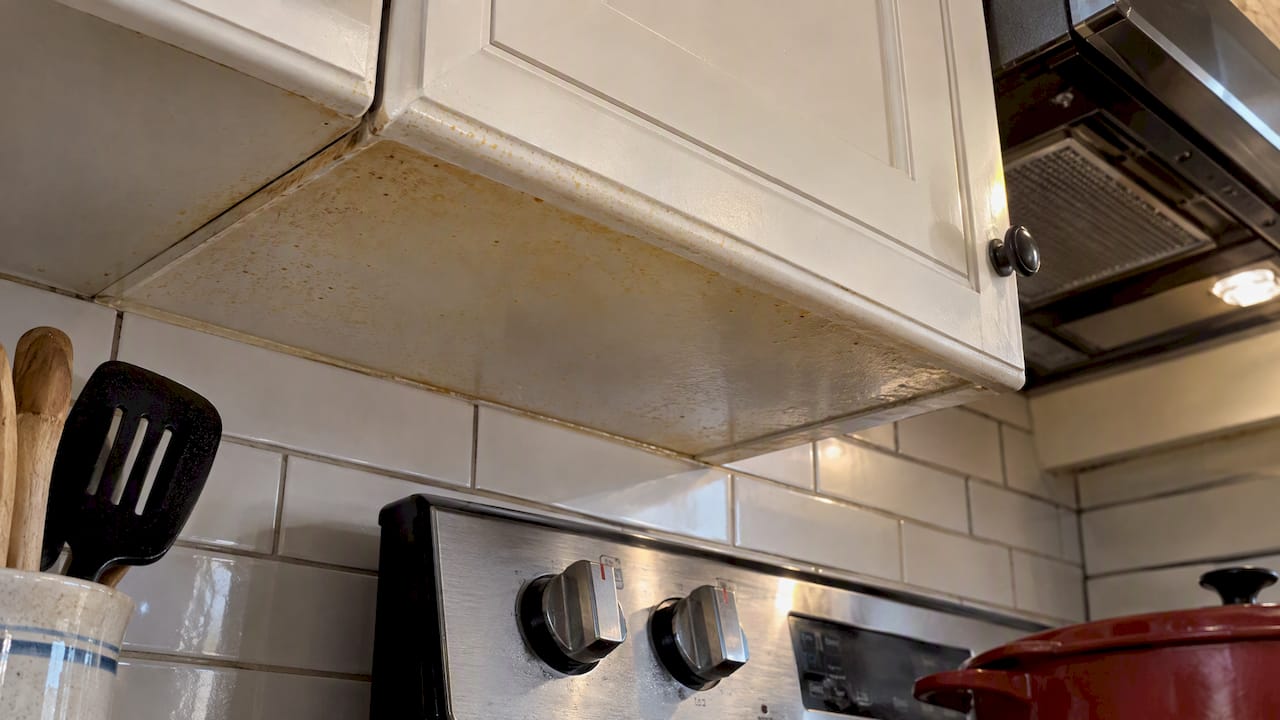
Finish chemistry plays a separate role. Sherwin-Williams explains that alkyd and oil-based paints, along with oil-based varnishes, naturally amber as they age, a chemical shift that no cleaning product can undo. Heat from a nearby stove or ductwork speeds this process, and a lack of direct light can actually make the yellowing more visible rather than less.
Moisture, tobacco smoke, and general environmental exposure add to the mix. Cabinets near a dishwasher or sink can pick up a yellow tint from trapped humidity, while homes with indoor smoking often see yellowing spread well beyond the kitchen.
- Airborne grease and cooking oil residue settle fastest near the stove and range hood.
- Alkyd or oil-based paint and varnish naturally amber with age, independent of cleaning.
- Heat and limited light exposure can accelerate or reveal ambering.
- Moisture and tobacco smoke contribute a separate layer of discoloration.
How to tell surface residue from finish ambering
Before reaching for any cleaner, run a controlled test. This confirms whether you are dealing with a removable film or a chemical change inside the finish, which Sherwin-Williams recommends as the most reliable way to diagnose yellowing without risking damage.
- Pick a hidden area, such as the inside edge of a door or the underside of a cabinet, and dampen a soft cloth with warm water and a few drops of dish soap.
- Wipe gently in a small circle for 15 to 20 seconds, then rinse with a clean, damp cloth and dry immediately.
- Compare that spot to a stove-facing surface and to a protected area, like inside a corner cabinet, to see whether the pattern matches cooking exposure.
- If the test spot turns noticeably whiter, the yellowing elsewhere is likely surface grease and safe to continue cleaning.
A uniform yellow cast that persists after cleaning, a sticky film that reappears within days, or a visible change in sheen all point to ambering inside the coating rather than dirt on top of it.
Pro Tip: Stop cleaning the moment a spot looks duller or slightly burnished. That is the finish telling you it has reached its limit, and further scrubbing only makes repainting harder later.
Step-by-step cleaning protocol for yellowed cabinets
Work from the gentlest method to the strongest, testing each new product on a hidden area first, a sequence outlined in cleaning guidance for laminate and painted cabinets.
- Mix warm water with a few drops of dish soap and wipe with a microfiber cloth, rinsing and drying fully before judging the result.
- If grease remains, make a paste of baking soda and water, apply with a soft cloth, let sit for a minute, then wipe and rinse thoroughly.
- For stubborn films, a solution of equal parts white vinegar and water can cut through grease, but skip this step on cabinets with a glossy lacquer, since vinegar’s acidity can dull some finishes.
- For stains that look oxidized rather than greasy, dab a small amount of hydrogen peroxide on a hidden spot first and watch for any color change before treating the full area.
- A commercial degreaser labeled safe for painted or laminate surfaces can finish the job where home remedies fall short.
Avoid anything that can strip or scar the finish:
- Bleach, which can react with certain paints and leave blotchy discoloration.
- Oven cleaner, formulated for bare metal, not painted wood or laminate.
- Pure acetone or other strong solvents.
- Highly alkaline cleaners and abrasive scouring pads.
Clean hardware, edges, and hinge areas with a soft-bristle brush dipped in the same soapy solution, and do not skip the tops of upper cabinets, where grease and dust combine into the thickest film in the kitchen. For a closer look at technique, see our professional cleaning guide for painted cabinets.
Prevention and maintenance routines to reduce re-yellowing
Ventilation does more to prevent yellowing than any cleaning product. The EPA recommends running a range hood that vents outdoors while cooking and for 10 to 20 minutes afterward, since that window is when most airborne grease settles on nearby surfaces. A peer-reviewed study of gas cooking emissions found that a high-flow range hood reduced pollutant concentrations substantially compared with cooking without one, which translates directly into less grease landing on your cabinets.
- Run the range hood during cooking and for 10 to 20 minutes after, and clean its filters on a regular schedule.
- Wipe stove-adjacent surfaces weekly, and do a deeper clean of cabinet tops and trim once a month.
- Cook on back burners when practical and use lids on pans to cut down on airborne grease.
- Keep cabinets out of direct heat and strong UV light where possible, and choose cleaners that rinse clean rather than leaving a residue.
For a more detailed prevention routine, our guide to preventing yellowing on painted cabinets covers seasonal upkeep in more depth.
When cleaning won’t restore the cabinets
If the hidden-area test shows a yellow cast that will not lift, or if cleaning leaves the surface dull or sticky again within a week, the discoloration is in the finish itself and cleaning has reached its limit. At that point the choice is between repainting, full refinishing, or replacement, and each solves a different problem.
- Repainting alone covers the color but can trap existing yellowing underneath if the old finish is not properly prepped.
- Refinishing strips or scuffs the old coating, repairs minor damage, and applies new primer and a non-yellowing topcoat, restoring the look without replacing the boxes.
- Replacement addresses structural damage but costs far more and takes much longer than either painting option.
A professional process typically includes degreasing, sanding or deglossing, bonding primer, and multiple coats of a water-white topcoat chosen specifically to resist future ambering. Our step-by-step painting process guide walks through what that prep work looks like in practice. Before hiring anyone, ask what topcoat they use, whether they offer a warranty, if they can show a sample on an inconspicuous panel, and what the realistic project schedule looks like.
A pro perspective on when refinishing makes sense
Cleaning solves surface grease. It cannot undo chemical ambering in old alkyd paint or varnish, and no amount of scrubbing will change that. Once a hidden-area test confirms the yellow is in the finish, refinishing restores the cabinets far faster and at a fraction of what full replacement costs.
— Jesse
Restoring yellowed cabinets with professional refinishing
When the finish itself has ambered, a factory-finish spray process can give yellowed cabinets a clean reset without the cost of full replacement. We prep every surface thoroughly, bond primer to the substrate, and apply non-yellowing topcoats formulated to resist the same heat, light, and grease exposure that caused the original discoloration.

- Most of our cabinet refinishing projects run $3,000 to $8,000, well under typical full-replacement budgets.
- Most jobs complete in 3 to 5 days, not the weeks a full replacement usually takes.
- Spray application, rather than brush or roller work, gives a smoother, more durable finish that holds its color longer.
If your cabinets are past the point cleaning can fix, request an estimate and we’ll walk you through color matching, sample panels, and a realistic schedule for your kitchen.
FAQ
How to get yellowing out of white material?
Start with the gentlest method that works: warm water and dish soap, then baking soda paste for grease that doesn’t lift the first time. If a hidden-area test shows the yellow won’t budge after careful cleaning, the discoloration is inside the material’s finish, and no cleaner will remove it.
Do white kitchen cabinets turn yellow over time?
Yes, especially cabinets finished with alkyd or oil-based paints and varnishes, which naturally amber as they age. Heat, limited light, and airborne cooking grease all speed up or reveal this process, particularly on cabinets near the stove.
Why are my white laminate cabinets turning yellow?
Laminate cabinets near a stove accumulate polymerized oil films from cooking fumes, which bond to the surface texture over time, according to cleaning guidance for laminate cabinets. A progressive cleaning approach, starting with dish soap and moving to baking soda or vinegar, usually removes this film without damaging the laminate.
How to restore yellowed white paint?
If a hidden-area soap test lifts the yellow, cleaning is enough and a consistent maintenance routine will keep it that way. If the test shows uniform yellowing that cleaning can’t remove, the paint has ambered at the chemical level and needs fresh primer and a non-yellowing topcoat rather than another round of scrubbing.
What should I ask before choosing cabinet color or sheen to avoid future yellowing?
Ask what topcoat chemistry is being used and whether it’s rated as non-yellowing, since standard alkyd paints amber faster than water-based acrylics. For color and sheen choices, a resource like this guide on interior door colors offers useful context on coordinating white tones across a room.
Sources
- Yellowing – Sherwin‑Williams
- Strategies for Improving Indoor Air Quality While Cooking Infographic | US EPA
- Pollutant concentrations and emission rates from natural gas cooking burners without and with range hood exhaust in nine California homes
- How to clean white laminate cabinets yellowed by oil fumes | Kitchen Clean Lab
Recommended
- Preventing Yellowing on White Painted Cabinets: The Ultimate Denver Homeowner’s Guide (2026)
- Homeowners: Five Minute Tests to Spot Cabinets Not Worth Painting
- Painting Oak Cabinets White in Denver: The 2026 Professional Guide
- Painting Oak Cabinets White: The Professional Before and After Transformation Guide