


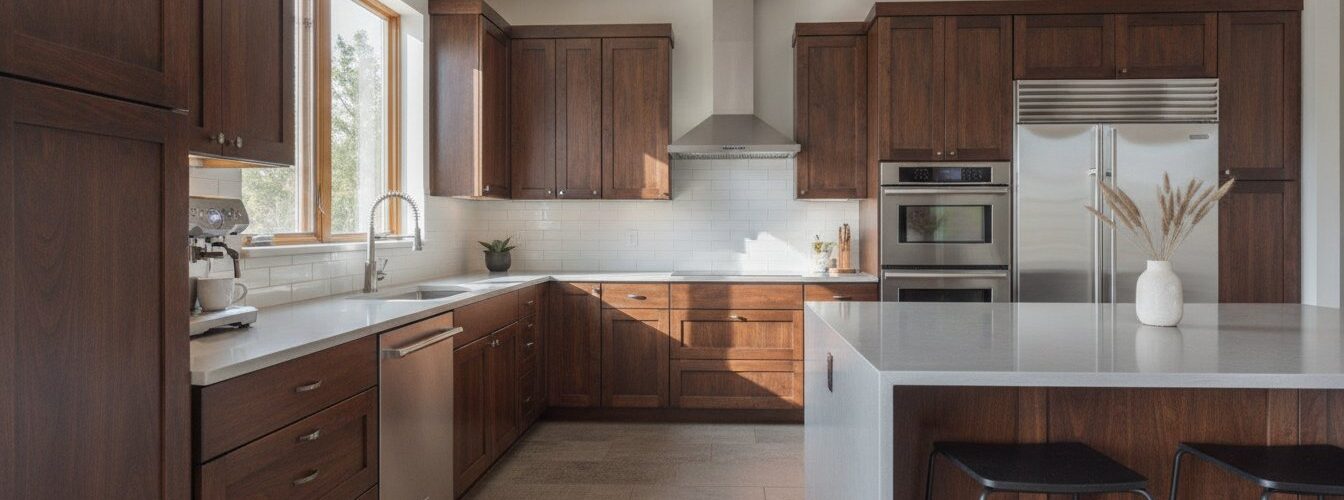
That beautiful, smooth finish on your painted kitchen cabinets looks flawless-and the thought of scratching it with the wrong cleaner is enough to make you avoid the task altogether. But daily cooking splatters and stubborn grease buildup are inevitable. You’re left wondering which products are safe and which will strip the paint right off, especially on a professional, factory-grade finish. The truth is, learning how to clean painted kitchen cabinets correctly is the most vital factor in preserving your investment and keeping your kitchen looking its best.
In this professional’s guide, we cut through the confusion. We will provide the exact, step-by-step methods to safely remove tough grease and grime without damaging your cabinet’s durable finish. You’ll get a clear list of approved, non-damaging cleaning solutions and gain the confidence to maintain your kitchen’s pristine appearance. Forget the guesswork and fear of costly mistakes; it’s time to clean like a pro.
Key Takeaways
- Protect your cabinet’s factory finish by always starting with the mildest cleaning solution. This guide details which simple, non-damaging cleaners are the most effective first line of defense.
- The professional approach to how to clean painted kitchen cabinets relies on consistency. Learn a simple weekly routine and a more thorough deep-cleaning process to prevent grease buildup.
- Tackle stubborn grease, grime, and fingerprint stains with targeted techniques. We provide the right methods and solutions for the most common and frustrating kitchen cabinet messes.
- Simple kitchen habits can significantly extend the life of your painted finish. You will also learn to recognize the signs that cleaning is no longer enough and professional refinishing is needed.
Before You Start: The Golden Rules of Cleaning Painted Cabinets
Your professionally painted kitchen cabinets feature a durable, factory-style finish designed to withstand the daily demands of a busy kitchen. However, this industrial-strength coating is not invincible, especially against grease, steam, and food splatters. The most important lesson in how to clean painted kitchen cabinets is to preserve this protective topcoat. The golden rule is simple: always start with the gentlest method first. Before applying any cleaner to a visible area, perform a spot test on a hidden surface, like the inside of a cabinet door, to ensure there is no adverse reaction.
For a clear demonstration of these foundational cleaning principles, the video below is an excellent resource:
Understanding Your Cabinet’s Finish
A professional cabinet finish is typically a precatalyzed lacquer, which cures through a chemical reaction to form a hard, non-porous shell. This is fundamentally different from standard latex paint, which simply air-dries and remains much softer. This lacquer topcoat is your primary defense, providing superior resistance to moisture and stains. A deep understanding of cabinet materials and their finishes is the first step to proper maintenance. Your goal is to clean the grime off this protective layer without damaging the layer itself.
What to AVOID at All Costs
Using the wrong products is the fastest way to strip, scratch, or dull your flawless cabinet finish, leading to costly repairs. To protect your investment, you must avoid a specific list of damaging items. Immediate cleanup of spills is also a vital factor, as substances like coffee, wine, or tomato sauce can stain if left to sit.
- Abrasive Sponges and Pads: This includes green scouring pads, steel wool, and even “magic erasers,” which act like extremely fine sandpaper. They will create micro-scratches that permanently dull the sheen of your paint. Always use a soft microfiber cloth.
- Harsh Chemical Cleaners: Avoid products containing bleach, ammonia, undiluted vinegar, citrus oils, or solvents. These aggressive chemicals can chemically break down the lacquer topcoat, leaving it weak and sticky.
- Wax or Silicone-Based Polishes: Products like furniture polish may promise a brilliant shine, but they leave behind a greasy film that attracts dust and dirt. This buildup is difficult to remove and can interfere with future touch-ups or refinishing.
- Excessive Moisture: Never saturate the surface. Use a well-wrung, damp cloth and dry the cabinets immediately with a separate dry cloth. This prevents water from penetrating seams or panel joints, which can cause the wood to swell and the paint to crack.
Your Cleaning Toolkit: Safe and Effective Solutions
To achieve a flawless, lasting finish on your cabinets, using the right cleaning supplies is a vital factor. The professional approach to how to clean painted kitchen cabinets avoids harsh, abrasive chemicals that can dull or damage the paint. Instead, it relies on simple, effective tools you likely already own. Gathering everything before you start makes the process efficient and guarantees you won’t be tempted to grab a product that could harm your cabinet’s factory finish.
The Essential DIY Cleaning Solution
The safest and most effective starting point for cleaning any painted surface is a simple mixture of warm water and a few drops of mild dish soap (like original Dawn). This solution is powerful enough to cut through everyday grease and grime without stripping the paint’s protective sealant. It gently lifts dirt, preserving the integrity and sheen of your cabinets. For more stubborn spots or built-up grease, a 50/50 solution of white vinegar and warm water acts as a natural degreaser. Use this stronger solution sparingly and only when necessary.
Recommended Cleaning Tools
Having the correct tools prevents scratches and ensures a streak-free result. Your toolkit should be simple and focused on gentle application. For a comprehensive look at what tools work best on different surfaces, this expert guide to cleaning kitchen cabinets provides additional professional insights. We recommend having the following on hand:
- Microfiber Cloths: Use three separate cloths. One for washing with your cleaning solution, a second one dampened with plain water for rinsing, and a third, completely dry cloth for buffing the surface. Microfiber is non-abrasive and highly absorbent.
- Soft Sponges: If you need slightly more cleaning power, a soft sponge can be used. Always use the non-scrubbing side to avoid creating micro-scratches in the paint.
- A Spray Bottle: Mixing your solution in a spray bottle allows you to apply a fine, even mist directly onto your cloth or the cabinet surface. This prevents over-saturating the wood and gives you better control.
If you choose to use a commercial cleaner, select one that is pH-neutral and explicitly labeled as safe for painted surfaces. Avoid any products containing ammonia, bleach, or abrasive particles. Before using any new product, test it on a hidden area, such as the inside of a cabinet door, to ensure it doesn’t cause discoloration or damage.
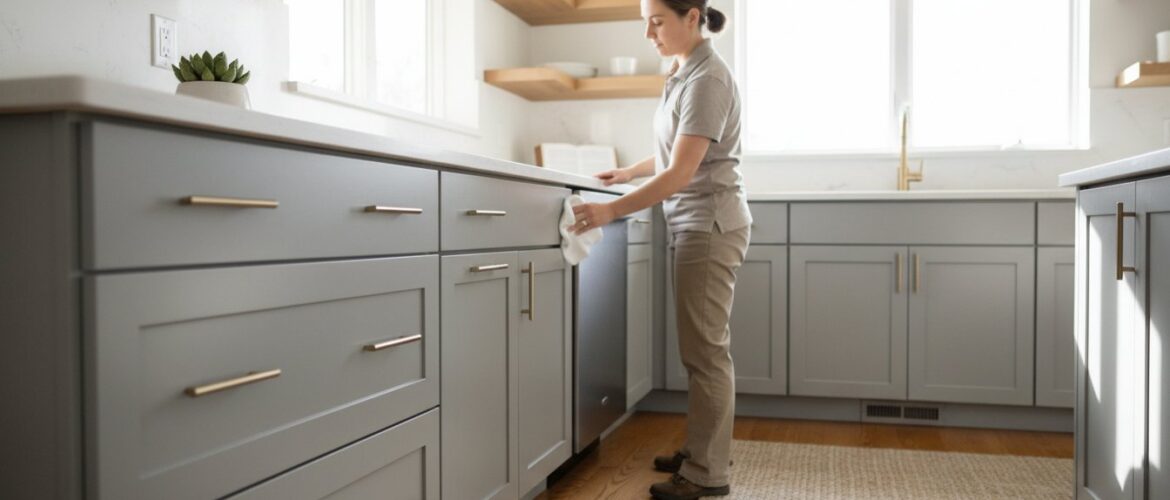
The Step-by-Step Method for Routine and Deep Cleaning
Maintaining the flawless, factory finish of your painted cabinets is straightforward with the right process. The key is consistency. A quick weekly wipe-down prevents the buildup of dust and grease, while a periodic deep clean tackles more stubborn grime. Following these professional methods ensures your cabinets remain in pristine condition for years, protecting your investment without damaging the durable lacquer finish.
Remember, the most vital factor in any cleaning process is to be gentle. Never use abrasive scrubbers or harsh chemicals. A soft touch is all you need to keep your cabinets looking brand new.
Weekly Maintenance: The 5-Minute Wipe-Down
This simple routine takes only minutes but makes a significant difference in preventing grime from setting in. Focus on consistency to keep your kitchen looking sharp.
- Dust First: Use a dry, clean microfiber cloth to quickly wipe down all cabinet faces and frames. This removes loose dust and debris before it can mix with kitchen moisture.
- Spot-Clean Splatters: Dampen a separate microfiber cloth with a little warm water to gently wipe away fresh fingerprints, water spots, or food splatters.
- Focus on Hardware: Pay extra attention to high-touch areas. Wipe down knobs, pulls, and the cabinet areas immediately surrounding them where oils from hands accumulate.
Deep Cleaning Your Painted Cabinets
Perform this more thorough cleaning every month or as needed to cut through grease and buildup. This is exactly how to clean painted kitchen cabinets when they need more than a simple dusting. The process is direct and results-oriented.
Step 1: Mix Your Cleaning Solution
In a small bucket or bowl, mix a few drops of a mild dish soap (like Dawn) into a gallon of warm water. Avoid any cleaners containing harsh chemicals, ammonia, or citrus oils, as they can degrade the paint over time.
Step 2: Gently Wipe All Surfaces
Dip a clean microfiber cloth into the soapy water and wring it out until it is just damp, not dripping. Working from the top of the cabinets down, gently wipe every surface, including doors, frames, and side panels. Use smooth, even strokes and do not apply aggressive pressure.
Step 3: Rinse with a Clean Cloth
Empty your bucket and refill it with clean, plain water. Using a new, clean microfiber cloth, dampen it with the fresh water and wipe down all the cabinet surfaces again to remove any lingering soap residue.
Step 4: Dry Thoroughly
This is a critical step. Immediately use a separate, completely dry microfiber cloth to dry every surface you cleaned. Proper drying prevents water spots, streaks, and protects the wood from any potential moisture damage, ensuring a flawless finish.

How to Tackle Tough Stains: Grease, Grime, and Fingerprints
Even the most durable factory finish will encounter tough stains in a busy kitchen. Grease, food splatters, and fingerprints are common issues that require more than a simple wipe-down. The key to success is using the right technique for the specific mess. Aggressive scrubbing or harsh chemicals can damage the paint, so the focus must always be on a gentle, targeted approach. Understanding how to clean painted kitchen cabinets when faced with stubborn grime is a vital factor in maintaining their flawless look for years.
Remember, patience and repetition are more effective and safer for your cabinet finish than brute force. Let the cleaning solution do the work.
Removing Stubborn Grease Buildup
Kitchen grease aerosolizes during cooking and settles on every surface, creating a sticky, yellow film that attracts dust and dirt. To cut through this buildup without harming your paint, you need a solution that dissolves the grease. A simple mixture of 50% white vinegar and 50% warm water is an industrial-strength degreaser that is safe for professional paint jobs.
- Apply the vinegar solution with a soft cloth or spray bottle directly onto the greasy area.
- Let the solution sit for one to two minutes. This dwell time is critical for breaking down the grease.
- Gently wipe the dissolved grease away with a clean, damp microfiber cloth, moving with the wood grain if visible.
- Repeat the process if necessary. Once the grease is gone, rinse the area with a water-dampened cloth and dry completely to prevent streaks.
Cleaning Dried Food Splatters and Sticky Spots
Dried-on food, like tomato sauce or syrup, can feel impossible to remove without scraping. However, picking or scraping at the spot will almost certainly chip or scratch the lacquered finish. The correct method relies on softening the grime first. Simply dampen a microfiber cloth with warm, soapy water (using the mild dish soap solution from our previous section), wring it out, and hold it firmly against the spot for 30-60 seconds. This warmth and moisture will rehydrate and loosen the mess, allowing you to wipe it away easily without any damage to the paint.
For all tough stains, the principle remains the same. This methodical approach is the professional secret to how to clean painted kitchen cabinets effectively, ensuring your investment remains in pristine condition without compromising the integrity of its finish.
Long-Term Care: Keeping Your Cabinets Looking Factory-Fresh
A professional, industrial-strength finish is designed for durability, but preventative maintenance is the most vital factor in its longevity. It is always easier to prevent damage than to repair it. While understanding the correct methods for cleaning is important, the best strategy for how to clean painted kitchen cabinets is to minimize how often deep cleaning is necessary. Adopting a few simple habits and being mindful of your kitchen environment will protect your investment and keep that flawless, factory finish looking its best for years.
Kitchen Habits to Adopt
The daily activities in your kitchen have a direct impact on your cabinet finish. Small adjustments to your routine can make a significant difference in preventing grease, grime, and water damage. We recommend making these habits second nature:
- Always use your range hood fan when cooking. This is non-negotiable. It pulls grease and moisture particles out of the air before they can settle on your cabinet surfaces, which is the primary cause of sticky buildup.
- Dry your hands completely before opening doors and drawers. Water and natural oils from your hands can degrade the paint finish over time, leaving dull spots or causing premature wear.
- Avoid hanging damp dish towels over cabinet doors. Prolonged moisture exposure is a leading cause of paint failure, which can lead to peeling and bubbling at the edges.
Protecting the Finish from Damage
Beyond daily grime, physical and environmental factors can compromise your cabinet’s finish. Regular inspection and proactive protection are key to avoiding chips, fading, and heat damage that require more than a simple cleaning.
- Check your cabinet bumpers. Ensure the small rubber or felt pads on the inside corners of your doors and drawers are in place. They prevent loud slamming that can crack the paint around the joints over time.
- Limit direct sun exposure. Harsh, direct sunlight will fade any painted surface. Consider using blinds or a UV-blocking window film on kitchen windows that get intense, direct sun.
- Be mindful of heat-producing appliances. Keep toasters, coffee makers, and pressure cookers from venting steam directly onto or underneath your upper cabinets. The combination of intense heat and moisture can cause serious damage to the finish.
Protecting your professionally painted cabinets is a straightforward process. By implementing these preventative measures, you ensure the durable finish performs as intended. This proactive approach makes the task of how to clean painted kitchen cabinets simpler and preserves the value of your kitchen transformation. For a finish built to last, trust the experts who understand every detail. See our quality work at Cabinet refinishing Denver.
When Cleaning Isn’t Enough: Signs You Need Professional Refinishing
Proper maintenance is key to a long-lasting finish. Following the right steps for how to clean painted kitchen cabinets will preserve their beauty for years. However, all paint has a lifespan. Daily use, exposure to heat and moisture, and accidental damage eventually take their toll. When you find that cleaning no longer brings back that fresh, clean look, it’s a clear sign that your cabinets need more than a simple wipe-down; they need professional restoration.
Identifying Permanent Damage
At a certain point, no amount of scrubbing can fix underlying paint failure. These are undeniable signs that the paint’s integrity is compromised and it’s time for a more permanent solution. Look for these common issues:
- Chipping, Peeling, or Bubbling: This is the most obvious sign of paint failure. It shows the paint is no longer adhering to the cabinet surface and cleaning will only make it worse.
- Stains That Won’t Lift: Grease, food, or water stains that have penetrated the paint layer and cannot be removed with gentle cleaning methods are permanent.
- Visible Cracks: Fine cracks, often called crazing or spider-webbing, especially around the joints and panels of cabinet doors, indicate the finish has become brittle and is breaking down.
- A Dull, Worn, or Sticky Finish: If the surface feels tacky or gummy to the touch, or if it has a dull, lifeless appearance that never feels truly clean, the protective topcoat has completely degraded.
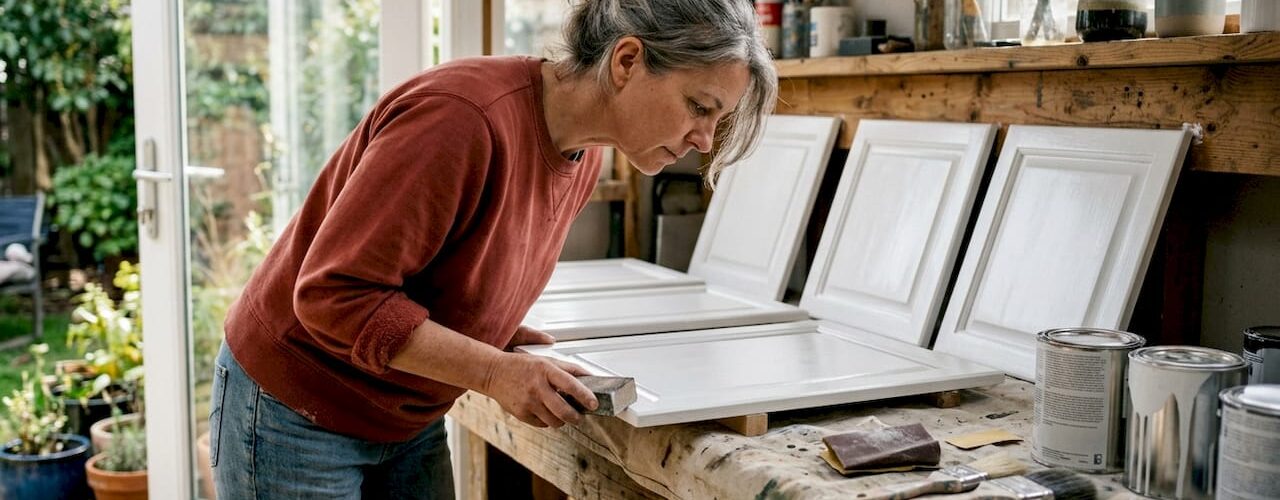
The Professional Solution
When you see these issues, the conversation shifts from how to clean painted kitchen cabinets to how to properly restore them. A professional refinishing service is the only way to achieve a durable, flawless, and long-lasting result. Unlike a typical house painter, a cabinet specialist focuses on meticulous prep work-the most vital factor in a finish that won’t fail. The old, failing paint is removed, surfaces are expertly prepared, and an industrial-strength, lacquered coating is applied to create a true factory finish.
This process not only restores the original durability but also gives you the opportunity to completely change the color and transform your kitchen. For a flawless look that is built to withstand the demands of a busy home, professional refinishing is the ultimate solution. Get an immediate quote to restore your cabinets.
The Final Word on Cabinet Care and Restoration
Mastering how to clean painted kitchen cabinets is about consistency and using the right, gentle methods. With the proper techniques, you can handle everything from daily dust to stubborn grease, preserving the beauty of your finish for years. However, it’s just as important to recognize when cleaning is no longer the solution for worn-out or damaged surfaces.
If you’re facing persistent stains, chipping paint, or a finish that looks dull no matter how much you scrub, it’s a clear sign that your cabinets need professional restoration. With over 38 years of experience serving Denver and the entire Front Range, we deliver a guaranteed durable, factory-like finish that transforms your kitchen. If your cabinets are beyond cleaning, get a fast, accurate quote for professional refinishing.
You deserve a kitchen that looks brand new, and with the right care-or the right experts-it’s entirely within reach.
Frequently Asked Questions About Cleaning Painted Cabinets
Can I use a magic eraser on my painted cabinets?
No, we strongly advise against using a magic eraser. These products are a form of micro-abrasive sandpaper and will dull, scratch, or even strip the paint and protective topcoat from your cabinets. Using one can permanently damage the flawless, factory finish you invested in. For safe cleaning, always stick to a soft microfiber cloth and a gentle, non-abrasive cleaning solution to protect the lacquered surface and ensure its longevity.
How often should I deep clean my painted kitchen cabinets?
We recommend a thorough deep cleaning every 3 to 6 months, depending on your kitchen’s usage. This schedule prevents the buildup of tough grease and grime that can damage the paint finish over time. For daily care, simply wipe away spills and splatters as they happen. Cabinets near the stove or sink may require more frequent spot-cleaning to maintain their pristine appearance and protect the professional-grade finish from breaking down.
Is it safe to use a vinegar solution on all types of cabinet paint?
You must be cautious with vinegar. Its acidic nature can be too harsh for certain professional-grade paints and lacquers, potentially dulling or damaging the finish over time. Before using a diluted vinegar solution, always test it on a small, hidden spot, like the back of a cabinet door. For a guaranteed safe option, we recommend using a pH-neutral cleaner or a simple solution of a few drops of mild dish soap in warm water.
What’s the best way to clean the hardware (knobs and pulls)?
For a deep clean, it is best to remove the hardware from the cabinets first. This prevents cleaning agents from dripping onto and damaging the paint. Create a paste of equal parts baking soda and water and gently scrub the hardware with a soft brush. Rinse thoroughly and dry every piece completely before reattaching them. This process ensures your hardware is spotless without risking the integrity of your cabinet’s lacquered finish.
Can I use a steam cleaner on painted cabinets?
Absolutely not. Using a steam cleaner is one of the most damaging things you can do to a painted cabinet. The combination of high heat and concentrated moisture can cause the paint to bubble, peel, and fail. It can also lead to the wood or MDF substrate warping. The best method for how to clean painted kitchen cabinets safely is always with gentle, non-abrasive liquid cleaners and soft cloths, never with extreme heat.
My white painted cabinets are turning yellow. Can this be cleaned?
Unfortunately, this yellowing is rarely a surface stain that can be cleaned off. It is typically caused by the aging of oil-based paints, a reaction to cooking fumes, or prolonged exposure to direct sunlight. While a deep clean might slightly improve the appearance, the only true way to fix yellowed cabinets is to have them professionally prepped and repainted with a modern, industrial-strength, non-yellowing lacquer to guarantee a durable, flawless white finish.