
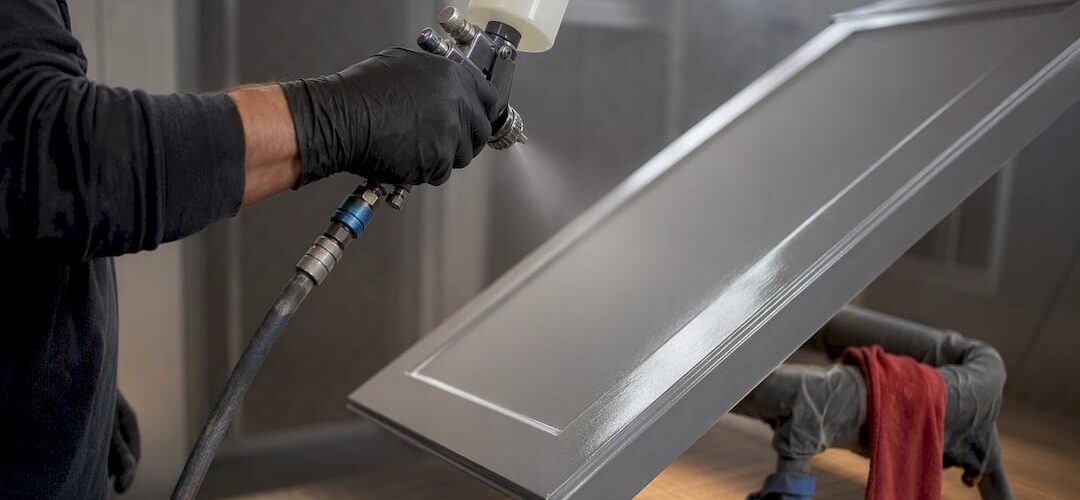
For pet-friendly cabinet painting, a factory-style waterborne urethane or professionally applied catalyzed finish beats DIY brush-and-roller jobs almost every time. These systems cure harder, resist claw marks and drool better, and off-gas far less once they are fully cured. If odor or air quality is your main worry, pick a low-VOC cabinet-specific enamel and have it shop-sprayed rather than brushed on-site.
TL;DR:
- Professional factory-style spray finishes outperform DIY brush-and-roller jobs in durability, resistance to scratches, and overall longevity, especially in pet households.
- Low-VOC, water-based urethanes and enamels like Insl-X Cabinet Coat are ideal for pet homes due to their fast drying, low odor, and ease of touch-up, but full curing can take up to a week.
- Proper prep steps such as degreasing, sanding, and controlling humidity are critical to ensure the finish withstands claw marks, nose prints, and water splashes over time.
- Pet safety during painting requires thorough ventilation, containment during application, and waiting the full cure time before pets can access the cabinets again.
- Professional refinishing in a controlled shop environment offers longer-lasting, factory-quality results at a lower cost and shorter timeline than full cabinet replacement.
Table of Contents
- What’s the Best Pet Friendly Cabinet Painting Finish?
- Is Low-VOC Paint Actually Safer for Pets?
- How Do You Prep Cabinets for Maximum Durability?
- Should You DIY Cabinet Painting or Hire a Pro?
- How Do You Clean Painted Cabinets With Pets in the House?
- What Pet Damage Should You Expect on Painted Cabinets?
- What Precautions Protect Pets During a Cabinet Painting Project?
- What Pet Owners Get Wrong About “Durable” Paint
- Get a Factory-Style, Pet-Safe Cabinet Finish in Denver
- Sources
- FAQ
What’s the Best Pet Friendly Cabinet Painting Finish?
Not every “durable” paint behaves the same way once a 60-pound dog starts bracing against a lower cabinet door to beg at dinner. The finish family you choose determines how well your cabinets survive nose prints, claw scrapes, and the occasional water bowl splash.
Water-based urethanes and enamels are the workhorse choice for most pet households. They dry fast, carry low odor, and clean up easily. Insl-X® Cabinet Coat from Benjamin Moore is built specifically for this job. It’s formulated for an ultra-smooth satin or semi-gloss finish that resists chipping, scuffing, and kitchen stains, and it’s available in low-VOC versions. It’s also dry to the touch in about an hour and ready for a recoat in six, which matters if you’re trying to keep a curious dog out of a workspace for as short a time as possible.
Conversion varnish and 2K systems sit at the top of the durability ladder. These cross-linked polymers deliver the highest hardness and moisture resistance available in cabinet coatings, but they need pro-grade spray equipment and controlled curing conditions. This isn’t a weekend-warrior product.
Hard-wax oils, like Osmo Polyx, offer something the others don’t: repairability. If a dog scratches the surface, you can often spot-treat the damaged area rather than repainting the whole door.
Skip high-gloss lacquer in a busy pet home. It looks striking in photos and shows every scratch, smudge, and nose print within a week.
- Water-based urethane/enamel: low odor, fast cure, easy touch-up
- Conversion varnish/2K: hardest, most moisture-resistant, professional application only
- Hard-wax oil: repairable, good scratch performance, more maintenance
- Lacquer/high-gloss: attractive but shows wear fastest, generally a poor fit for pets
Satin sheen tends to be the practical sweet spot for family kitchens. It hides fingerprints and minor imperfections while still cleaning up easily, whereas semi-gloss offers slightly better stain resistance if you’re willing to trade some forgiveness for shine.
For homeowners who want to skip paint altogether, REHAU’s RAUVISIO shade laminate is worth a look.
Is Low-VOC Paint Actually Safer for Pets?
Low-VOC means the paint releases fewer volatile organic compounds as it dries and cures. That matters because pets spend most of their day at nose level with your cabinets, sniffing, licking, and occasionally chewing on cabinet edges when they’re bored.
The bigger factor, though, is cure time, not just the VOC label. A fully cured finish is chemically stable and essentially inert for daily contact. A finish that’s dry to the touch but still curing underneath is a different story. Waterborne lacquers used in professional shops carry significantly less odor than solvent-based products, and shop spraying keeps that exposure out of your home entirely.
Water-based high-performance polyurethanes, such as products in the General Finishes lineup, cure in roughly three to seven days and can match oil-based hardness while producing far less odor. That’s a meaningful trade for anyone with a dog that sleeps in the kitchen.
Practical timeline for a pet household:
- Keep pets out of the work area entirely during application and for at least 24 hours after
- Ventilate the space with open windows or fans, even with low-VOC products
- Wait for the manufacturer’s full recoat and cure window before reinstalling doors and returning pets to the room
- Check the product’s technical data sheet (TDS) for exact dry, recoat, and full-cure times rather than guessing
Pro Tip: Ask your painter or contractor for the exact TDS of the product they’re using. “Low-VOC” on a label doesn’t tell you when the surface is safe for a dog to lean against. The cure time on the data sheet does.
How Do You Prep Cabinets for Maximum Durability?
Prep work is where most DIY cabinet paint jobs quietly fail, usually within six months, right around the time a dog starts leaning on the lower cabinets every single day.
- Degrease first. Kitchen grease and pet dander both interfere with paint adhesion, so a thorough degreasing pass matters more in a pet home, not less.
- Sand to the right grit. Most cabinet projects need 120 to 150 grit to scuff the surface for adhesion, followed by a lighter pass between coats.
- Control dust with a tack cloth. Trapped dust under a finish coat creates weak points that chip first under repeated paw contact.
- Build enough film thickness. Two to three coats, sanded lightly between each, create the film build that actually resists scratching. One heavy coat is weaker than three thin ones.
- Seal edges and corners. These high-contact zones, especially lower cabinet corners where dogs bump and paw, wear first. Extra attention here pays off.
- Control humidity and temperature during cure. Cross-linking chemistry that gives conversion varnish and 2K systems their hardness needs a stable environment to finish properly.
Spraying beats brushing almost every time for pet households, because a sprayed finish lays down evenly with no brush marks or ridges where dirt and dander can collect. That’s part of why factory-applied finishes outperform site-applied ones so consistently: 360-degree sealing and oven-curing produce a harder, more uniform film than anything achievable with a paintbrush in a kitchen. If you’re tackling this yourself, our sanding guide walks through grit selection step by step.
Pro Tip: If you’re painting cabinet interiors, watch for blocking, where painted surfaces stick together after closing. It’s a common mistake that undermines an otherwise solid job.
Should You DIY Cabinet Painting or Hire a Pro?
The honest answer depends on how much you value your weekends and how tough your pets are on furniture.
DIY materials for a kitchen’s worth of cabinets typically run a few hundred to around a thousand dollars, plus every weekend for a month. Professional refinishing, using factory-style spray methods, generally runs $3,000 to $8,000 and wraps up in 3 to 5 days rather than weeks, according to figures published by Cabinetsrefinishing. Full cabinet replacement, by comparison, typically runs $15,000 to $40,000.
- DIY suits: small projects, simple two-coat jobs, homeowners without pet allergy concerns, budget-first priorities
- Professional suits: whole-kitchen jobs, conversion varnish or catalyzed finishes, households with allergy-sensitive members, anyone who wants the hardest, longest-lasting film
- Factory-shop sprayed and catalyzed systems consistently outlast typical brush-and-roller DIY finishes in scratch and moisture testing
- DIY finishes often need a full repaint in 2 to 3 years in a busy pet home; professional catalyzed finishes can go considerably longer before needing attention
How Do You Clean Painted Cabinets With Pets in the House?
Daily upkeep is simple: wipe with a microfiber cloth and mild soap and water. Skip ammonia-based cleaners and abrasive pads. Both can dull a cured finish faster than normal wear ever would.
- Wipe daily with microfiber and mild soap, especially near food and water stations
- Buff occasionally with a soft cloth to maintain sheen
- Spot-recoat small worn areas rather than waiting for full damage to spread
- Trim pet nails regularly. It’s cheaper than refinishing cabinets every two years
- Use a mat under food and water bowls to catch splashes before they reach cabinet edges
Pro Tip: Call a professional the moment you see the finish worn through to bare wood in one spot, not after it spreads across the whole door. A small spot repair now beats a full recoat later.
What Pet Damage Should You Expect on Painted Cabinets?
Claw marks near the floor, on lower cabinet doors dogs use to brace themselves, are by far the most common damage pattern. Cats add their own signature: scratch trails near cabinet corners and countertop edges where they jump up or sharpen claws.
Moisture damage shows up around food and water stations, where splashed water sits against the cabinet base and eventually causes the finish to soften or bubble. Chew marks appear on lower cabinet edges when puppies are teething, and nose-print grease buildup accumulates on any cabinet at snout height near the kitchen.
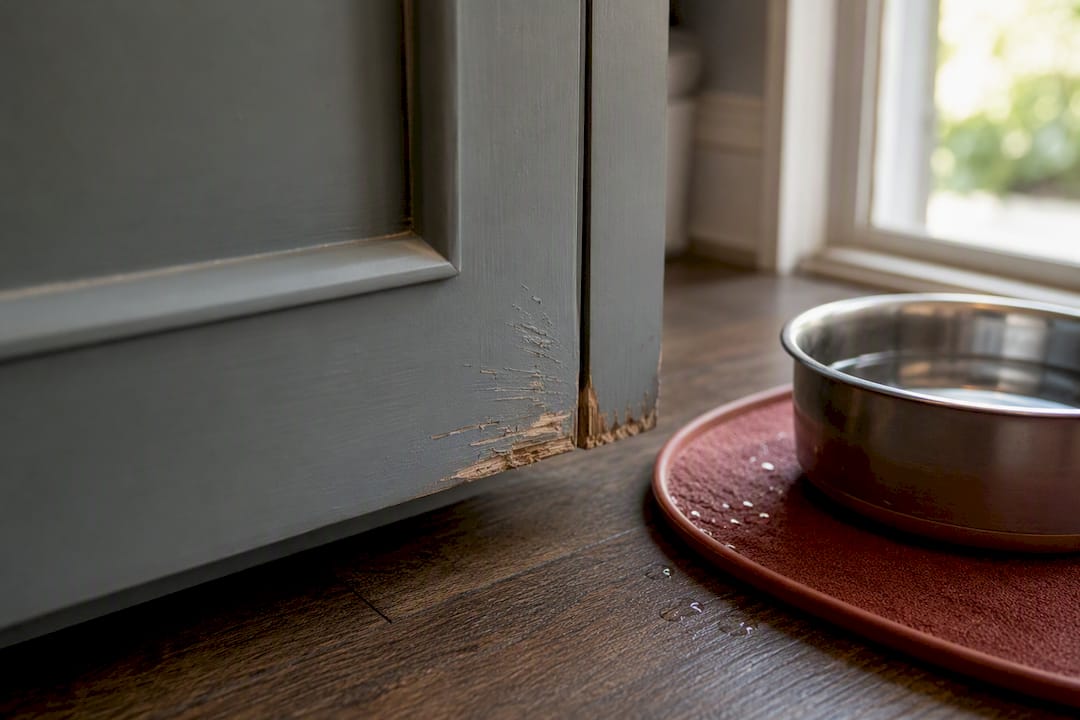
Most of this is preventable, and what’s not preventable is usually repairable if you caught the right finish in the first place. A hard-wax oil finish allows for the kind of spot sanding and reoiling that fixes a scratch without redoing the whole door. Waterborne urethane and conversion varnish finishes are tougher against scratches from the start, but a chip or gouge usually means a full panel recoat rather than a quick touch-up.
The fix that actually works long-term is prevention: mats under water bowls, corner guards on cabinets near jumping spots, and nail trims on a regular schedule. For damage that’s already happened, a light sand and recoat of just the affected panel, done by someone experienced with matching sheen and color, usually costs far less than most homeowners assume.
What Precautions Protect Pets During a Cabinet Painting Project?
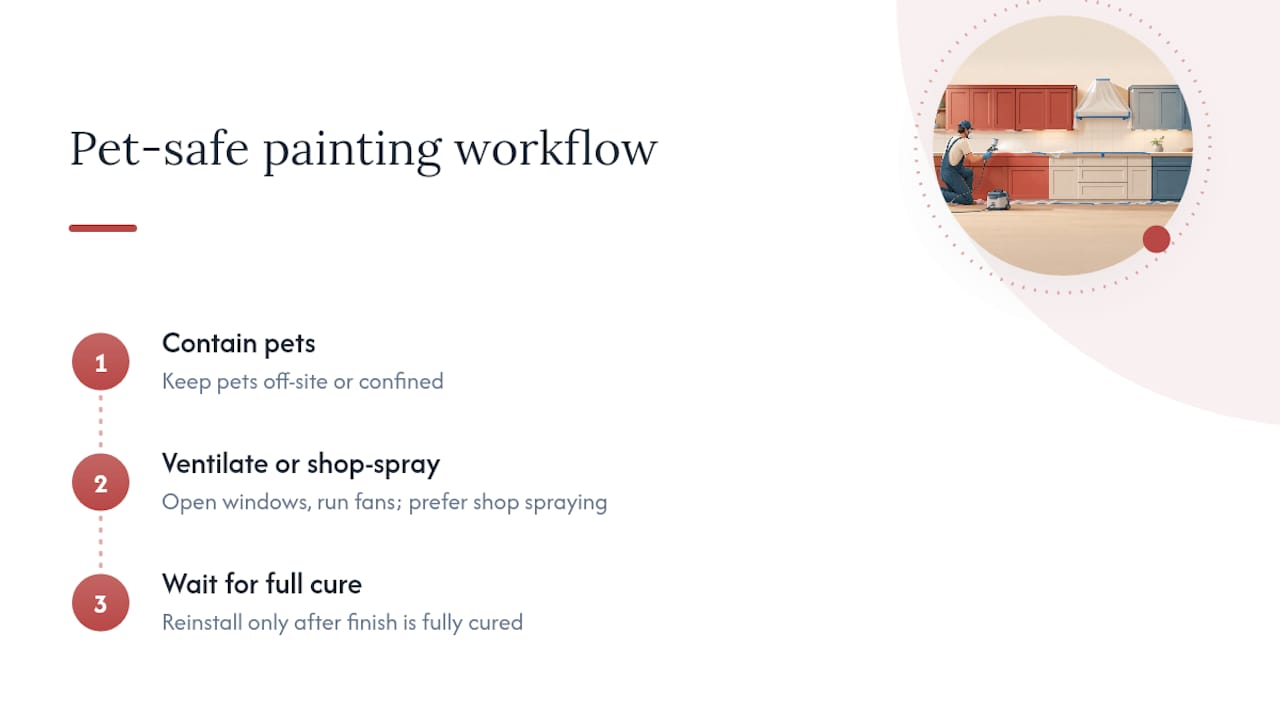
Timing and containment matter more than most homeowners expect going into a project.
Keep pets in a separate part of the house, or better, with a friend or in boarding, for the duration of active spraying or brushing. Fumes settle faster than most people think, but “faster” still means hours, not minutes, especially in a closed kitchen with cabinet doors removed and stacked for spraying.
Ventilation isn’t optional. Open windows, run fans, and if the work is happening in a shop rather than your kitchen, that’s one less thing to manage at home. This is actually one of the strongest arguments for professional shop-based spraying over on-site work: cabinet doors get removed, sprayed in a controlled shop environment, and reinstalled once fully cured, which keeps your pet’s daily environment nearly untouched by fumes or dust.
Timing your project matters too. If you have to paint on-site, schedule it while pets can stay elsewhere for at least a full day, and don’t rush the reinstall. Reinstalling doors before the finish has cured, just because the calendar says it’s been long enough, is how homeowners end up with soft, easily damaged surfaces within the first month. Pet safety during a renovation, like pet-friendly plumbing practices during other home projects, comes down to the same basic principle: contain, ventilate, and don’t rush the timeline.
What Pet Owners Get Wrong About “Durable” Paint
Most homeowners assume durability is about the paint can label. It’s really about the whole system: prep quality, film build, cure conditions, and application method. A premium enamel brushed on in a humid garage with one coat will lose to a mid-range product properly sprayed in three thin coats in a controlled shop, every time.
The other blind spot is odor. Homeowners chase “low-VOC” labels but ignore cure time, which is the number that actually determines when a finish is safe for a dog to lean against all day. Shop-based spray finishing solves both problems at once by controlling the environment and the cure, not just the paint chemistry.
— Jesse
Get a Factory-Style, Pet-Safe Cabinet Finish in Denver
If you’ve been weighing DIY paint against a full cabinet replacement, there’s a third option that actually fits pet households better than either: professional refinishing with the same factory-quality spray process manufacturers use to build durability into a finish from the start. Cabinetsrefinishing applies coatings in a controlled shop setting rather than with a brush or roller in your kitchen, with low-VOC materials and a focus on the kind of hard, cleanable film that holds up against daily paws, nose prints, and spills.

The numbers make the case on their own. Professional refinishing through Cabinetsrefinishing typically runs $3,000 to $8,000, compared with $15,000 to $40,000 for full cabinet replacement, and most projects wrap in 3 to 5 days rather than the weeks a full remodel demands. That means less time with your kitchen torn apart and your pets displaced.
If your cabinets are showing claw marks, worn edges, or a finish that’s simply had enough, request an estimate through the cabinet painting page and find out what a factory-style finish would cost for your kitchen.
Sources
- Insl-X® Cabinet Coat — Benjamin Moore
- RAUVISIO shade super-matte PET surface | Millwork & Cabinetry | REHAU
- What is the Most Durable Kitchen Cabinet Finish? The High-Performance Guide to 2026 Kitchen Equity
- Choosing durable finishes for dog-friendly cabinets (Finish Guide) — ToolsRadar
FAQ
What Kind of Paint Is Safe for Pets?
Low-VOC, water-based cabinet enamels like Insl-X Cabinet Coat are the safest practical choice once fully cured, since they release fewer fumes during application and cure to a stable, inert film. The key is respecting the full cure window on the product’s technical data sheet, not just the “dry to touch” time.
Can I Just Paint Over My Kitchen Cabinets?
Yes, but painting over cabinets without proper degreasing and sanding usually leads to chipping and peeling within a year, especially with pets brushing against lower doors daily. Proper prep, including a scuff sand and tack-cloth pass, is what makes a paint job actually last.
Is It Cheaper to Paint or Refinish Cabinets?
Professional refinishing, which includes proper prep and a factory-style sprayed finish, typically costs $3,000 to $8,000 and takes 3 to 5 days, while full replacement runs $15,000 to $40,000. DIY painting costs less upfront in materials but generally delivers a shorter-lived finish, particularly in pet households.
How Much Does It Cost to Have Kitchen Cabinets Painted Professionally?
Exact pricing depends on cabinet count, current condition, and the finish system chosen, so getting a specific quote is the best next step.