

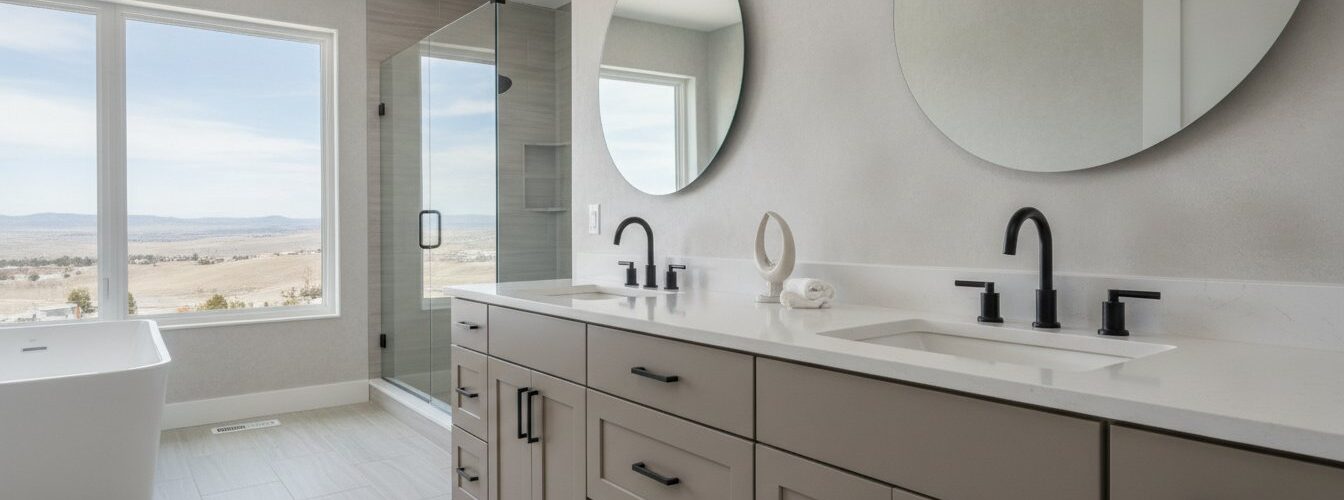

You’ve made the smart decision to transform your kitchen with professionally painted cabinets, but now the questions begin. What exactly do you need to do before the painters arrive? How can you minimize disruption in your home, and how do you ensure the final result is the durable, beautiful finish you’re paying for? These concerns are completely normal, but we believe a smooth project starts with clear communication and a simple plan.
Cabinet Painting Service Areas in Denver & Surrounding Cities, Cabinet Refinishing in Denver County, CO
Serving Lakewood, CO, Littleton, CO, Golden, CO,
Arvada, CO, Wheat Ridge, CO, Evergreen, CO,
and Morrison, CO. Parker CO. Castle Pines CO. Englewood CO. Centennial CO.
Cabinet Painting in Arapahoe County, CO
Including Centennial, CO, Greenwood Village, CO,
Cherry Hills Village, CO, Englewood, CO,
and Aurora, CO.
Feeling confident in your investment is our top priority. That’s why we’re demystifying the entire process, starting with an easy-to-follow guide on how to prepare cabinets for professional painting. This article provides a simple homeowner checklist that clearly outlines your responsibilities. More importantly, we’ll walk you through the crucial expert steps our team takes to guarantee that flawless, factory-like finish. By the end, you’ll understand the timeline, feel completely prepared, and know your kitchen is in the hands of seasoned professionals dedicated to quality work.
Key Takeaways
-
A simple homeowner prep checklist is your first step to ensuring a smooth, efficient project from start to finish.
-
Discover the crucial difference between standard prep and the meticulous professional process required for a durable, factory-like finish.
-
Understanding how to prepare cabinets for professional painting also involves knowing the project timeline to manage your week with minimal disruption.
-
Properly preparing your space not only speeds up our work but also protects your belongings and guarantees a flawless outcome.
Table of Contents
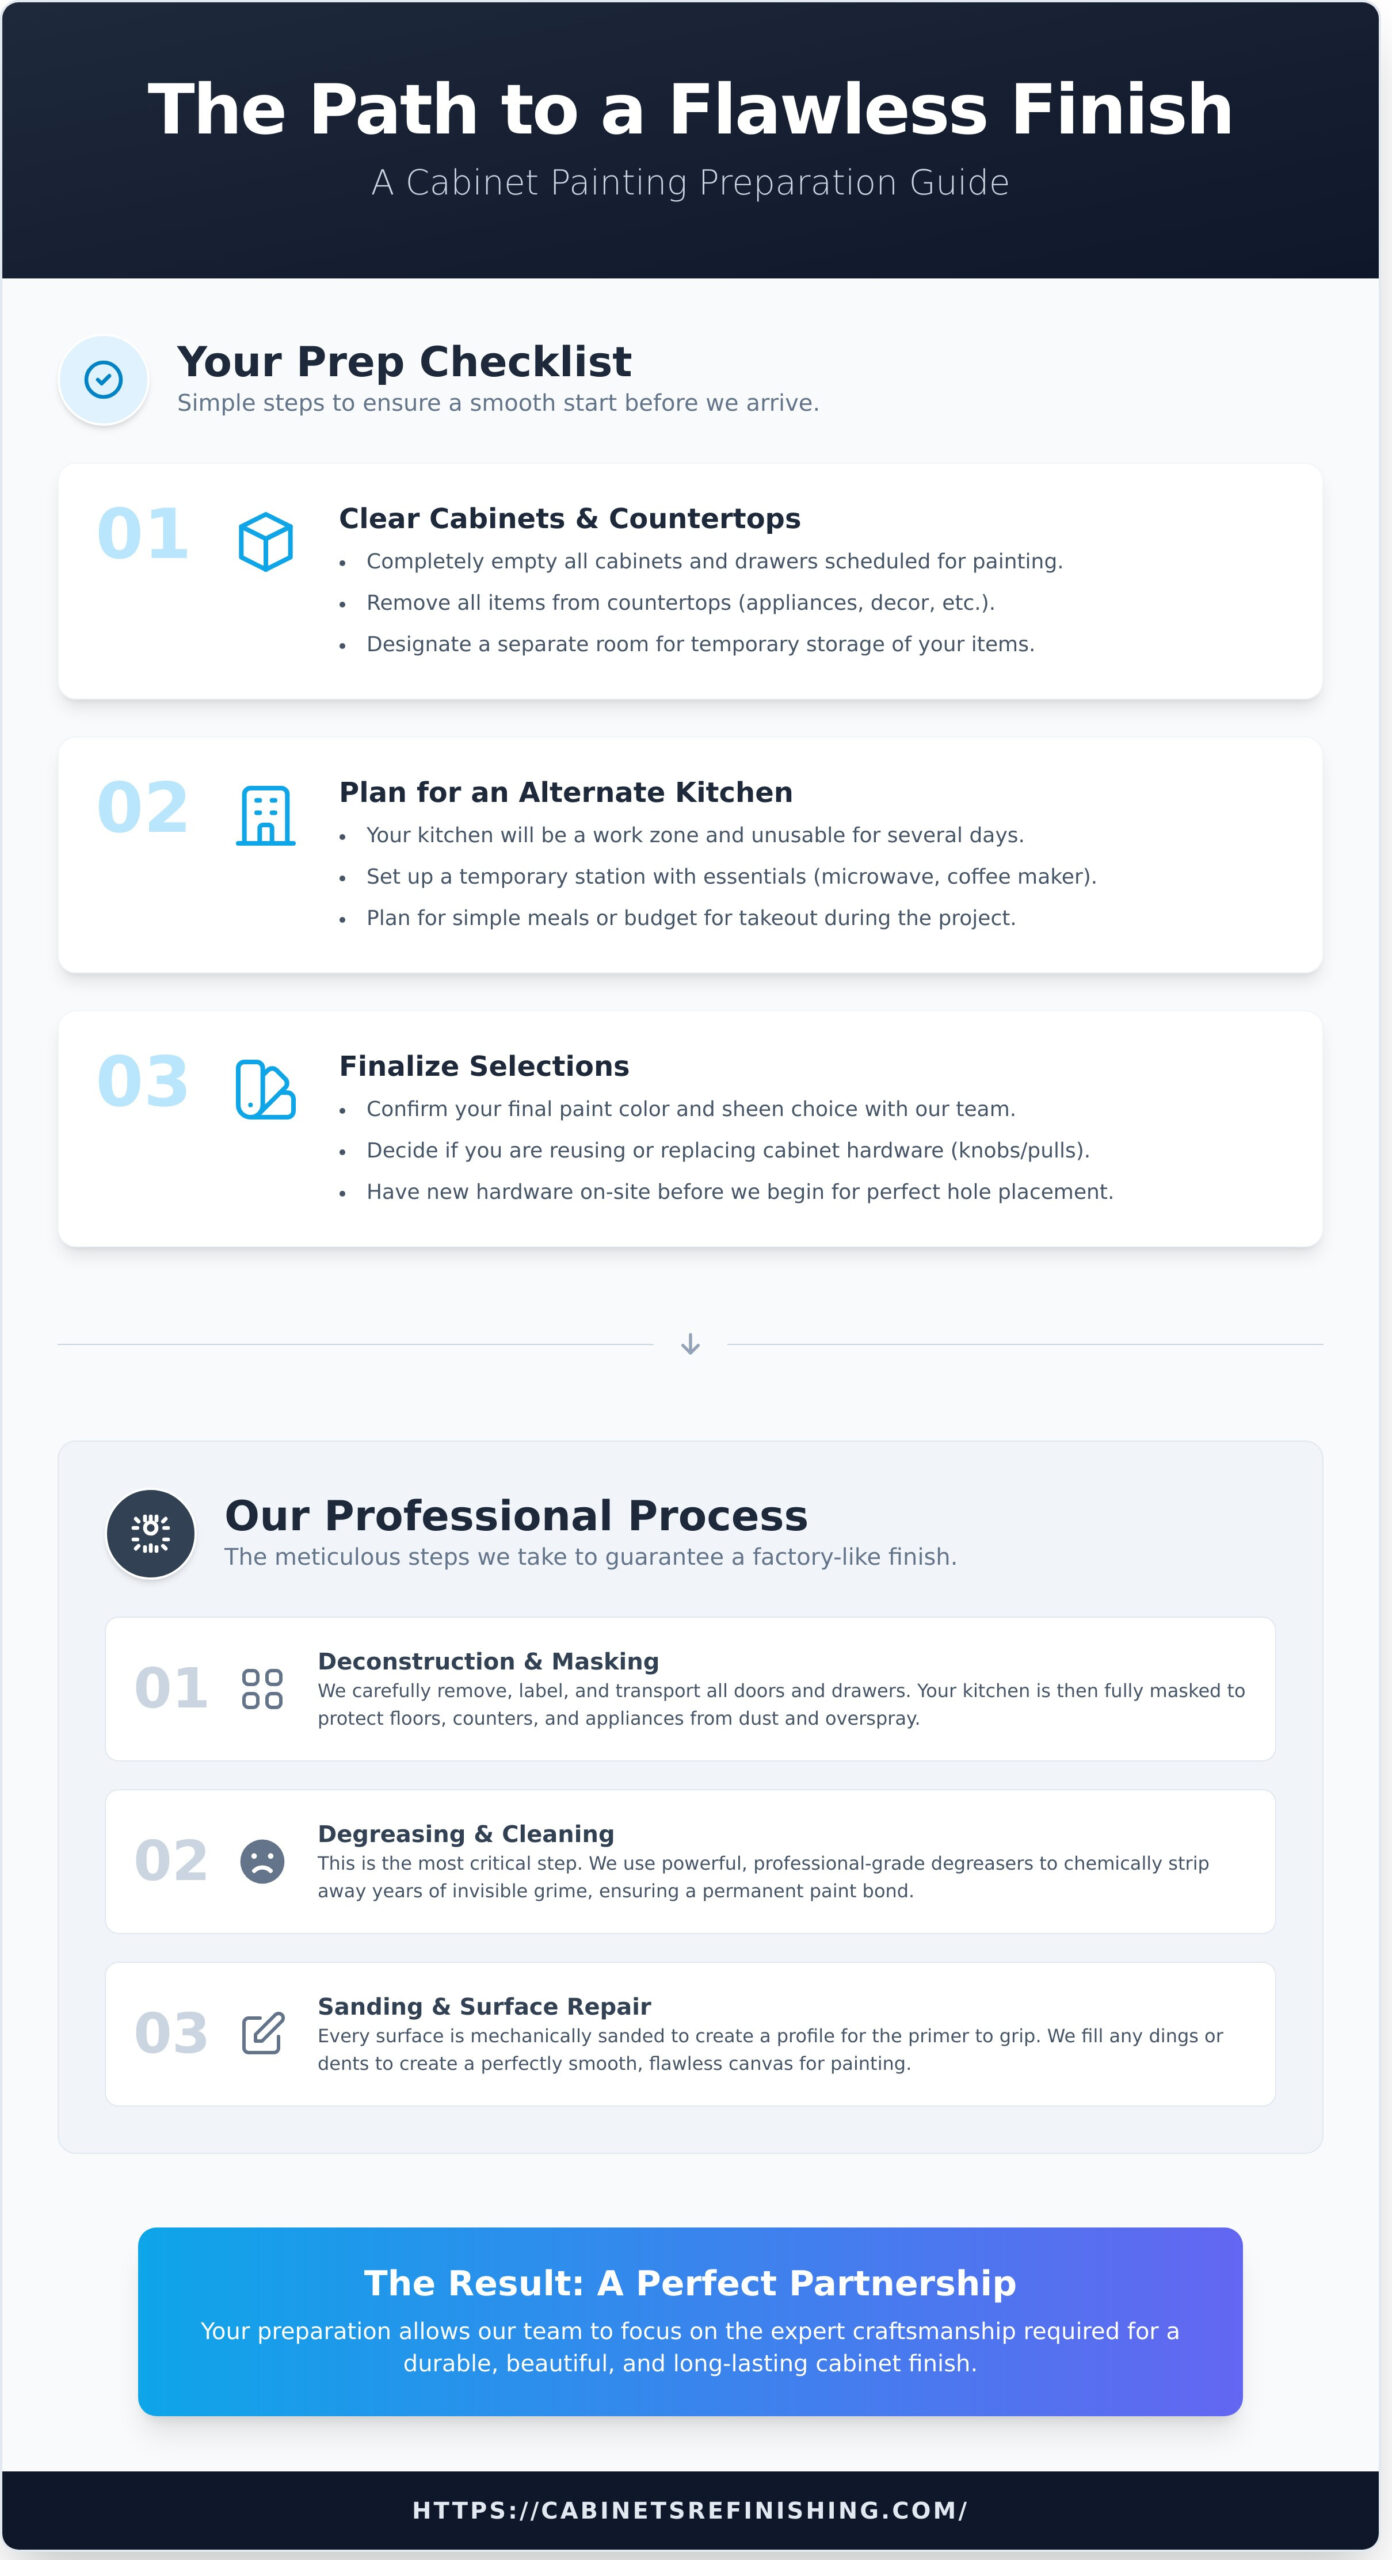
The Homeowner’s Prep Checklist: Your Role Before We Arrive
You have made the smart choice to hire a professional for a guaranteed, factory-finish result on your kitchen cabinets. Our team has perfected the process of transforming kitchens, but the project’s efficiency starts with you. Completing a few simple tasks is a vital factor in how to prepare cabinets for professional painting. This preparation allows our crew to focus entirely on the meticulous prep work and application that creates a flawless, durable finish.
To see a quick overview of how the cabinet boxes are prepped inside your home, this video provides a great visual.
Follow this straightforward checklist before we arrive to ensure a smooth, stress-free experience from start to finish.
1. Clear Your Cabinets and Countertops
To protect your belongings and give our team the full access we need, please prepare the work area. This is the most important step in how you can prepare cabinets for professional painting and ensures we can work efficiently and safely.
-
Completely empty all cabinets, drawers, and pantries that are scheduled for painting.
-
Remove all items from your countertops, including coffee makers, toasters, and decor.
-
Designate a separate room, like a dining room or spare bedroom, for temporary storage of these items.
2. Plan for an Alternate Kitchen Space
Your kitchen will be a work zone and unusable for several days during the painting process. Planning ahead minimizes disruption to your daily routine and family life.
-
Set up a temporary kitchen station in another area with essentials like a microwave, coffee maker, and paper plates.
-
Plan for simple meals that don’t require a full kitchen, or budget for takeout and dining out during the project timeline.
3. Finalize Color, Sheen, and Hardware
Making final decisions before we start is critical to avoid delays. The sheen you choose affects the final look and durability, as a deeper understanding of paint coatings demonstrates how formulations provide different levels of protection and light reflection. Confirming these details ensures a perfect result.
-
Provide our team with your final paint color and sheen selection.
-
Decide if you are keeping your existing hardware or installing new pulls and knobs.
-
If you are using new hardware, please have it on-site before the project begins so we can ensure perfect hole placement after painting.
Understanding a Professional’s Prep Process: What We Do Differently
Many homeowners believe a quality paint job is all about the final coat, but the secret to our durable, factory-like finish is the intensive prep work. The key to understanding how to prepare cabinets for professional painting is recognizing that the real work happens long before any color is applied. This meticulous process goes far beyond a typical DIY weekend project, utilizing specialized tools and industrial-strength products to guarantee a flawless, lasting result. This is why professional preparation is a non-negotiable for true quality.
This principle of meticulous prep applies to all major home projects. For example, experienced teams like Brisbane Roof & Paint build their reputation on a similar foundation of thorough preparation, ensuring results that last, whether for roofs or house exteriors.
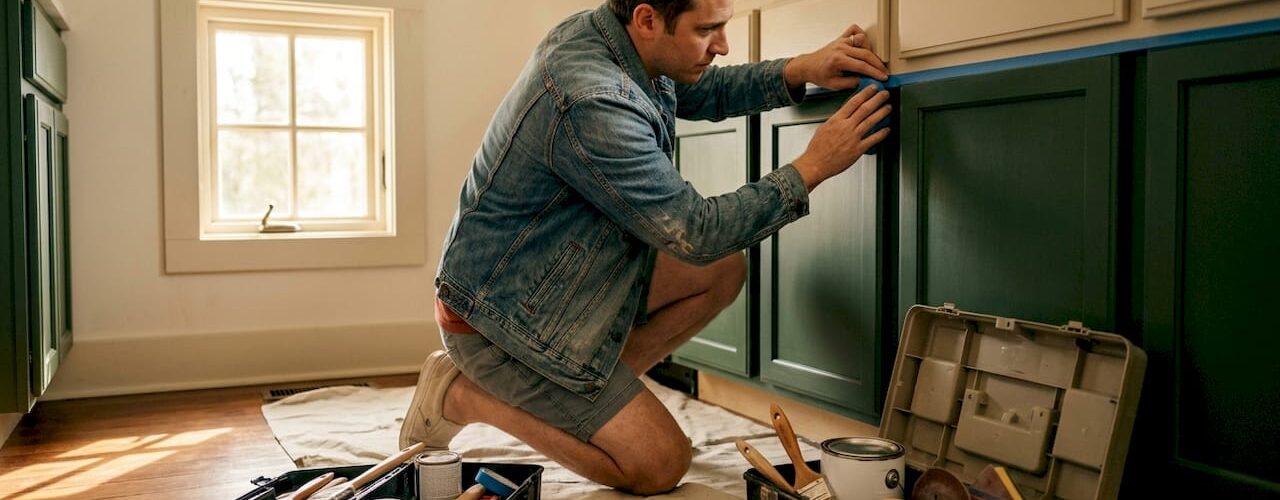
Step 1: Meticulous Deconstruction and Masking
Our process begins with carefully removing every door, drawer, and piece of hardware. Each item is meticulously labeled to ensure it returns to its exact original location. We then transform your kitchen into a controlled environment, completely masking off floors, countertops, backsplashes, and appliances with plastic and paper. This containment strategy protects your home from dust and overspray, allowing us to work efficiently and cleanly.
Step 2: The Critical Degreasing and Cleaning Stage
Years of cooking can leave a thin, invisible layer of grease and grime on cabinet surfaces. This residue is the #1 enemy of paint adhesion and the primary cause of future peeling and chipping. We use powerful, professional-grade degreasers to chemically strip away all contaminants. This critical step ensures the surface is pristine, allowing the primer and paint to form a permanent, unbreakable bond with the wood.
Step 3: Sanding and Surface Repair for a Flawless Canvas
To achieve a truly smooth finish, every square inch of the cabinet boxes, doors, and drawers is mechanically sanded. This creates a microscopic profile for the primer to grip onto. For homes built before 1978, this step is performed with extreme care, following strict lead-safe painting practices to ensure your family’s safety. We then fill any dings, dents, or deep wood grain to create an ultra-smooth, flawless canvas ready for primer.
Step 4: Applying Industrial-Strength Bonding Primer
Unlike the water-based primers found at hardware stores, we use industrial-strength, solvent-based, or pre-catalyzed bonding primers. This is a fundamentally different product designed for maximum adhesion and durability. This primer penetrates and seals the wood, blocking stubborn stains from tannins or old finishes from bleeding through. It creates the perfect, uniform foundation required for a beautiful and long-lasting lacquer finish.
What to Expect: Managing Your Home During the Project
A professional cabinet refinishing project is a major upgrade, but it doesn’t have to be a major disruption. At Cabinet refinishing Denver, our process is streamlined, clean, and efficient. Part of knowing how to prepare cabinets for professional painting is understanding the on-site logistics our team manages for you. We prioritize clear communication and maintain a tidy work area from start to finish, making the entire experience as seamless as possible.
A Typical Project Timeline
Knowing the schedule helps you plan your week with confidence. Our proven 5-day process is designed for efficiency and predictable, high-quality results.
-
Day 1: Site Prep & Removal. Our team arrives to set up a full containment system, meticulously masking off your kitchen. We then carefully remove all cabinet doors and drawer fronts.
-
Day 2-3: Off-Site Finishing. Your doors and drawers are transported to our dedicated spray shop. Here, they undergo extensive prep work and are sprayed with industrial-strength coatings for a flawless, factory finish.
-
Day 4: On-Site Spraying. With your kitchen fully protected, we prep and spray the cabinet boxes on-site. We use professional ventilation systems to ensure a safe, clean environment.
-
Day 5: Reassembly & Final Reveal. We reinstall all doors and drawers, mount your new or existing hardware, perform a final, thorough cleanup, and walk you through the stunning transformation.
On-Site Environment and Safety
Your home’s safety and cleanliness are our top priorities. Our meticulous containment is a critical part of how to prepare cabinets for professional painting safely inside your home. We seal the kitchen entirely with plastic barriers and use industrial-grade ventilation systems and air scrubbers to manage all dust and fumes. While you can absolutely stay in your home during the project, access to the kitchen itself will be restricted. At the end of each day, we ensure the site is left clean and organized.
Post-Painting Cure Time
When we reassemble your cabinets, the new finish will be durable and dry to the touch. However, like any industrial-strength coating, it requires a full cure time-typically 2-3 weeks-to reach its maximum hardness. We provide every client with simple, clear instructions on how to care for their newly painted cabinets during this period. Gentle use is recommended initially to ensure a lifetime of flawless performance from your investment.
Our entire process is designed to deliver outstanding quality with minimal impact on your daily life. To see the results of our professional approach, view our gallery or contact us for an immediate quote.
Why Your Preparation Helps Us Deliver a Perfect Finish
When you hire Painting Kitchen Cabinets Denver, you’re not just getting a paint job; you’re investing in a professional refinishing process. Your role in the preparation is a vital part of our partnership. Following the steps on how to prepare cabinets for professional painting clears the path for our team to work with maximum efficiency and precision. This collaboration ensures we can focus entirely on what we do best: delivering the flawless, durable factory finish your kitchen deserves.
Maximizing Efficiency and Minimizing Time
An empty and accessible kitchen allows our team to begin the critical masking process immediately upon arrival. We don’t have to spend valuable time moving small appliances, decor, or personal items. This means we can start protecting your floors, countertops, and backsplash right away, helping us stick to the projected timeline. A smooth start guarantees we can return your transformed kitchen to you sooner, with minimal disruption to your home.
Ready for a smooth process? Text us for your free estimate.
Ensuring a Clean and Safe Work Environment
Our process involves professional-grade tools, equipment, and materials. Clearing your countertops and floors does more than just protect your belongings from dust and overspray; it provides the essential space we need to work safely and effectively. This clear workspace prevents accidents and allows us to maintain our high standards for job site cleanliness. A prepared space is a safe space for both your family and our expert crew.
The Value of a True ‘Factory Finish’
What we provide isn’t just a layer of paint-it’s a complete cabinet refinishing service. We use industrial-strength, precatalyzed lacquers to create a hard, non-porous surface that is incredibly durable and easy to clean. This true factory finish is what boosts your home’s value and stands the test of time. Achieving this level of quality is only possible when every single step, from your initial prep to our final spray, is handled with professional care.
Ultimately, knowing how to prepare cabinets for professional painting is the first step toward a successful project. Your effort upfront allows our expertise to shine, resulting in the stunning, long-lasting kitchen you’ve envisioned. It’s this teamwork that guarantees a result that far surpasses any DIY attempt.
From Preparation to a Perfect Factory Finish
Ultimately, a successful cabinet transformation is a partnership. Your role in clearing counters and creating access is the crucial first step that allows our team to work efficiently. Now that you understand how to prepare cabinets for professional painting, you can see how your efforts directly contribute to the quality of the final product. When you handle the homeowner’s checklist, you empower us to focus entirely on what we do best: our meticulous, multi-step professional preparation that is the foundation for a lasting, beautiful result.
For over 38 years, Painting Kitchen Cabinets Denver has been the trusted expert for homeowners across Denver and the entire Front Range. We don’t cut corners-we deliver a true, durable factory finish that looks and feels brand new. Your small part in the prep work helps us guarantee that flawless outcome. The next step is easy.
Ready for a flawless finish? Text us photos of your cabinets for a fast, accurate quote! We are ready to partner with you to bring a stunning, long-lasting transformation to your kitchen.
Frequently Asked Questions About Cabinet Preparation
Do I need to clean my cabinets before you arrive?
No, you do not. A critical part of our professional prep work is a thorough degreasing and cleaning process. We use industrial-strength cleaners to remove all built-up grease, grime, and contaminants from the surfaces. This step is a vital factor in ensuring our primers and lacquers adhere perfectly, creating the durable, factory finish we guarantee. We handle this entire process to ensure flawless results and long-lasting durability for your newly painted cabinets.
What if my cabinets are thermofoil or laminate, not wood?
We can absolutely refinish thermofoil and laminate cabinets. The key is in the specialized prep work and using the correct industrial-strength bonding primers designed for these non-porous surfaces. Our team has the experience to know exactly which products and techniques to use for a flawless, durable finish that will not peel or chip. This is a core part of how to prepare cabinets for professional painting, ensuring a beautiful transformation regardless of the original material.
How long until I can put my items back in the cabinets?
We recommend waiting 24 to 48 hours after the final topcoat is applied before reloading your cabinets and drawers. While the surface may feel dry to the touch much sooner, this additional time is crucial for the industrial-strength lacquer to properly cure. Rushing this step can lead to scuffs or imperfections in your new factory finish. Allowing the paint to fully harden is essential for achieving the maximum durability we promise in our work.
Will there be strong paint smells in my house?
We take extensive measures to minimize odors and disruption in your home. All cabinet doors and drawer fronts are taken off-site to be sprayed in our professional facility. For the cabinet boxes that are painted in your kitchen, we set up powerful ventilation systems that exhaust air and fumes directly outside. While there might be a faint paint smell during the process, it dissipates very quickly, ensuring a clean and efficient experience for our clients.
Should I remove appliances like my refrigerator or stove?
In most cases, you will not need to move major appliances. Our professional team is expert at meticulously masking off and protecting all surrounding surfaces, including your refrigerator, stove, countertops, backsplash, and floors. If an appliance is positioned in a way that severely restricts access to a cabinet panel, we will identify this during our initial assessment and discuss the best and safest solution with you before any work begins.
Can you help me choose a paint color?
Yes, we are happy to help. With over 38 years of experience, we have a deep understanding of which colors perform best in different kitchen environments and lighting. We can provide professional advice and show you samples from trusted brands like Sherwin-Williams and Benjamin Moore to help you find the perfect shade. Our goal is to deliver a final product you will be truly impressed with, and that starts with a color you love.