
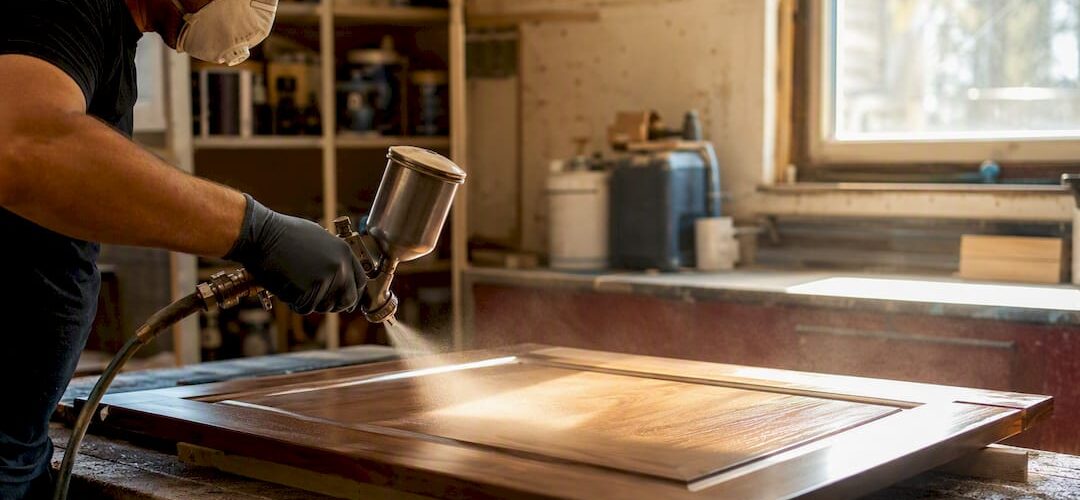
The fastest, cheapest way to change how your kitchen looks is to work with the cabinet boxes you already own. Paint or professional refinishing changes the entire style for a fraction of replacement cost. Hardware swaps, trim, glass inserts, and open shelving handle smaller budgets. Peel-and-stick options work if you’re renting.
- Paint or refinish: biggest style change, best cost-to-impact ratio
- Reface or swap door fronts: dramatic look, boxes stay put
- New hardware and hinges: cheapest, fastest, done in an afternoon
- Trim, molding, glass inserts: mid-cost detail work that reads expensive
- Open shelving: modern look, zero material cost, more upkeep
- Under-cabinet lighting: small investment, outsized visual payoff
- Peel-and-stick films: renter-safe, fully reversible
If your cabinet boxes are solid but the finish is peeling, chalky, or just dated, refinishing beats replacement almost every time. When the damage runs deeper than the surface, or you want a factory-hard finish without spending three weekends in a respirator, that’s when a professional crew like Cabinet Refinishing Denver earns its fee.
Key Takeaways
Painting, refacing, and hardware swaps let most homeowners change cabinet style completely without replacing the boxes underneath.
| Point | Details |
|---|---|
| Prep decides durability | Degreasing and sanding before primer prevents the peeling that ruins most DIY paint jobs. |
| Label doors before removal | Doors can vary by up to a quarter inch, so mislabeling causes reinstallation headaches. |
| Hardware is the cheapest win | Matching hole spacing avoids extra drilling, filling, and touch-up paint. |
| Match method to timeline | DIY paint takes weekends; professional refinishing wraps in 3 to 5 days. |
| Professional refinishing closes the gap | Cabinet Refinishing Denver delivers a factory-spray finish with custom color matching in 3 to 5 days for $3,000 to $8,000. |
Table of Contents
- Which cabinet update method fits your budget and timeline?
- How do you paint or refinish kitchen cabinets yourself?
- Is refacing or replacing door fronts worth it?
- Can new hardware really change how cabinets look?
- Do trim and glass inserts actually upgrade cabinet style?
- Should you remove cabinet doors for open shelving?
- What interior updates make cabinets feel high-end?
- Are peel-and-stick cabinet updates worth trying?
- What tools and materials do you need for each method?
- How long does each update take, and what does it cost?
- When should you hire a professional refinisher?
- What mistakes ruin a DIY cabinet refinish?
- Sources
Which cabinet update method fits your budget and timeline?
Match the method to what you actually have to work with: time, money, and how much of a style shift you want. A tight weekend calls for hardware. A full style overhaul calls for paint or a professional spray finish.
- DIY paint or refinish: best for homeowners with a weekend or two and a garage to work in.
- Professional refinishing: best for anyone who wants a durable, factory-level finish without the sanding dust.
- Refacing or new door fronts: best when the boxes are solid but the doors look dated or damaged.
- Hardware and hinge swaps: best for instant style change on a tiny budget.
- Trim, molding, or glass inserts: best for adding custom character to flat, builder-grade doors.
- Removing doors for open shelving: best for a modern, airy look in a kitchen you keep tidy.
- Under-cabinet lighting and interior updates: best for making the whole kitchen feel higher-end.
- Renter-safe peel-and-stick: best for apartments and short-term stays.
| Method | Budget Band | Visual Impact | DIY Difficulty |
|---|---|---|---|
| Paint/refinish (DIY) | Low to moderate | High | Moderate to hard |
| Professional refinish | Moderate | Very high | None (hired out) |
| Refacing/door swap | Moderate to high | High | Moderate |
| Hardware/hinges | Very low | Moderate | Easy |
| Trim/glass inserts | Low to moderate | Moderate to high | Moderate |
| Peel-and-stick | Very low | Moderate | Easy |
Durability varies more than most people expect. A brushed DIY paint job holds up fine on lightly used cabinets but tends to show wear near handles within a couple of years. Refaced doors last as long as the veneer bond stays intact. A factory-spray finish applied by a pro produces a harder, more uniform surface than brushed enamel, which is the main reason homeowners hire that work out instead of doing it themselves.
How do you paint or refinish kitchen cabinets yourself?
Painting is the single most transformative, budget-friendly way to change cabinet style, and it works on wood, MDF, and most laminate surfaces if you prep correctly. The process is simple in concept and unforgiving in execution. Skip a step and you’ll see it in six months.
- Label everything. Number each door and its matching opening with painter’s tape before removal. Doors can vary by up to a quarter inch, so guessing at reinstallation causes gaps and misaligned hinges.
- Remove doors, drawers, and hardware. Set hardware aside in labeled bags.
- Degrease every surface. Kitchen grease sits invisibly on cabinet faces and blocks paint adhesion.
- Sand to remove sheen. You’re not stripping the wood, just knocking down the gloss so primer has something to grip.
- Fill dents, dings, and old hardware holes with wood filler, then sand smooth.
- Apply a bonding primer matched to your substrate. Laminate and MDF need a different primer than bare wood.
- Paint in thin, even coats using cabinet-grade enamel, lightly sanding between coats.
- Let it cure fully before rehanging doors or loading shelves.
Tools and materials:
- Orbital sander with 120 to 220 grit sandpaper ($30 to $60)
- Bonding primer ($25 to $45 per gallon)
- Cabinet-grade enamel paint ($40 to $80 per gallon)
- HVLP sprayer rental for a smoother finish ($40 to $80 per day) or good angled brushes ($15 to $25)
- Wood filler, caulk, painter’s tape, drop cloths ($30 to $50 total)
DIY material costs typically land between $150 and $400 for an average kitchen. Renting an HVLP sprayer adds cost but gets you closer to a professional finish than a brush ever will.
Pro Tip: Never skip primer, and choose semi-gloss or gloss over matte or eggshell. Kitchen cabinets take constant contact from hands and cleaning wipes, and a higher-sheen finish wipes clean without scuffing. Plan for a full 7 to 14 day cure before you load cabinets with dishes, even if the paint feels dry to the touch after a few hours.
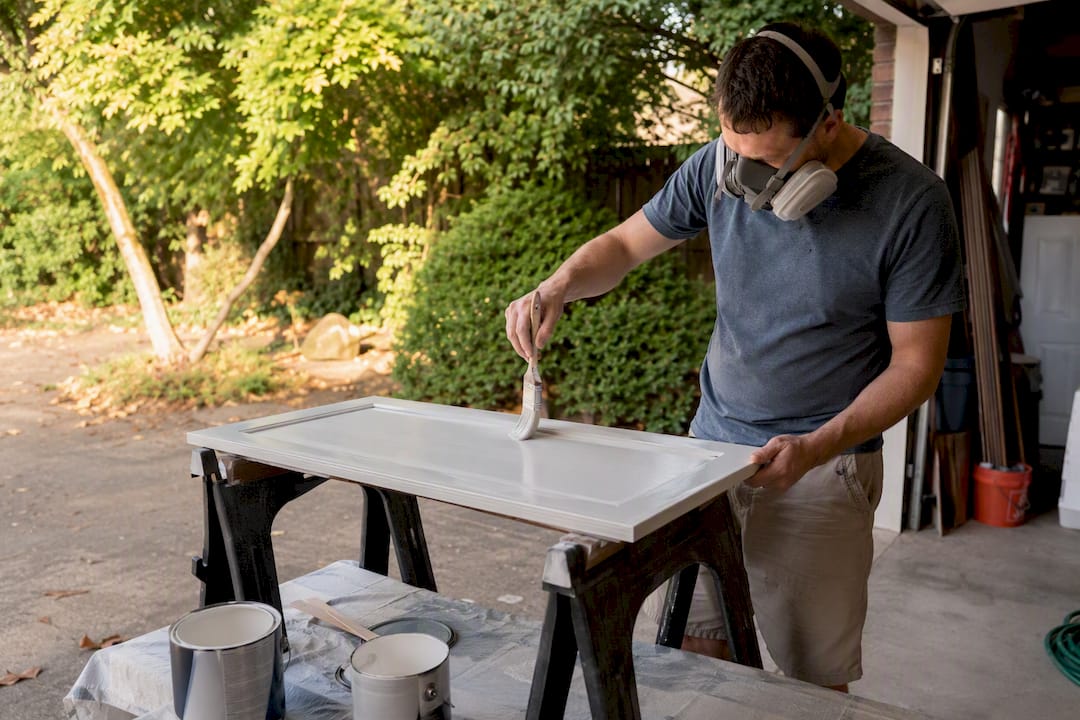
Work in a ventilated space, wear a respirator rated for solvents, and keep flammable materials away from heat sources while paint and primer are off-gassing. If your finish is peeling or bubbling months later, the cause is almost always inadequate degreasing or a primer mismatched to the substrate. That’s the failure point that separates a cabinet refinish that lasts a decade from one that needs redoing next year.
Is refacing or replacing door fronts worth it?
Refacing means keeping your existing cabinet boxes and replacing only the doors, drawer fronts, and visible surfaces with new material or veneer. It’s a middle ground between painting and full replacement, and it changes the style dramatically while leaving your cabinet layout untouched.
Pros:
- Costs far less than gutting and replacing entire cabinets
- Lets you switch door styles completely (shaker, flat panel, glass front)
- Faster than a full remodel, often finished in a few days
Cons:
- Only fixes the surface. It won’t correct sagging shelves or a warped box.
- Custom door sizes or glass inserts push the price up quickly.
- Hinge and fit issues can appear if new doors don’t perfectly match old hardware placement.
Refacing costs substantially less than full replacement while still delivering a real style change, but it only makes sense if the boxes themselves are sound. Before committing, check corners and glue lines for lifting veneer or separation. If the veneer is peeling or the box has water damage, refacing over it will not hold, and you’re better off with a full refinishing approach or a professional assessment first.
Can new hardware really change how cabinets look?
Yes, and it’s the cheapest style shift available. Swapping pulls, knobs, and hinges is the fastest way to modernize a kitchen without touching paint or wood at all.
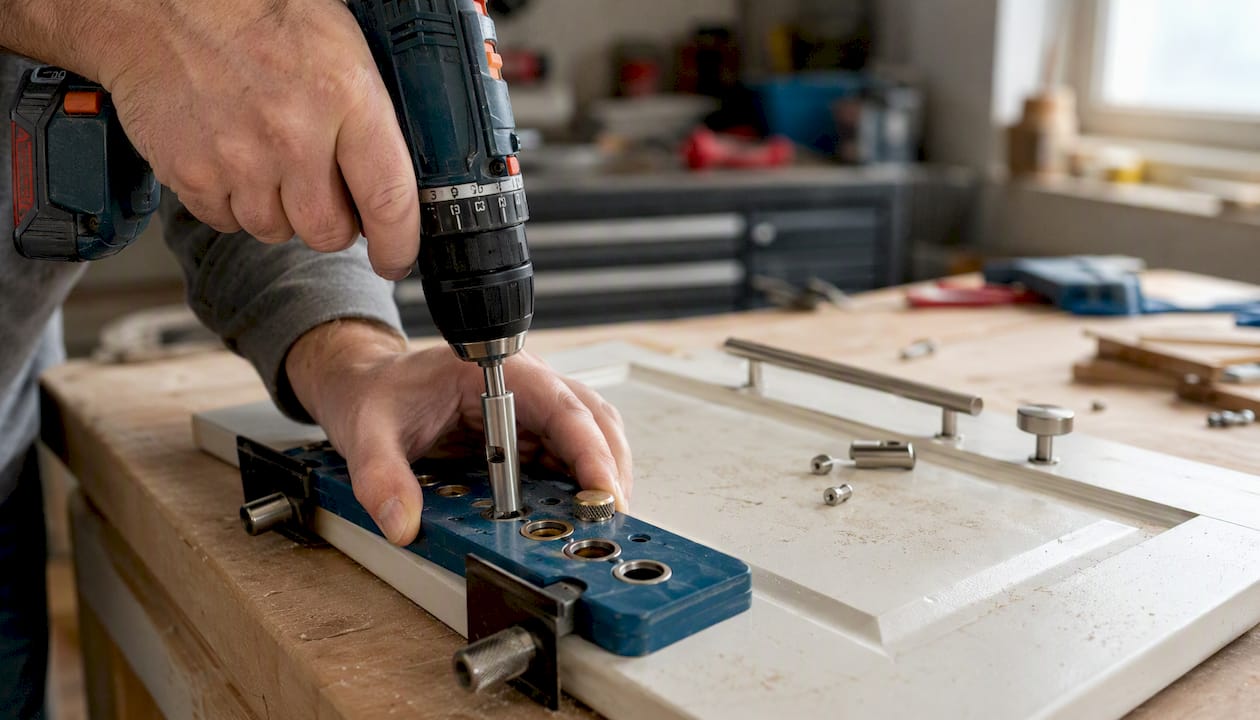
Before you buy new hardware, measure the hole spacing on your existing pulls. Standard spacing runs at set increments, and matching your existing holes to new hardware saves you from drilling, filling, and repainting around mismatched holes.
- If you’re changing hole spacing, fill old holes with wood filler or matching wood glue and sawdust, then sand flush and touch up paint before drilling new holes.
- Concealed hinges give a cleaner, more modern look; exposed decorative hinges suit farmhouse or traditional styles.
- Buy hardware in one trip so finishes match across every door and drawer.
Our cabinet hardware update guide walks through hole-filling and hinge selection in more detail if you’re planning a full swap.
Pro Tip: Mix pull sizes intentionally, longer bar pulls on drawers, smaller knobs on doors, for a designer look that a single uniform hardware style can’t match. Keep the finish (brushed nickel, matte black, brass) consistent throughout the kitchen so it reads as one cohesive design rather than mismatched pieces.
Do trim and glass inserts actually upgrade cabinet style?
Adding trim or swapping flat door panels for glass, cane, or metal mesh inserts gives cabinets a custom, high-end look without new boxes or full-door replacement.
- Attach shaker-style trim strips to flat door fronts with wood glue and brad nails, then caulk the seams and paint over them so they read as one solid piece.
- Add crown molding along the top of upper cabinets to fill awkward gaps to the ceiling and make builder-grade boxes look custom.
- Cut out the center panel of a flat door and insert glass, cane webbing, or metal mesh for texture and visual lightness.
| Detail Option | Typical Cost | Skill Level |
|---|---|---|
| Shaker trim strips | $5 to $15 per door | Easy to moderate |
| Crown molding | $3 to $8 per linear foot | Moderate |
| Glass inserts | $25 to $45 per door | Moderate to advanced |
| Cane webbing | $15 to $30 per door | Moderate |
| Metal mesh | $25 to $60 per door | Moderate to advanced |
Beadboard panels and cane inserts tend to suit cottage or coastal kitchens, while metal mesh and glass lean modern or transitional. Pick one detail type and repeat it across the kitchen rather than mixing several, or the result looks scattered instead of intentional.
Should you remove cabinet doors for open shelving?
Removing a handful of upper doors creates an airy, modern look instantly, but it also means everything on those shelves is on display, including the mess.
- Paint the interior back panel a contrasting color before restyling shelves; it makes the open section look designed rather than incomplete.
- Stagger shelf heights and group dishware by color or type for a curated look instead of a cluttered one.
- Try partial removal first, one or two cabinets near a sink or coffee station, before committing to a full open-shelf wall.
Skip open shelving if:
- You rely on those cabinets for food storage that needs to stay out of sight and dust.
- The interior finish is chipped, stained, or otherwise not presentable once exposed.
- You don’t want to dust and rearrange shelves regularly, because open shelving needs more upkeep than closed doors.
What interior updates make cabinets feel high-end?
Lighting and interior details change how the entire kitchen reads, often for less than $100. A dark, empty cabinet interior looks dated no matter how nice the doors are. A lit, organized one looks custom.
- Stick adhesive LED light strips under upper cabinets for instant, no-wiring task lighting.
- For a cleaner look, hardwire puck lights and run wiring through the cabinet back panel.
- Paint or wallpaper the interior of glass-front or open cabinets in a color that contrasts with the exterior.
- Roll-out shelves for lower cabinets improve access without any exterior style change.
- Drawer dividers keep utensils and linens organized and visible when drawers open.
- Shelf liners protect interior paint and make cabinets easier to keep clean.
Are peel-and-stick cabinet updates worth trying?
Peel-and-stick films, removable wallpaper, and magnetic door fronts give a real style change without touching paint, wood, or your security deposit. These renter-friendly options can be applied and removed in an afternoon.
- Choose thicker vinyl films over thin contact paper. They resist bubbling and last longer under daily wear.
- Magnetic panels work only on metal cabinet fronts, so check your material first.
- Always patch-test adhesive products in a hidden spot, and get landlord approval before applying anything semi-permanent.
- Remove adhesive residue with a hair dryer on low heat and a plastic scraper to avoid gouging the surface underneath.
What tools and materials do you need for each method?
Budget for tools before you budget for materials. Renting the right equipment often costs less than buying tools you’ll use once.
- Painting/refinishing: orbital sander ($30 to $60 to buy), HVLP sprayer rental ($40 to $80 per day), primer and paint ($65 to $125 combined)
- Refacing: veneer sheets or refacing kit ($1,000 to $3,000), contact adhesive, edge banding tool
- Hardware swap: drill, hardware jig ($15 to $25), new pulls and knobs ($3 to $15 each)
- Trim work: miter saw or hand miter box, brad nailer, wood glue, caulk
| Tool/Material | Approximate Cost |
|---|---|
| Orbital sander | $30 to $60 |
| HVLP sprayer rental (per day) | $40 to $80 |
| Bonding primer (per gallon) | $25 to $45 |
| Cabinet enamel (per gallon) | $40 to $80 |
| Hardware drilling jig | $15 to $25 |
| Refacing veneer kit | $1,000 to $3,000 |
A drilling jig is worth the small investment if you’re swapping hardware on more than a handful of doors. It keeps every hole aligned, which matters more than it sounds like once you’re on door number twelve.
How long does each update take, and what does it cost?
A weekend DIY paint job on an average kitchen takes 15 to 25 working hours spread across two to three weekends, once you count cure time between coats. Professional refinishing typically wraps in 3 to 5 days since crews work with commercial spray equipment and controlled drying environments.
| Project Size | DIY Time | Pro Time |
|---|---|---|
| Small (hardware or trim only) | 2 to 6 hours | 1 day |
| Medium (paint one section) | 1 to 2 weekends | 2 to 3 days |
| Large (full kitchen refinish) | 3 to 4 weekends | 3 to 5 days |
- DIY material costs generally run $150 to $500 for a full kitchen, not counting tool rentals.
- Professional refinishing quotes commonly are in the several thousands of dollars range.
- Projects push toward the high end when you’re color matching custom stains, repairing damaged wood, or working with oversized kitchens.
When should you hire a professional refinisher?
Hire out the job when you see structural damage, widespread veneer failure, or you want a factory-hard finish without spending three weekends sanding. Limited time and the need for exact color matching are the other common triggers.
- Professionals bring a factory-spray finish that dries harder and more evenly than brushed enamel.
- They handle minor wood repairs and custom color matching in the same visit.
- Many refinishing services back their work with a finish warranty, something a DIY job never comes with.
- Turnaround is measured in days, not weekends stretched across a month.
| Factor | DIY | Professional |
|---|---|---|
| Cost | Lower upfront | Higher upfront, no redo costs |
| Durability | Depends on technique | Consistently harder finish |
| Finish quality | Good with practice | Factory-level from the start |
| Time | Multiple weekends | 3 to 5 days |
What mistakes ruin a DIY cabinet refinish?
Skipping primer is the single biggest cause of peeling paint within a year. Not letting paint fully cure before rehanging doors causes sticking and surface damage. Using the wrong primer on laminate leads to poor adhesion, and misaligned hardware holes are usually a measuring mistake, not a drilling one.
- Adhesion failure: sand back, re-degrease, and reprime before repainting the affected area.
- Visible brush marks: switch to a foam roller or rent an HVLP sprayer for the next coat.
- Mismatched holes: fill, sand, and touch up paint before redrilling at the correct spacing.
Keep windows open or a fan running while working with primer, paint, and solvents, and never work with these products near an open flame or pilot light.
A quick word from someone who’s seen a lot of cabinets
Paint and refinishing solve more kitchen style problems than any other update on this list, which is why it’s the default recommendation here. When the boxes are structurally sound but the finish is failing, that’s a DIY-friendly project. Once veneer is lifting or the finish needs to survive another decade of daily use, I’d rather see a homeowner call in a pro than redo the same cabinets twice.
Get a factory-like finish without the replacement price tag
If reading through primer types and cure times made you want to skip straight to hiring it out, that instinct makes sense. Cabinet Refinishing Denver delivers a factory-spray finish in 3 to 5 days, with custom color matching and minor repairs handled in the same visit, all without the weeks of downtime or the $15,000 to $40,000 price tag that full cabinet replacement typically carries.

Homeowners in the Denver metro area who want that durability without the sanding dust can get a project estimate through Cabinet Refinishing Denver’s service page. Call or text 720-219-9716 to check availability and get a cost range for your specific kitchen.
Sources
- How to Update Kitchen Cabinets: 8 Designer-Approved Ideas – Bobby Berk
- How to Refinish Cabinets Like a Pro | HGTV
- Redoeing kitchen cabinets DIY makeovers (The Spruce)
- Easy kitchen cabinet updates from Kitchen Makeovers Magazine | BHG
Recommended
- Update Cabinets Without Replacing: The 2026 Denver Homeowner’s Guide
- How to Update Oak Cabinets Without Replacing: The Denver Homeowner’s Guide – Cabinet Refinishing and Cabinet Painting Denver 720-219-9716
- Farmhouse DenverKitchen Cabinet Style: What You Need to Know
- How to Modernize Dated Kitchen Cabinets in 2026 720-219-9716