

Before any refinisher steps into your kitchen, capture eight things: timestamped photos and a short video walkthrough, a full inventory of every door and drawer, precise measurements, written condition notes on damage and odors, a repair priority list, the existing finish and substrate type, an in-place color sample, and a signed pre-refinish checklist. Each item does a specific job. Photos and video prevent “that damage was already there” arguments after the crew leaves. The inventory stops a bidder from quoting eighteen doors when you actually have twenty-three. Written notes turn vague memories into evidence you can point to if a warranty claim comes up two years from now.
This isn’t paperwork for its own sake. A contractor who receives a complete record can quote once, correctly, instead of padding the number to cover unknowns. And a signed checklist, paired with a written warranty and the coating’s technical data sheet (TDS), becomes the paper trail you’d need if a finish fails or a hinge was never reset properly.
Here’s what belongs in that record:
- Timestamped wide and close-up photos of every cabinet run, plus a continuous phone video walkthrough
- An inventory table listing every door, drawer front, and hardware type by location
- Exact measurements for each face, recorded consistently
- Written notes on scratches, chips, water stains, delamination, and odors, each tied to a photo ID
- A severity rating for every damage item: minor, repair required, or replace
- The current finish type, sheen level, and substrate material
- A 48-hour in-place color sample on real sample doors
- A signed pre-refinish checklist with a date and both parties’ initials
Key Takeaways
Complete documentation, meaning timestamped photos, an itemized inventory, written damage notes, and a signed checklist, produces more accurate bids and enforceable warranties than a walkthrough and a handshake.
| Point | Details |
|---|---|
| Shoot the full photo and video set | Capture two wide shots plus three close-ups per damaged area, and one continuous video walkthrough. |
| Count every removable piece | List each door, drawer front, and panel individually rather than counting by cabinet bank. |
| Rate damage by severity | Use minor, repair required, or replace so bidders separate finish work from repair work. |
| Test color in place for 48 hours | Live with real sample doors under morning, midday, and evening light before approving a color. |
| Work with a documentation-first contractor | Cabinetsrefinishing builds itemized inspection, sample-door testing, and written warranties into every refinishing job. |
Table of Contents
- Printable One-Page Pre-Refinish Checklist
- How to Photograph and Record a Video Walkthrough for Estimates
- Inventory and Measurement Protocol: What to Count
- How to Describe Damage and Prioritize Repairs
- Recording the Existing Finish and Running a Color Test
- How to Package and Hand Off Documentation to Bidders
- Pre-Refinish Walkthrough and Post-Refinish Inspection
- Why Documentation Protects Your Estimate and Warranty
- What Homeowners Get Wrong Most Often
- Ready to Have Cabinetsrefinishing Handle It From Here?
- Where to Verify TDS, Warranty Terms, and Contractor Prep Standards
- Frequently Asked Questions
Printable One-Page Pre-Refinish Checklist
A single sheet, filled out during the estimate walkthrough, keeps everyone honest. Print it, clip it to a board, and walk the kitchen with the estimator instead of trying to remember details afterward.
The sheet should be organized into clear blocks so nothing gets skipped in the middle of a conversation about pricing:
- Photos & video: wide shots taken (Y/N), video walkthrough recorded (Y/N), file count noted
- Inventory & measurements: total doors/drawers counted, measurements logged, hardware type recorded
- Damage log: number of issues found, severity assigned to each, photos attached
- Finish & substrate: current finish type identified, substrate material noted (wood, MDF, thermofoil, laminate)
- Odor/moisture checks: any musty smell, staining, or softness noted by location
- Hardware & hinge notes: wear level, hinge type, drawer glide condition
- Contractor documents requested: TDS on file (Y/N), written warranty on file (Y/N)
- Sign-off: homeowner signature, contractor signature, date
| Checklist Section | What to Confirm |
|---|---|
| Photos & video | Wide shots and video walkthrough completed and saved |
| Inventory | Every door/drawer counted and matched to a location |
| Damage log | Each issue has a severity rating and a photo ID |
| Documents | TDS and written warranty requested before signing |
Handing a contractor this filled-out sheet at the estimate visit signals you’re organized, and organized clients tend to get more careful bids in return. When a contractor is willing to complete and sign this sheet with you on-site, that’s a decent early read on how they’ll handle the rest of the job.
How to Photograph and Record a Video Walkthrough for Estimates
A standard photo set (two wide shots plus three close-ups per problem area) combined with one continuous video walkthrough is what actually cuts down on disputes later. Estimators rely on clear photos that show the whole space and the specific flaws, and a video fills in the context a still photo can’t.
Shoot these angles for every room being refinished:
- Two wide shots of the full kitchen or bathroom, taken from opposite corners
- A front-facing photo of every cabinet bank, straight on, not at an angle
- Three close-ups of each damaged door or drawer: full face, mid-distance, and tight on the flaw
- Close-ups of every hinge and hardware piece, open and closed
- Interior shots of the sink base and any cabinet with visible moisture staining
Name files consistently so nothing gets lost in a folder of two hundred images. A pattern like 0315_kitchen_pantrydoor_02 (date, room, item, sequence) lets anyone sort the folder alphabetically and immediately know what they’re looking at. Set your phone’s camera to embed location and timestamp data, and avoid apps that strip metadata when compressing images for text or email.
For the video, start at the room entry and pan slowly across every cabinet run without stopping to narrate at length. Say the room name and date out loud once at the start, then call out specific problem spots as you pass them (“chip here, lower left”) so the audio track doubles as a running log.
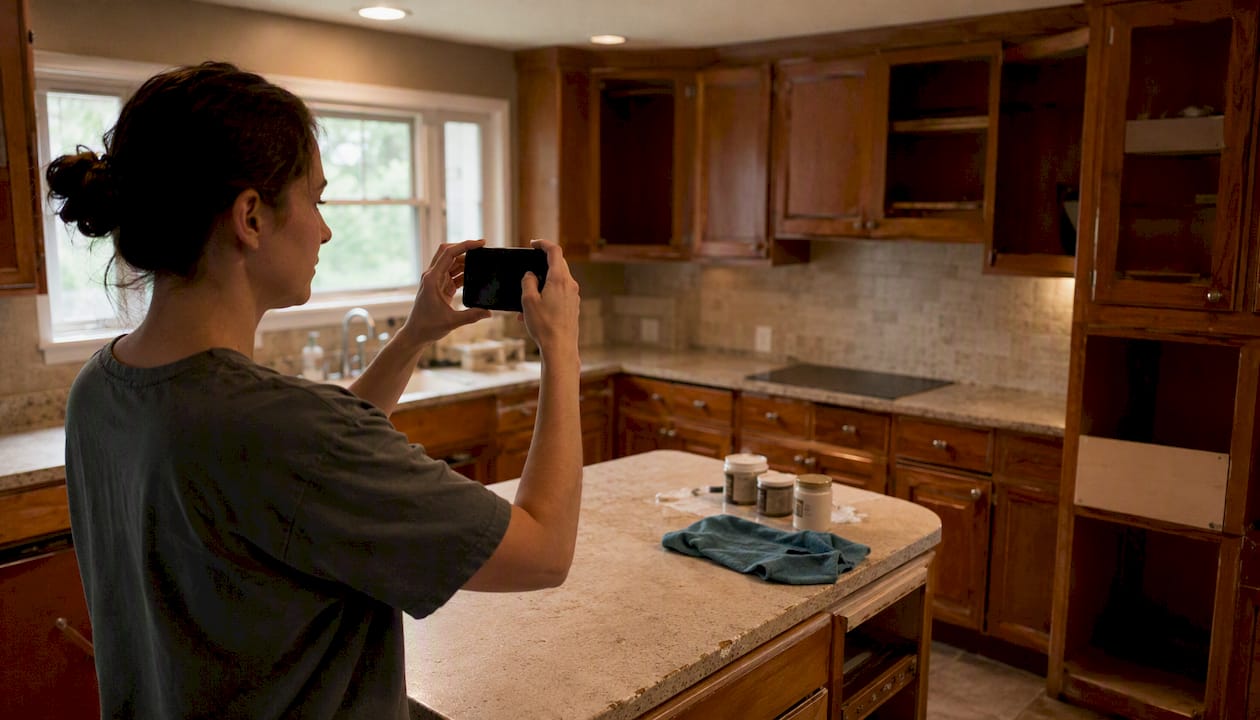
Pro Tip: Shoot photos in daytime with the overhead lights on, not just natural light. Contractors need to see the finish under the same conditions they’ll be working in, and shadows from a single window can hide real damage.
Inventory and Measurement Protocol: What to Count
Count and list every removable piece, not just “upper cabinets” and “lower cabinets.” That means every door, every drawer front, every drawer box, open end panels, and pantry doors get their own line. A vague count is the single biggest reason bids come in wildly different from each other.
Build a simple spreadsheet with these columns:
| Field | What to Enter |
|---|---|
| Item ID | Matches the photo file naming pattern |
| Location | Room and cabinet run (e.g., “kitchen, island”) |
| Type | Door, drawer front, drawer box, panel |
| Dimensions | Width x height, face measurement only |
| Hinge type | Concealed, exposed, cup hinge, etc. |
| Hardware | Pull, knob, or none |
| Removable | Yes/No |
| Current finish | Paint, stain, laminate, thermofoil |
| Damage notes | Cross-reference to the damage log |
For quoting purposes, measure the visible face only, width by height. Interior box dimensions only matter if you’re also discussing refacing or structural repair, not a straight refinish. Keep your measuring approach consistent across every piece; switching between “outside edge to outside edge” and “reveal to reveal” halfway through the kitchen creates numbers nobody can trust.
An itemized inventory like this is what stops scope creep once the job starts. When every door has an ID number tied to a photo and a measurement, there’s no room for “we didn’t realize there were that many drawer fronts” three days into the project.
How to Describe Damage and Prioritize Repairs
Use a three-level severity scale: minor/cosmetic, repair required, and replace. This single choice does more to organize a bid than almost anything else on this list, because it tells a contractor exactly where finish work ends and carpentry work begins.
For each damage item, record five things: the item ID, a photo reference, the severity level, a short factual description, and the likely cause. Write it the way an inspector would, not the way a frustrated homeowner would. Compare these two notes:
- Vague: “This door is trashed.”
- Objective: “3-inch chip at lower right edge of pantry door; substrate exposed; recommended fill and sand; repair priority: repair required.”
The second version gives a bidder something to actually price. It also holds up better if there’s ever a dispute about what was damaged before work started versus during it.
Odors and moisture deserve their own careful language. Note what you observe, not a diagnosis: “musty smell near sink base cabinet, interior surface slightly soft to touch” is useful and honest. Avoid writing “mold” unless it’s been tested and confirmed. Structural or air-quality issues are outside a refinisher’s scope anyway, and inspecting for box integrity and moisture damage before committing to refinishing versus replacement matters more than the finish choice itself in cases like this.
Attach the relevant photo ID to every log line so a contractor can flip between the spreadsheet and the photo folder without hunting.
Recording the Existing Finish and Running a Color Test
Record the exact current finish, its sheen level, and the substrate underneath, because prep work and primer choice depend entirely on these details. Paint over old lacquer needs different prep than raw wood or thermofoil, and a contractor who doesn’t ask about substrate before quoting is skipping a step.
Once you’re past the estimate stage and into product selection, insist on the sample-door protocol. A reputable painter will order or paint two to three real sample doors for you to live with in the actual kitchen for 48 hours, checking the color under morning light, midday light, and evening light. This step exists because color reads differently depending on time of day and what’s reflecting off nearby surfaces, and no paint chip in a showroom can substitute for that.
Ask any bidder for these details before signing anything:
- The exact topcoat product name, not just a color name
- Number of coats being applied
- Application method: spray versus brush and roll
- Cure time before the kitchen is fully usable
- The current TDS for the coating system
Pro Tip: Test your sample doors near the cabinet run that gets the least natural light, not the brightest window. That’s where color problems show up first, and it’s the spot most homeowners forget to check.
How to Package and Hand Off Documentation to Bidders
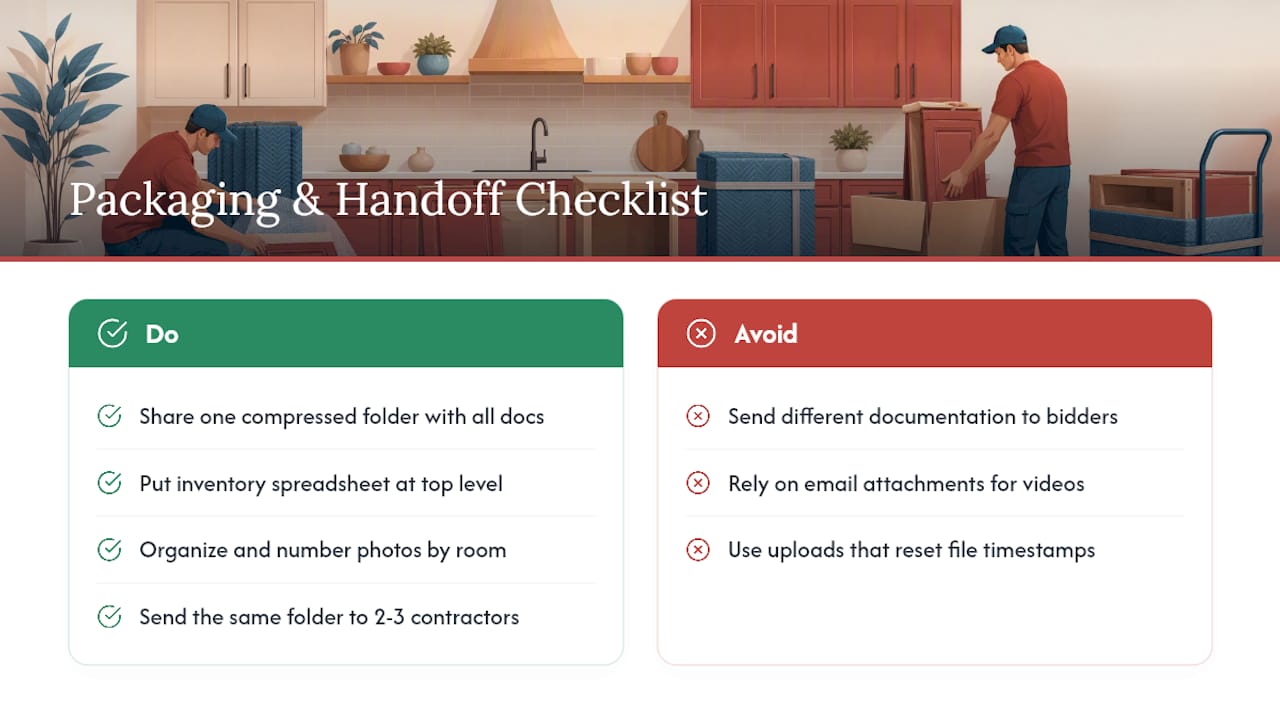
Share one compressed folder containing a named spreadsheet, numbered photos, the video walkthrough, and the signed checklist, so every bidder is quoting against the exact same scope. This single habit eliminates the most common cause of wildly different quotes: contractors working from different assumptions about what they’re pricing.
A clean folder structure looks like this: a root folder named for the project and date, a subfolder for photos organized by room, the video file, and the inventory spreadsheet sitting at the top level where it’s the first thing anyone opens. Keep the file-naming pattern from your photo shoot consistent throughout, and compress the folder using a method that preserves file timestamps rather than resetting them on upload.
A short email to send with the folder link might read:
“Attached is our full documentation folder for the cabinet refinishing project at [address], including photos, a video walkthrough, an inventory spreadsheet, and a signed condition checklist. We’d like an itemized bid referencing our inventory IDs and damage log IDs, along with the current TDS for your coating system and a copy of your written warranty before we make a decision.”
Cloud links work well for most homeowners because they’re free and easy to update. Vendor portals, if a contractor offers one, keep everything in one place but lock you into their system. Straight email attachments are the least reliable option since large video files often get bounced or compressed into uselessness.
Pro Tip: Send the same folder to at least two or three contractors at once. Identical documentation across every bidder is the only way to compare quotes apples to apples.
Pre-Refinish Walkthrough and Post-Refinish Inspection
Require and sign both a pre-job walkthrough and a final punch-list walkthrough with the foreman present. Both signed lists become part of your contract and your warranty record, not just a courtesy.
The pre-job walkthrough should confirm the inventory count matches what’s actually in the kitchen, lock in which repairs are agreed to and when they’ll happen, get sign-off on the approved sample-door color, and cover the containment and dust control plan along with crew access days.
The final walkthrough is where problems get caught while the crew is still on-site to fix them. A standard punch list checks hinge alignment, door-to-counter clearance, drips at the toe-kicks, missed spots inside corner cabinets, functioning drawer glides, and correct hardware reinstallation.
| Walkthrough Stage | Key Items to Confirm |
|---|---|
| Pre-job | Inventory match, agreed repairs, sample-door approval, access schedule |
| Final inspection | Hinge alignment, toe-kick drips, missed spots, drawer glide function |
Attach the signed final punch list and after photos to your warranty paperwork, and ask for a 7 to 14-day reinspection window in case minor touch-ups surface once you’re using the cabinets daily.
Why Documentation Protects Your Estimate and Warranty
Systematic documentation reduces the gap between what different contractors quote you, prevents scope creep once the crew arrives, and gives you real leverage if a warranty claim ever comes up. A bid built from a full inventory and photo set is a bid you can hold someone to.
The economics back this up. Refinishing typically runs $3,000 to $8,000 and finishes in three to five days, compared to $15,000 to $40,000 and several weeks for full replacement. That gap is exactly why documentation matters so much here: on a smaller project with a tighter margin, a vague scope hurts you more, not less.
Certain signals mean it’s time to bring in a professional rather than a general painter: widespread finish failure across most doors, water-damaged substrate that needs repair before any coating goes on, or a clear desire for a factory-like sprayed finish that brush work can’t replicate. When you get to that point, ask any bidder for the same things: factory-finish spray capability, a current TDS, a written multi-year warranty, and references you can actually call. Cabinetsrefinishing works from exactly this documentation-first model, treating the inventory and sample-door process as standard practice rather than an upsell.
What Homeowners Get Wrong Most Often
Homeowners consistently undercount their cabinet pieces, skip the in-place color sample because it feels like an unnecessary delay, and accept one-line bids that say “refinish kitchen cabinets, $5,500” with no breakdown at all. Every one of those habits costs money or time later.
Under-counting doors is the most common mistake, and the fix is simple: build the itemized inventory before you call a single contractor, not after. Skipping the sample-door test is the second most common, usually because homeowners assume a paint chip is close enough. It rarely is once it’s on cabinet doors under kitchen lighting. And accepting a vague one-line bid means you have nothing to point to later if the finish fails or a hinge starts sagging within a year.
If there’s one habit worth adopting above all the others, it’s insisting on a signed pre-job checklist and real sample doors before any paint touches your cabinets. It slows down day one by maybe an hour. It saves you from nearly every dispute that shows up in month six.
Ready to Have Cabinetsrefinishing Handle It From Here?
You can build this entire documentation packet yourself, or you can hand the whole process to a team that already builds it into every job. Cabinetsrefinishing runs the itemized inspection, the sample-door test, and the signed pre-job checklist as standard steps, not add-ons, which means you get a factory-finish result without having to chase down a TDS or a warranty on your own.

That matters most on cost and timeline. A refinishing project through Cabinetsrefinishing typically runs three to five days from start to finish, at a fraction of what a full cabinet replacement costs, because the crew is prepping, spraying, and reassembling with a documented process instead of guessing scope on day one. If you’ve already put together photos and an inventory using the steps above, you’re ahead of the game. If you haven’t, bring what you have.
Call or text to schedule an on-site estimate in the Denver metro area, and the team will walk your kitchen with you, confirm the inventory together, and set up sample doors before anything gets scheduled.
Where to Verify TDS, Warranty Terms, and Contractor Prep Standards
A few resources are worth bookmarking as you move from documentation to hiring. For a breakdown of what a truly itemized bid should include, the guidance on comparing cabinet refinishing bids covers exactly what to check for warranty terms and product documentation. For a deeper look at what proper prep work involves before any coating goes on, Cabinetsrefinishing’s own guide on sanding cabinets for refinishing walks through the mechanical deglossing and dust control steps that affect your final quote. And for a homeowner-facing overview of the full prep sequence contractors follow, the cabinet refinishing preparation steps guide doubles as a useful checklist template of its own.
Frequently Asked Questions
What’s the minimum documentation a contractor needs for an accurate quote?
At minimum, provide an itemized inventory of every door and drawer, a full photo set with wide and close-up shots, and written notes on any visible damage. A video walkthrough speeds things up further, especially for remote estimates.
Do I need professional photos, or will phone photos work?
Phone photos work fine as long as they’re taken in good lighting with the overhead lights on, include both wide context shots and tight close-ups, and have timestamp metadata enabled in your camera settings.
How long should I live with sample doors before choosing a color?
Forty-eight hours is the standard recommendation, long enough to see the color under morning, midday, and evening light in your actual kitchen.
What should I do if a contractor won’t provide a TDS or written warranty?
Treat it as a red flag. A technical data sheet and a written warranty are standard, low-effort documents for any legitimate refinisher to produce before you sign a contract.
Is this documentation actually useful for a warranty claim later?
Yes. A signed pre-job checklist, dated photos, and a final punch list give you a factual record of the cabinet’s condition and the agreed scope, which is exactly what you’d need to support a claim if a finish issue shows up within the warranty period.
Recommended
- 7 Signs Your Cabinets Need Refinishing (Not Replacing) – Cabinet Refinishing and Cabinet Painting Denver 720-219-9716
- How to Batch Kitchen Cabinet Refinishing Project Efficiently
- Sanding Cabinets for Refinishing: A DIY Success Guide – Cabinet Refinishing and Cabinet Painting Denver 720-219-9716
- Cabinet Refinishing, Painting Preparation Steps: A DIY Guide