
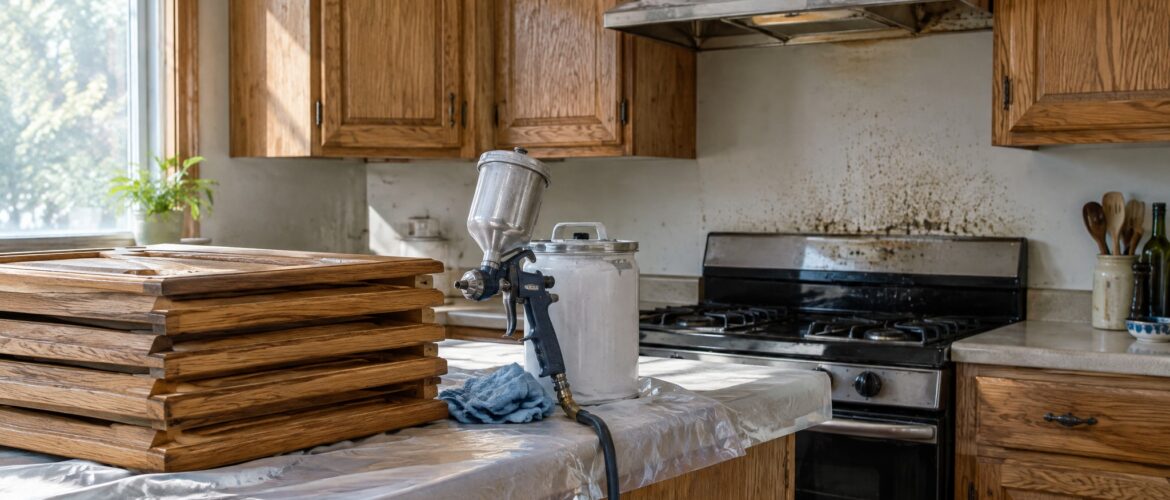
A typical call to our shop starts the same way. A homeowner in a 1990s house is holding a replacement quote north of $25,000 for oak cabinets that are structurally sound but look tired. The honey-oak doors have gone sticky around the sink and range, and the uppers carry years of cooking grease.
That homeowner usually asks whether paint will fix it. The honest answer depends on what kind of paint, how it goes on, and what happens to the surface first. Below is what factory finish cabinet refinishing involves, using that exact kitchen as the example.
What a Factory Finish Cabinet Refinishing Job Looks Like, Step by Step
A factory finish is a sprayed, multi-layer coating: a primer, then a chemically curing topcoat, laid down in thin, even coats. It is the same approach a cabinet manufacturer uses on new cabinets. The result is a smooth, hard, uniform surface with no brush marks and no roller stipple. It is not a can of cabinet paint applied with a brush.
We’ve been doing this in Denver since 1979. Every job is sprayed with HVLP equipment, using precat primer and a crosslinking urethane lacquer topcoat. Here is how the oak kitchen goes, in the order we do it.
- Remove and label. We take off every door, drawer front and piece of hardware and number them so each one returns to its original opening. The doors come out of the kitchen, so the sanding and spraying don’t happen over your counters and cookware.
- Degrease and deep-clean. This is the step cheaper jobs skip. Cooking grease and silicone-based cleaners and polishes are what make paint fail, and the area around the range and the upper doors is loaded with both. Paint can’t bond to a film of oil.
- Scuff-sand and repair. We sand the old finish so the primer has something to grip. Dings, scratches and worn spots at the handles get repaired at this stage rather than hidden under color.
- Fill the grain. Oak has open pores. Without filling, a sprayed finish still shows the grain as a textured, ridged surface, and many homeowners want it smooth. We fill the pores so the door goes flat. Here is how we fill oak grain before the 2K poly goes on.
- Spray precat primer. The primer goes on with HVLP equipment, which atomizes the material finely and puts it down evenly with little overspray. Primer is the layer that bonds to the prepared wood and anchors everything above it.
- Sand between coats. A light sanding after the primer knocks down any raised grain or dust nib. It leaves a surface the topcoat can lay flat on.
- Spray the crosslinking urethane lacquer. This is the topcoat, and it belongs to the same family of hard, chemically curing finishes as 2K poly and conversion varnish.
- Cure, reinstall, adjust. The finish cures before the doors go back on. We rehang everything and adjust each door so the reveals are even and the doors close squarely.
Crosslinking is worth a plain explanation, because it is the whole difference. Brushed latex paint dries: the water leaves and a soft film stays behind. A crosslinking coating cures. A chemical reaction links the molecules into a tight network, and the result is a hard film that doesn’t soften with heat, grease or cleaners the way latex does.
Now put a brushed or rolled job on that same kitchen. The brush leaves marks and the roller leaves texture. The oak grain telegraphs through the paint. The film stays soft, so it chips at the door edges and at the handle zones where fingers land a dozen times a day. Where grease was left behind, the paint peels over it.
In decades of this work, most cabinet failures we see trace back to skipped degreasing, weak primer or a soft topcoat. The color is rarely the problem. For a deeper look at the spray-versus-brush contrast, see HVLP spray versus brush paint.
The same work goes into homes across Denver and the nearby west and south metro neighborhoods, including Lakewood and Roxborough.
Then there is the comparison that brought the homeowner to us. The whole kitchen typically takes 2-5 days, and the cabinet boxes stay where they are, so there’s no demolition and no weeks without a kitchen. It typically saves about 70% against a $25,000+ replacement. We are licensed and insured, and the work carries a 3 year warranty. If you want the full argument, we lay it out in refinishing versus replacement.
Refinishing does not change your layout, and it can’t rescue cabinet boxes that are water-damaged or falling apart. If the cabinets themselves are failing, replacement is the right call.
Why Spray-Applied Finishes Hold Up in Colorado’s Dry Climate
Colorado is hard on wood. Humidity is low, and the seasons swing from dry heat to cold snaps, so doors and frames take on and give up moisture and move a little all year. A coating has to move with that, and it also has to stay bonded.
A hard, well-primed urethane film does that better than a thin coat of brushed paint, because the bond starts at the primer and the film stays intact at the edges. Door edges and the zone around the stove are where thin paint gives out first: it chips, yellows from the heat and cooking residue, and starts to lift. A cured, properly primed film resists all three.
We don’t put numbers on that, and nobody should. What we can say is what we’ve watched for decades: the finishes that last are the ones with clean prep, a real primer and a hard topcoat. That is also why we stand behind the work with a 3 year warranty.
If your current paint is already peeling or chipping at the edges, the cause is usually underneath it, not on top. Read up on fixing peeling cabinet finishes before you pay anyone to paint over it again.
How to Vet a Contractor Who Says They Offer a Factory Finish
“Factory finish” is easy to say and hard to deliver, so get specifics before you sign. You can learn a lot from four questions.
- What gets sprayed? Ask for the primer and topcoat by type. You want a precat primer and a crosslinking urethane lacquer, not a cabinet-grade paint in a can.
- Where and how is it sprayed? Doors should come off and be sprayed in a controlled setup. If the answer is that they’ll brush it on right on the wall, you aren’t getting a factory finish.
- How is the surface prepared? Ask how the cabinets are degreased and how they’re sanded. A vague answer here predicts peeling later.
- What does the written warranty cover? Get it in writing, with the term and what’s included.
For more on comparing shops, see choosing a refinishing company in Denver, and for budgeting detail, what cabinet refinishing really costs.
When you’re ready to compare a sprayed factory finish against that replacement quote, the practical next step is to request a quote. Send us your kitchen details and we’ll tell you what the job involves.
Frequently asked questions
How long does a factory finish cabinet refinishing job take?
A typical kitchen takes 2-5 days. The doors and drawer fronts come out for prep and spraying, and the cabinet boxes stay in place, so you don’t lose your kitchen for weeks the way you would with a replacement.
How much cheaper is refinishing than replacing cabinets?
Refinishing typically saves about 70% compared with a replacement job of $25,000 or more. The savings come from keeping your existing cabinet boxes and skipping demolition, new construction and countertop disruption.
Will a sprayed finish really last in Colorado’s dry climate?
A hard, crosslinked urethane film over a proper primer resists the chipping, yellowing and peeling that thin brushed paint tends to show at door edges and around the stove. Clean prep matters as much as the product. Our work carries a 3 year warranty.
Can you refinish cabinets that are damaged or falling apart?
Refinishing fixes the surface: worn finish, dings, scratches and dated color. It doesn’t fix water-damaged or structurally failing cabinet boxes, and it doesn’t change your layout. In those cases replacement makes more sense.