
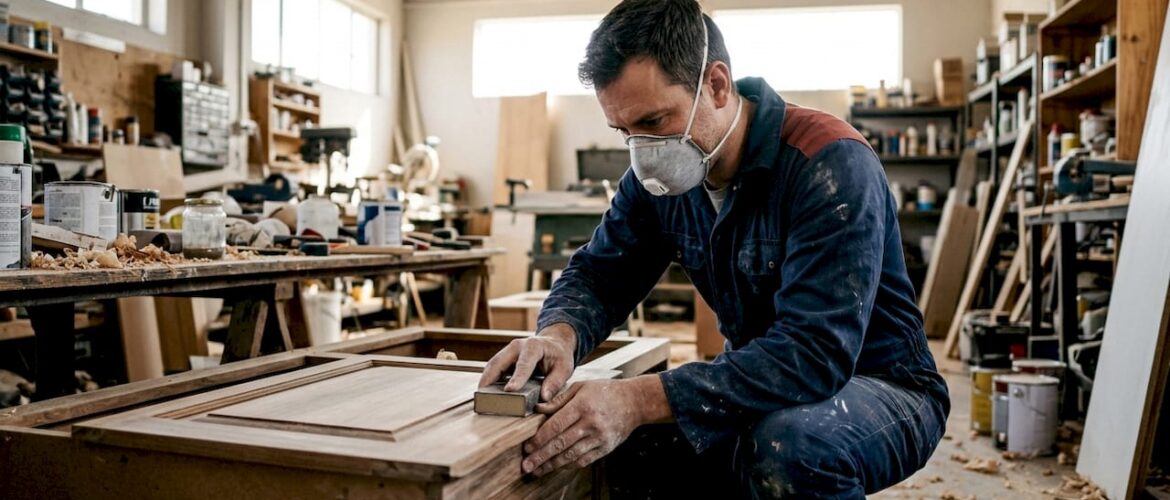
Cabinet spraying techniques are defined as methods of applying paint or finish to cabinet surfaces using pressurized equipment, and they consistently produce smoother, more durable results than brushing or rolling. The three primary types of cabinet spraying techniques are HVLP sprayers, airless sprayers, and aerosol cans. Each method uses different nozzle sizes, pressure levels, and coverage patterns suited to specific stages of a kitchen remodel. Choosing the right approach depends on your project size, budget, and the finish quality you want. This guide breaks down each method so you can make a confident decision before you buy a drop of paint.
1. What is an HVLP sprayer and when should you use it?
HVLP stands for High Volume, Low Pressure. It delivers paint in a fine, controlled mist with minimal overspray, making it the top choice for detailed topcoat work on cabinet doors and frames. HVLP sprayers use 1.3–1.4 mm needle and nozzle sizes for precision atomization. That tight nozzle size produces a finish that looks and feels factory-made.
HVLP is the best cabinet spraying technique for homeowners who want a smooth, glass-like surface on their cabinet doors. The low pressure reduces bounce-back, so more paint lands on the surface and less drifts into the air. The trade-off is speed. HVLP covers less area per minute than an airless sprayer, so it works best on smaller or more intricate cabinet parts rather than large flat panels.
- Best for: Topcoats, detail work, Shaker-style doors, and smaller cabinet sets
- Finish quality: Excellent. Produces a factory-like, smooth surface
- Overspray level: Low. Requires less masking than airless
- Skill required: Moderate. Consistent gun distance and steady motion matter
Pro Tip: Keep your HVLP gun moving at a steady pace. Stopping mid-stroke, even for a second, causes paint to pool and run.
2. How do airless sprayers differ and when should you choose them?
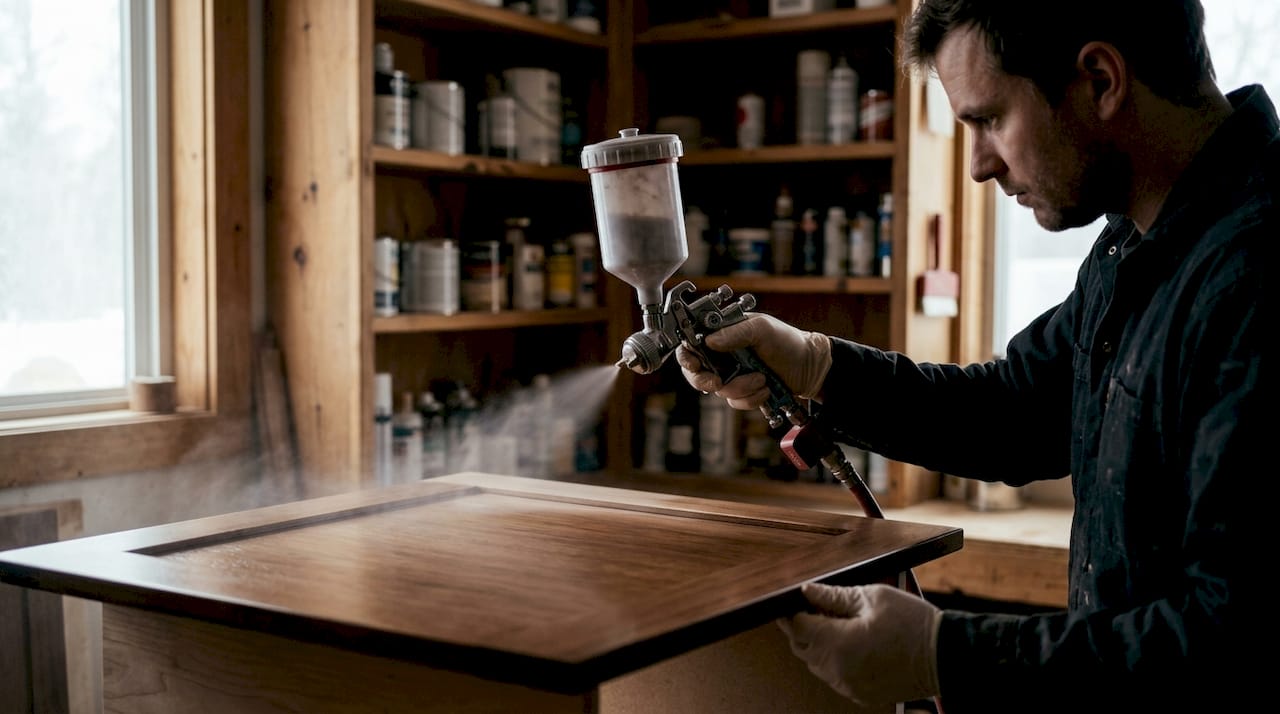
Airless sprayers atomize paint by forcing it through a small tip at very high pressure, with no air mixing into the stream. This method covers large, flat surfaces fast, making it the preferred tool for priming cabinet boxes and large door panels. Airless sprayers work best with fine-finish tips such as 310–412 for controlled spray on cabinets. The tip number tells you the fan width and orifice size, so choosing the right tip is not optional.
The speed advantage of airless is real. A full kitchen’s worth of cabinet boxes can be primed in a fraction of the time it would take with HVLP. The downside is overspray. Airless sprayers produce more mist, which means more masking, better ventilation, and a dedicated spray area are all required.
- Best for: Primers, sealers, and large flat cabinet surfaces
- Finish quality: Good for build coats. Less refined than HVLP for topcoats
- Overspray level: Higher. Requires thorough masking and ventilation
- Skill required: Moderate to high. Pressure settings need careful calibration
Pro Tip: Use an airless sprayer for your primer coats and switch to HVLP for topcoats. You get the speed of airless and the finish quality of HVLP in the same project.
3. When are aerosol sprays a practical option?
Aerosol sprays are best suited for minor touch-ups rather than full cabinet refinishing projects. A spray can is convenient, portable, and requires no equipment setup. For a small chip on a cabinet door or a hardware area that needs a quick refresh, aerosols get the job done without mixing paint or cleaning a spray gun.
The limitations are significant for full kitchen projects. Aerosol cans deliver inconsistent coverage and texture across large surfaces. The pressure is fixed, so you cannot adjust the fan pattern or flow rate to match your surface or environment. Surface preparation still matters with aerosols. Skipping degreasing or sanding leads to the same adhesion failures you would see with any other application method.
- Best for: Touch-ups, small hardware areas, and budget-limited spot repairs
- Not suitable for: Full kitchen cabinet refinishing or achieving a smooth factory finish
- Prep required: Degrease and lightly sand the surface before applying
- Cost: Low upfront, but expensive per square foot compared to bulk paint
4. What is the recommended workflow for spraying cabinets?
A professional cabinet finish follows a 7-stage process: degrease, sand, fill, prime, scuff sand, apply topcoats, and cure. Skipping any stage compounds into visible defects in the final finish. The sanding grits change at each stage: use 120–150 grit for initial prep, 180–220 grit for scuff sanding between coats, and 320–400 grit after primer. Each grit level serves a specific purpose, from removing old finish to creating tooth for the next coat to bond.
Preparation accounts for about 80% of finish quality. Grease, wax, or silicone residue left on the surface causes defects like fish eyes, which are small craters in the finish caused by contamination repelling the paint. Silicone from furniture polish is a particularly stubborn offender. It can cause fish eyes in the finish that require stripping and restarting the entire prep process to fix.
Spraying technique during application follows specific rules. Maintain a gun distance of 6–8 inches and overlap each pass by 50% for consistent coverage. Consistent distance prevents thin spots and runs. Maintaining a wet edge and working methodically across each door prevents lap marks from forming where wet and dry paint meet.
For Shaker-style doors, spray the inner grooves lightly first, then move to the outer frame. Starting with the outer frame pushes heavy paint buildup into the corners, which causes cracking and finish defects as the paint dries.
Pro Tip: Before each spraying session, test your fan pattern on scrap wood to calibrate air pressure and flow for the day’s temperature and humidity. What worked last weekend may not work today.
| Stage | Grit / Action | Purpose |
|---|---|---|
| Degrease | TSP or degreaser | Remove grease, wax, silicone |
| Sand | 120–150 grit | Remove old finish, create adhesion |
| Fill | Wood filler | Level grain and surface defects |
| Prime | Adhesion primer | Bond topcoat to substrate |
| Scuff sand | 180–220 grit | Smooth primer, improve topcoat bond |
| Topcoat | 2–3 coats, 2–4 mils wet | Build color and sheen |
| Cure | 24–72 hours | Harden finish before use |
Environmental control is as critical as the spraying action itself. Cold temperatures slow drying and cause water-based topcoats to sag. High humidity traps moisture in the film. Poor ventilation creates solvent buildup that affects both finish quality and safety.
5. How to choose the best spraying method for your project
Matching your sprayer type to your project scope is the single most important equipment decision you will make. HVLP suits homeowners who want a detailed, factory-like finish on a standard kitchen cabinet set and are willing to take their time. Airless suits larger projects where speed on primer coats matters more than fine finish detail. Aerosols suit only minor repairs.
Spraying consistently achieves smoother, more factory-like finishes than brushing or rolling, regardless of which spray method you choose. The gap in quality between spraying and brush application is most visible in raking light, where brush marks show clearly on a rolled surface but disappear on a sprayed one.
| Method | Control | Speed | Overspray | Best use case |
|---|---|---|---|---|
| HVLP | High | Moderate | Low | Topcoats, detail work |
| Airless | Moderate | High | High | Primers, large flat panels |
| Aerosol | Low | Low | Moderate | Touch-ups, spot repairs |
- Budget under $200: An entry-level HVLP gun handles most DIY cabinet projects
- Budget $300 and up: A mid-range HVLP with adjustable fan and pressure gives better control
- Workspace: Airless requires a larger, better-ventilated area than HVLP
- Skill level: HVLP is more forgiving for beginners than airless on finish coats
Key Takeaways
The most effective cabinet spraying approach combines HVLP for topcoats, airless for primers, and thorough preparation at every stage to achieve a durable, factory-quality finish.
| Point | Details |
|---|---|
| HVLP for topcoats | HVLP sprayers deliver the smoothest finish on cabinet doors and detailed surfaces. |
| Airless for primers | Airless sprayers cover large flat surfaces fast, making them ideal for primer coats. |
| Prep is 80% of the result | Degreasing and proper sanding matter more than paint brand or equipment quality. |
| Environment affects finish | Temperature, humidity, and ventilation directly impact how water-based topcoats dry. |
| Aerosols are for touch-ups only | Spray cans cannot deliver consistent coverage for full kitchen cabinet refinishing. |
What I’ve learned after years of watching DIY cabinet projects succeed and fail
Most homeowners focus on the spray gun. They research HVLP versus airless, compare tip sizes, and watch hours of technique videos. Then they skip the degreasing step because the cabinets “look clean,” and the finish peels within six months. The equipment choice matters far less than the prep work that comes before it.
The second most common mistake is ignoring the environment. I have seen perfectly applied topcoats turn milky white because the garage temperature dropped below 55°F overnight. Water-based finishes are sensitive. A space heater and a humidity gauge cost less than $50 combined and save you from redoing an entire project.
The one thing that separates good DIY results from great ones is the scrap wood test. Professionals calibrate their sprayer before every single session. Humidity changes the viscosity of paint. Temperature changes how fast it atomizes. A 30-second test on a piece of cardboard tells you everything you need to know before you point the gun at a cabinet door.
If you are choosing between HVLP and airless for a first-time DIY project, start with HVLP. The lower overspray means less masking, less cleanup, and a more forgiving learning curve. You can always add an airless sprayer later for primer work once you have the technique down. Patience with prep and practice with the gun will get you closer to a smooth factory-like finish than any expensive equipment upgrade ever will.
— Jesse
When professional cabinet refinishing makes more sense
Some kitchen cabinet projects are simply too large, too complex, or too visible to risk on a first-time spray attempt. Cabinetsrefinishing uses a factory-finish methodology with professional HVLP equipment, controlled off-site spraying environments, and multiple protective layers to deliver results that hold up for years.
Refinishing with Cabinetsrefinishing costs $3,000–$8,000 and completes in 3–5 days. Full cabinet replacement runs $15,000–$40,000 and takes weeks. For Denver-area homeowners who want a flawless factory finish without the learning curve of DIY spraying, professional refinishing delivers the same showroom result at a fraction of the replacement cost. Reach out to Cabinetsrefinishing to get a quote for your kitchen.
FAQ
What is the best spraying technique for kitchen cabinets?
HVLP spraying is the best technique for kitchen cabinet topcoats because it delivers fine atomization, low overspray, and a smooth factory-like finish. Use airless sprayers for primer coats on large flat surfaces to save time.
How far should you hold a spray gun from cabinet surfaces?
Hold the spray gun 6–8 inches from the cabinet surface and overlap each pass by 50% for consistent, even coverage without runs or thin spots.
Can you use aerosol spray cans to refinish kitchen cabinets?
Aerosol cans are not suitable for full kitchen cabinet refinishing because they produce inconsistent coverage and texture. They work well only for minor touch-ups or small spot repairs.
Why does preparation matter more than the spray equipment?
Preparation accounts for about 80% of finish quality. Grease, wax, or silicone residue left on the surface causes defects like fish eyes and peeling that no spray technique can fix after the fact.
What environmental conditions affect cabinet spray finishing?
Cold temperatures, high humidity, and poor ventilation all negatively affect water-based topcoats, causing sagging, milky discoloration, or uneven drying. Spray in a temperature-controlled, well-ventilated space for best results.
Recommended
- Professional cabinet spray finishing services, in Denver CO.
- Spray finish cabinet painting in Colorado homes 720-219-9716
- Off-Site Cabinet Door Spray Painting: The Secret to a Factory-Like Finish – Cabinet Refinishing and Cabinet Painting Denver 720-219-9716
- Cabinet Refinishing Denver flawless finish Call 720-219-9716