
A cabinet hardware update refinishing project is the process of replacing or refinishing knobs, pulls, and handles to give your kitchen a fresh, polished look without replacing the cabinets themselves. Hardware is the jewelry of the kitchen. It is often the first detail guests notice, yet it is usually the last decision homeowners make. A simple hardware swap costs as little as $30–$80 in materials, while a full DIY refinishing kit runs $150–$400. Compare that to full cabinet replacement at $15,000–$40,000, and the math is obvious. This guide covers every step, from tools and prep to finish selection and troubleshooting.
What does a cabinet hardware update refinishing project require?
Every successful cabinet hardware update refinishing project starts with the right tools and a clean surface. Skipping prep is the single most common reason DIY finishes peel within months.

Tools and materials you need
For a hardware swap, you need a screwdriver, a measuring tape, and painter’s tape. For a full refinishing project, the list grows. You will need sandpaper in 80, 120, and 220 grit, a degreaser like TSP substitute, wood filler, a quality primer, and your chosen paint or stain. A foam roller and a fine bristle brush give you the smoothest finish on flat and detailed surfaces.
| Task | Core materials needed |
|---|---|
| Hardware swap only | Screwdriver, measuring tape, new hardware |
| Surface prep | TSP substitute degreaser, clean rags, painter’s tape |
| Filling and sanding | Wood filler, 80/120/220 grit sandpaper, sanding block |
| Priming and painting | Bonding primer, cabinet paint, foam roller, fine brush |
| Protection | Topcoat or polyurethane, door bumpers |
Pro Tip: Label every door and drawer with masking tape and a marker before you remove anything. Reinstalling them in the wrong order wastes hours and can cause alignment problems.
Degreasing is not optional. Kitchen cabinets collect grease and cooking residue that prevent paint from bonding. Wipe every surface with a TSP substitute solution and let it dry completely before sanding. The cabinet refinishing preparation steps guide from Cabinetsrefinishing walks through this phase in detail if you want a deeper checklist.
How do you update cabinet hardware the right way?
Replacing cabinet hardware can be done in under one hour when your new hardware matches the existing drill hole spacing. That single measurement, called the center-to-center distance, determines whether your new pulls drop straight in or require new holes.
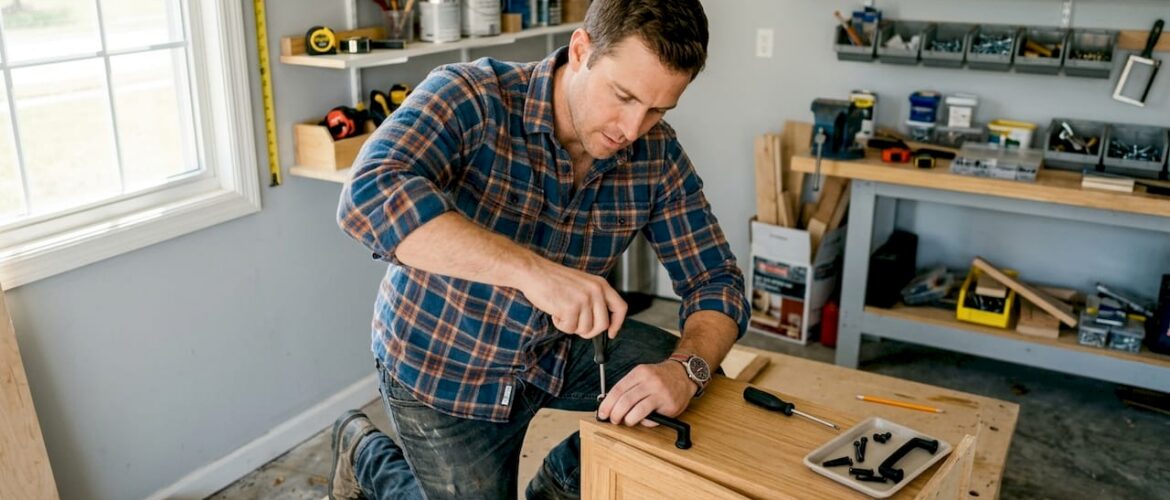
Removing old hardware safely
Use a hand screwdriver rather than a power drill when removing old hardware. A power drill set too fast strips screws and damages the cabinet face. Hold the hardware from the front while you unscrew from the back to avoid scratching the finish.
Choosing hardware that fits your kitchen style
Hardware style should match your cabinet design for visual cohesion. Vintage cup pulls work well on farmhouse shaker cabinets. Flat bar pulls suit flat-front modern cabinets. Mixing pulls on drawers and knobs on doors creates a high-end, intentional look that uniform hardware cannot match.
Common hardware styles and finishes to consider:
- Shaker style: Cup pulls, bin pulls, or simple round knobs in brushed nickel or matte black
- Modern flat-front: Long bar pulls in satin brass or polished chrome
- Farmhouse: Aged bronze or oil-rubbed bronze cup pulls
- Transitional: Mixed metals with a consistent undertone (warm or cool)
- Industrial: Pipe-style pulls in raw or blackened steel
Hardware selection should balance style with ergonomics. Smooth edges, proper sizing for your grip, and thoughtful placement all affect how comfortable your kitchen feels every day. A pull that looks great but sits awkwardly will frustrate you every time you open a drawer.
Pro Tip: Hold a sample pull against your cabinet door before buying a full set. Check that the size feels proportional and that your fingers clear the cabinet face comfortably when you grip it.
What are the best techniques for refinishing cabinet hardware and surfaces?
Refinishing cabinet surfaces alongside a hardware update produces a result that looks factory-made rather than painted-over. The key is following each step in order and respecting the curing timeline.
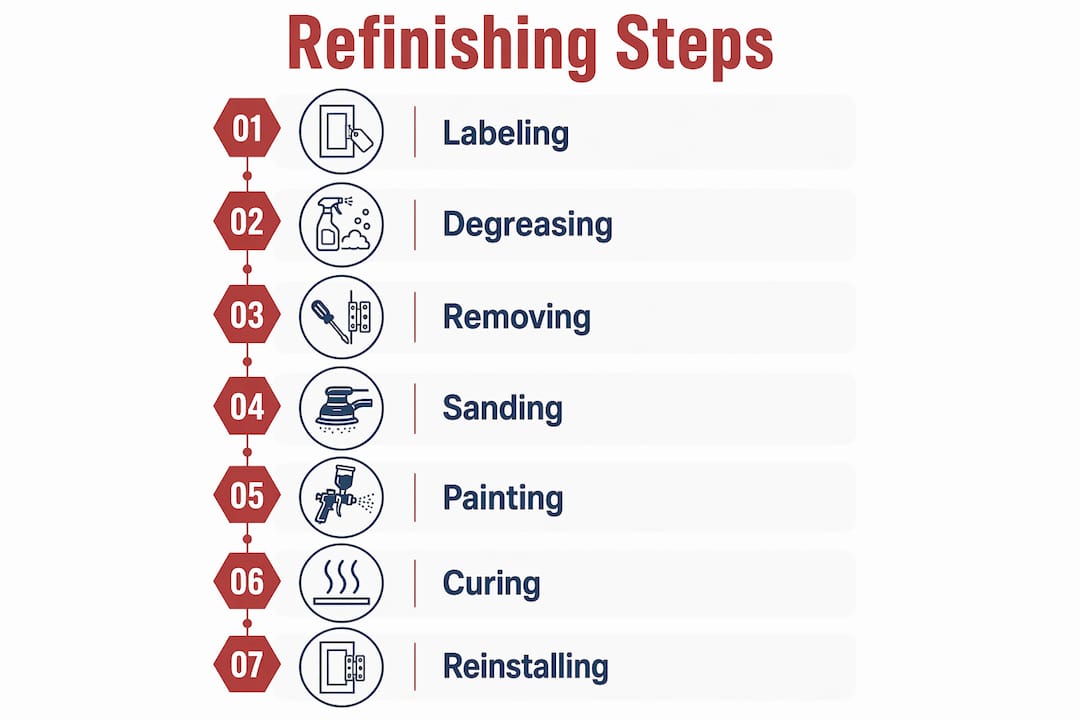
Step-by-step refinishing process
- Remove all doors, drawers, and hardware. Number each piece so reinstallation is straightforward.
- Degrease every surface with a TSP substitute. Let dry fully, at least two hours.
- Sand with 80-grit sandpaper to scuff the existing finish. Follow with 120-grit, then 220-grit for a smooth base.
- Fill old screw holes with a high-quality wood filler. Fill mismatched hardware holes flush, let harden completely, then sand smooth before priming.
- Apply a bonding primer in thin, even coats. Let each coat dry fully before adding the next.
- Paint or stain using a foam roller for flat areas and a fine brush for details. Two to three thin coats beat one thick coat every time.
- Apply a protective topcoat for durability, especially on high-traffic doors and drawers.
| Approach | Best for | Finish quality | Typical cost |
|---|---|---|---|
| DIY refinishing kit | Small kitchens, budget projects | Good with prep | $150–$400 |
| Professional-grade method | Full kitchens, lasting results | Factory-smooth | $3,000–$8,000 |
Professional cabinet refinishing typically takes 3–5 working days on-site. That timeline reflects the multiple coats and drying phases required for a durable finish.
Curing is the step most homeowners rush. Wait 7–14 days after the final coat before rehanging doors and reinstalling hardware. Hanging doors too early dents the fresh paint at the hinge points and leaves permanent marks.
Pro Tip: Treat your hardware finish as part of a “metal family.” If your faucet is brushed nickel, your pulls and your light fixture should share that same undertone. Coordinating your metal finishes across hardware, faucets, and fixtures prevents the visual discord that makes a kitchen feel unfinished.
How do you troubleshoot common problems in a kitchen cabinet makeover?
Even well-planned projects hit snags. Knowing the fixes in advance keeps your kitchen cabinet makeover on track.
- Mismatched screw holes: Apply wood filler in layers rather than one thick glob. Sand each layer flush after it hardens. Prime over the filled area before painting to prevent the filler from showing through.
- Peeling paint: The cause is almost always grease left on the surface before painting. Strip the affected area, degrease thoroughly, re-prime, and repaint.
- Visible brush marks: Switch to a foam roller for flat panels. Use a fine-bristle brush only for recessed details, and apply paint in thin passes.
- Hardware that wobbles: The screw hole in the cabinet face has stripped. Fill it with a wooden toothpick and wood glue, let it cure overnight, then re-drive the screw.
- Doors that bang: Add self-adhesive door bumpers to the inside corners of each door. They protect the finish and reduce noise.
Blending your new hardware finish with the rest of the kitchen takes one extra step. Look at your lighting fixtures, faucet, and appliance handles as a group. If they share a warm metal tone, choose hardware in the same family. A matte black pull against warm brass fixtures creates tension that no amount of paint can fix.
Pro Tip: After reinstalling hardware, open and close every door and drawer ten times. This stress test reveals any loose screws, alignment issues, or finish weak spots before they become bigger problems.
Maintenance is simple once the finish cures fully. Wipe hardware with a damp cloth and mild dish soap. Avoid abrasive cleaners, which scratch metal finishes and dull paint. A light wipe-down once a week keeps both the hardware and the cabinet surface looking fresh for years.
Key Takeaways
A cabinet hardware update refinishing project delivers the highest visual return of any kitchen upgrade at the lowest material cost, provided preparation and curing steps are followed without shortcuts.
| Point | Details |
|---|---|
| Hardware swap cost | A hardware-only update costs $30–$80 in materials and takes under one hour. |
| Prep is non-negotiable | Degreasing and sanding before painting prevents peeling and ensures lasting adhesion. |
| Curing time matters | Wait 7–14 days after the final coat before rehanging doors to avoid finish damage. |
| Style coordination | Match hardware finish to your kitchen’s existing metal family for a cohesive look. |
| Fill old holes first | Use wood filler on mismatched screw holes and sand flush before priming for a clean result. |
Hardware is the detail that defines the whole kitchen
Hardware is the detail guests notice first, even though most homeowners treat it as an afterthought. I have seen beautifully refinished cabinets undermined by generic builder-grade pulls that were never swapped out. The cabinet surface looked fresh, but the hardware told a different story.
The ergonomics point is one most guides skip entirely. A pull that is too small for the drawer size, or placed too close to the edge, creates a subtle daily frustration that adds up. I always recommend holding a sample piece at the actual cabinet before committing to a full set. Your hand knows immediately whether it feels right.
Patience during the curing phase is where most DIY projects succeed or fail. Rushing the rehang by even a few days can leave hinge impressions in the paint that are nearly impossible to fix without stripping and repainting. The finish looks fine until you open the door the first time and see the dent. Wait the full 7–14 days. The kitchen will survive without its doors for two weeks.
The biggest shift I have seen in kitchen cabinet makeovers is homeowners treating hardware as a design decision rather than a hardware-store errand. When you approach pulls and knobs the same way you approach tile or countertop selection, the whole kitchen reads as intentional. That is the difference between a kitchen that looks updated and one that looks designed.
— Jesse
How Cabinetsrefinishing can help with your project
Cabinetsrefinishing brings a factory-finish methodology to every project, covering both surface refinishing and hardware coordination so you get a result that holds up for years.
The team completes most projects in 3–5 days, applying multiple protective layers that DIY kits rarely match. If your kitchen needs more than a hardware swap, their professional cabinet refinishing services in the Denver metro area deliver a durable, high-end finish at a fraction of replacement cost. Refinishing with Cabinetsrefinishing runs $3,000–$8,000 compared to the $15,000–$40,000 a full cabinet replacement typically costs. Call or text 720-219-9716 to get a consultation and see what your kitchen could look like.
FAQ
How much does a cabinet hardware update cost?
A hardware-only swap costs $30–$80 in materials and takes under one hour with a screwdriver. Full DIY refinishing materials run $150–$400.
How long should I wait before reinstalling hardware after refinishing?
Wait 7–14 days after the final paint coat for a full cure. Reinstalling hardware earlier risks denting or marking the fresh finish permanently.
Can I mix different hardware styles on the same cabinets?
Yes. Mixing pulls on drawers and knobs on doors creates a custom, high-end look. Keep the metal finish consistent across all pieces for cohesion.
How do I fix mismatched screw holes when changing hardware?
Fill old holes with wood filler, let it harden fully, sand flush, then prime before painting. This gives you a clean surface for new hardware placement.
What finish should I choose for cabinet hardware?
Coordinate hardware finish with your kitchen’s existing fixtures by treating all metals as one family. If your faucet is brushed nickel, choose pulls in the same tone to avoid visual discord.
Recommended
- Sanding Cabinets for Refinishing: A DIY Success Guide – Cabinet Refinishing and Cabinet Painting Denver 720-219-9716
- Cabinet Color Selection Refinishing Guide for 2026 – Cabinet Refinishing and Cabinet Painting Denver 720-219-9716
- Cabinet Refinishing, Painting Preparation Steps: A DIY Guide
- How to Update Oak Cabinets Without Replacing: The Denver Homeowner’s Guide – Cabinet Refinishing and Cabinet Painting Denver 720-219-9716