
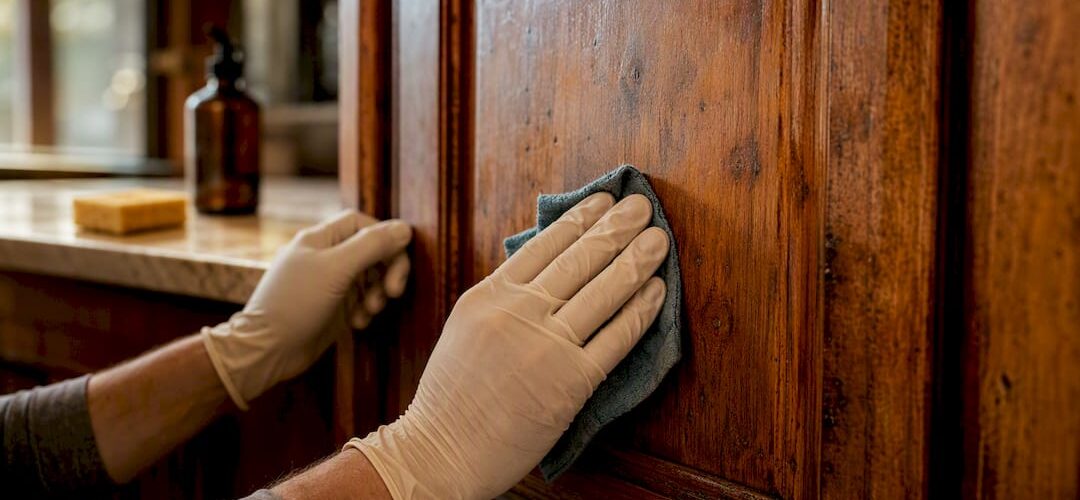
Daily wiping with a damp microfiber cloth, plus four short seasonal checks, is the entire formula for cabinets that still look good in twenty years. Nothing complicated, nothing expensive. Here’s the routine, boiled down:
- Daily: Wipe spills and splatters immediately with a damp cloth and mild dish soap.
- Monthly: Check hinges, knobs, and drawer slides for looseness or drag.
- Spring: Inspect under-sink and dishwasher-adjacent cabinets for moisture or soft spots.
- Summer: Tighten hardware and lubricate drawer slides.
- Fall: Touch up chips and protect finishes before heating season starts.
- Winter: Keep indoor humidity between 35–50% and ventilate while cooking.
If you spot swollen panels, peeling finish across multiple doors, or mounting screws that won’t hold anymore, that’s your signal to call a professional rather than keep patching it yourself, as explained in Is It Worth Replacing Interior Doors?.
Key Takeaways
A consistent seasonal maintenance schedule, built around daily wiping and four short seasonal checks, is what keeps kitchen cabinets functional and attractive for decades.
| Point | Details |
|---|---|
| Daily wiping is non-negotiable | Wipe spills immediately with a damp microfiber cloth and mild dish soap to prevent finish damage. |
| Follow the seasonal rhythm | Inspect for moisture in spring, tighten hardware in summer, touch up finishes in fall, manage humidity in winter. |
| Fix hardware before it fails | Tighten screws and adjust hinges monthly; repair stripped holes with glue and a dowel before they worsen. |
| Match cleaners to finish type | Use mild soap for painted and stained wood, conditioner for oil finishes, and always avoid ammonia, bleach, and abrasive pads. |
| Know when to call a pro | Swollen panels, mold, or widespread finish failure signal it’s time for professional refinishing, not another patch job. |
| Refinishing extends cabinet life affordably | Cabinetsrefinishing offers factory-finish results in three to five days for $3,000 to $8,000, well below full replacement cost. |
Where to read more on cabinet care
- Interstate Kitchens’ cabinetry maintenance guide covers daily cleaning and manufacturer warranty considerations.
- Activepropertycare’s seasonal calendar walks through the year-round approach used in this guide.
- Rivermill Cabinets’ care guide details deep-clean frequency and technique.
- BTB Cabinets’ maintenance guide explains humidity’s long-term effect on finishes.
- Always cross-check your own cabinet manufacturer’s care instructions, since approved cleaners can vary by finish.
Table of Contents
- Cabinet Maintenance Schedule Best Practices Start With Daily Habits
- What Should a Seasonal Cabinet Checklist Include?
- How Do You Fix Loose Hinges and Stripped Screws?
- Which Cleaners Match Your Cabinet Finish?
- When Should You Call a Cabinet Professional Instead?
- How Cabinet Organization Reduces Everyday Wear
- Why Ventilation Around Cabinets Prevents Mold and Warping
- Keeping Cabinet Hardware Safe for Kids and Pets
- Sources
Cabinet Maintenance Schedule Best Practices Start With Daily Habits
Most cabinet damage doesn’t come from one dramatic event. It comes from a hundred small moments, a coffee splash left overnight, tomato sauce that dries onto a painted door, water pooling on a windowsill cabinet after washing dishes. Wiping these up the moment they happen prevents the vast majority of finish failure, and it’s backed by cabinetry maintenance guides that treat daily cleaning as the single highest-impact habit a homeowner can build.
The method matters as much as the timing. Use a damp microfiber cloth with a small amount of mild dish soap, wipe with the wood grain rather than against it, and dry the surface immediately afterward. Standing water is the enemy of every cabinet finish, painted, stained, or oiled.
What to use:
- Microfiber cloths
- Mild dish soap diluted in warm water
- A soft-bristle toothbrush for hinge crevices and corners
What to avoid:
- Ammonia-based glass cleaners
- Bleach or bleach wipes
- Magic Eraser or any melamine abrasive pad
- Steel wool or scouring pads
Pro Tip: Keep a cloth and a small spray bottle of diluted soap under the sink itself. If cleanup takes ten extra seconds because the supplies are two rooms away, it won’t happen consistently.
What Should a Seasonal Cabinet Checklist Include?
Tying cabinet care to the seasons works because it piggybacks on chores you’re already doing, gutters, furnace filters, spring cleaning, so cabinet tasks never pile into one overwhelming project. This is the year-round maintenance calendar approach that distributes small tasks across twelve months instead of dumping them all on you at once.
Spring: hunt for moisture damage.
Winter condensation and slow leaks tend to surface as swelling right around when the heat finally shuts off. Start with the cabinets under the sink, then check anything next to the dishwasher or the trash pull-out.
- Open the cabinet and shine a flashlight along the back corners and floor.
- Run your hand across the bottom panel, feeling for soft or spongy spots.
- Check the caulk line where the countertop meets the backsplash for gaps.
- Look for early delamination, edges of laminate or veneer starting to lift.
Summer: tighten and lubricate.
Heat and use cause screws to work loose and slides to dry out. Grab a screwdriver and go around the kitchen tightening hinge screws and cabinet pulls, then apply a drop of silicone lubricant to any drawer slide that’s started to squeak or stick.
Fall: inspect finishes and prep for heating season.
Before the furnace kicks on and dries out the air, walk the kitchen looking for chips, scratches, or dull spots. Small chips can often be touched up with matching touch-up paint, though repeated spot repairs on the same door usually mean the underlying finish is failing. If your cabinets have an oil finish, this is the season to reapply conditioner.
Winter: manage humidity.
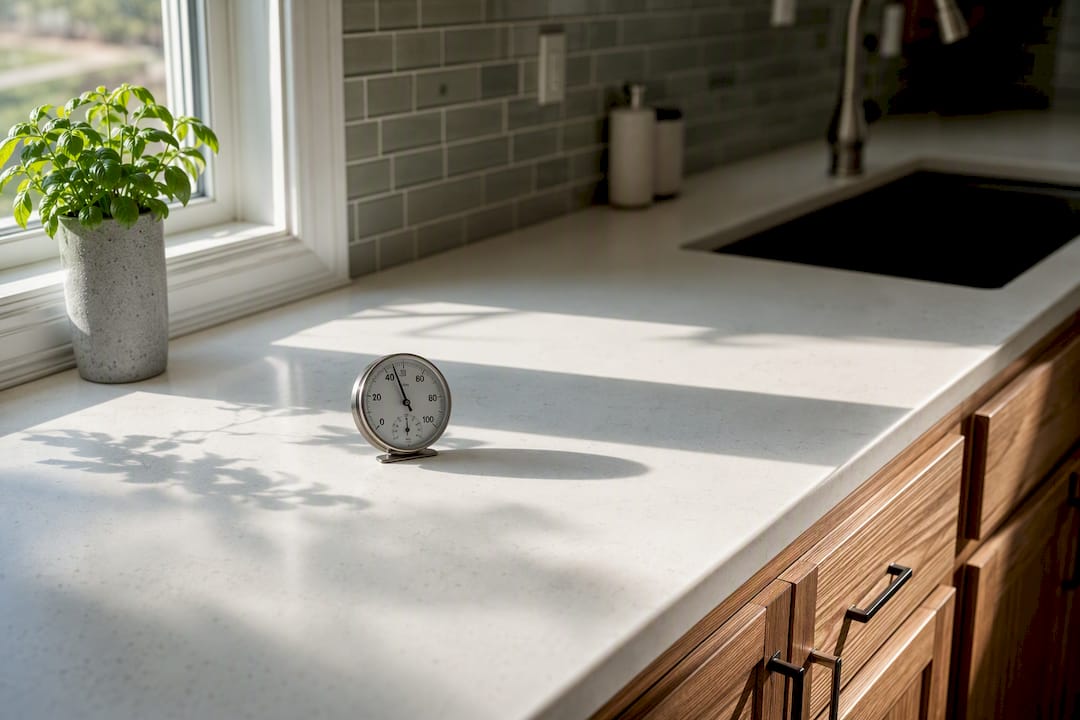
Furnaces pull moisture out of indoor air, and wood cabinets respond to that swing by shrinking, cracking, or developing gaps at the joints. Maintaining indoor humidity in the 35–50% range protects both the wood and the finish. Run your range hood while cooking, crack a window after the dishwasher finishes its cycle, and consider a small hygrometer, they cost about the same as a coffee maker and take the guesswork out of it.
How Do You Fix Loose Hinges and Stripped Screws?
A door that hangs crooked or a drawer that scrapes almost never means you need new cabinets. It usually means a screw has backed out or a hinge needs a quarter-turn adjustment, and modern hinges are built with exactly this kind of fine-tuning in mind.
- Adjust a crooked door: Most cabinet hinges have two or three adjustment screws. Turn the vertical screw to raise or lower the door, and the depth screw to pull it flush with the frame.
- Tighten a loose knob or pull: Use a screwdriver from inside the cabinet, not just hand-tightening from the front, since vibration loosens these fast.
- Repair a stripped screw hole: Back the screw out, fill the hole with wood glue and a toothpick or matchstick, let it cure for an hour, then re-drill and reinsert the screw. This restores a solid anchor point instead of just spinning in a dead hole.
Keep on hand: a Phillips and flat-head screwdriver, a small flashlight, wood glue, and a silicone-based lubricant. Unplug or shut off power to any nearby outlets before working near a dishwasher connection, and never force a hinge screw that won’t turn, you’ll strip it further.
Which Cleaners Match Your Cabinet Finish?
Not every cleaner works on every finish, and the wrong pairing can strip a factory finish or dull a hand-rubbed oil surface permanently. Test any new product on the inside of a door first, where a mistake won’t be visible.
- Painted cabinets: Mild soap and water only. Harsh degreasers can dull or streak the paint over repeated use.
- Stained wood: Same soap-and-water base, followed by an occasional wood-specific cleaner for grease buildup near the range.
- Oil finishes: Periodic wood conditioner keeps the finish from drying out and cracking.
- Drawer slides and hinges: Silicone spray lubricant, never petroleum-based products, which attract dust and grime.
Avoid across every finish type: ammonia, bleach, citrus-oil cleaners, Magic Erasers, and any polish with a petroleum base. These either strip protective layers or leave a residue that attracts more dirt than it removes. Manufacturers often list approved cleaners in your cabinet paperwork, and following that guidance keeps any warranty intact.
When Should You Call a Cabinet Professional Instead?
Call a professional when you see moisture damage that’s already set in, panels have swollen or delaminated, multiple doors have warped, or the finish has failed across large sections rather than one isolated spot. These are structural or material problems, not cleaning problems, and DIY touch-ups at that point usually just delay the inevitable.
Signs it’s time to stop patching and start planning:
- Soft, swollen, or spongy panels near water sources
- Persistent musty odors or visible mold inside cabinet boxes
- Multiple doors warped or no longer closing flush
- Screw holes that won’t hold even after the glue-and-dowel repair
- Finish failure (peeling, bubbling, or extensive discoloration) across more than one or two doors
Refinishing solves most of these problems at a fraction of replacement cost, with a factory-quality finish and a project timeline measured in days rather than weeks. If you’re weighing your options, these seven signs help clarify whether refinishing or full replacement makes more sense for your kitchen.
How Cabinet Organization Reduces Everyday Wear
How you load your cabinets matters almost as much as how you clean them. Heavy stockpots stacked on a thin plywood shelf will bow that shelf over time, and cramming too many items into a lower cabinet means constant scraping against the door’s interior finish every time something gets pulled out.
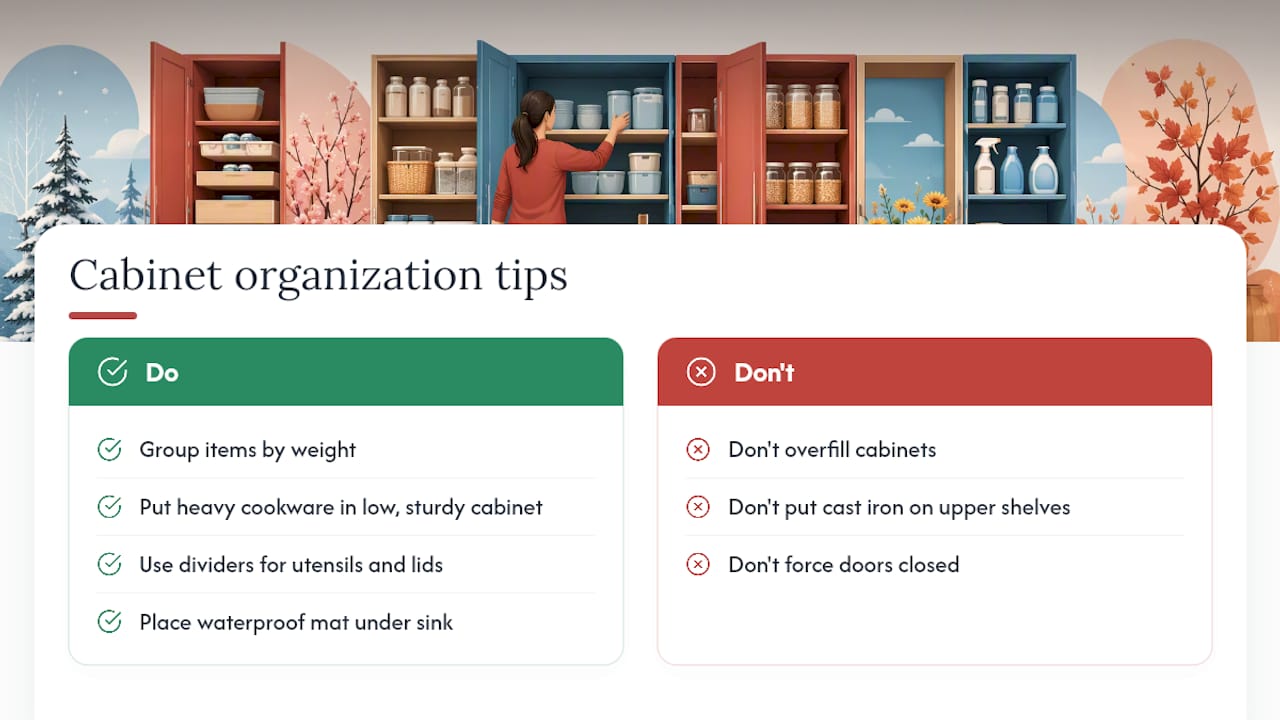
Group items by weight and give heavy cookware its own low, sturdy cabinet rather than distributing cast iron across upper shelves. Use drawer dividers or pullout organizers for utensils and lids so nothing gets dragged across a painted interior. In the cabinet under the sink, a waterproof mat under cleaning supplies catches drips before they reach the wood, a cheap habit that pairs well with the twice-yearly plumbing inspection many homeowners already do.
Avoid overfilling any cabinet to the point where doors won’t close without force. That constant strain on hinges is exactly what leads to the loose screws and misaligned doors covered earlier. Lazy Susans and pull-out trays in corner cabinets also reduce the reaching-and-scraping motion that wears down interior finishes faster than anything else in daily use.
None of this requires new hardware or an organizing system purchase. It just means thinking about weight distribution and access points the way you’d think about packing a moving box, heaviest and least-used items low and toward the back, everyday items at eye level.
Why Ventilation Around Cabinets Prevents Mold and Warping
Trapped moisture is the quiet cause behind most warped doors and musty cabinet interiors, and it’s almost always a ventilation problem rather than a cleaning one. Steam from cooking, humidity from a dishwasher cycle, and even a slow leak all need somewhere to go, and a kitchen without adequate airflow just lets that moisture settle into cabinet boxes.
Run your range hood every time you cook, especially when boiling water or using the oven for extended periods. If your hood only recirculates air rather than venting it outside, crack a window during and after cooking to let humidity actually leave the room. The same goes for the dishwasher, open the door slightly after the cycle ends instead of sealing in the steam behind adjacent cabinet panels.
Cabinets installed flush against a wall with poor airflow behind them are particularly prone to trapped moisture, which is one reason toe-kick vents and small gaps behind base cabinets exist in good kitchen design, they’re not decorative, they’re functional. If your kitchen runs on the humid side, a small dehumidifier or simply keeping the exhaust fan on longer after cooking makes a real difference over a year of daily use. Combined with the 35–50% humidity target for winter months, consistent airflow is what actually stops the slow warping that shows up as doors that no longer close flush.
Keeping Cabinet Hardware Safe for Kids and Pets
Cabinet hardware maintenance isn’t just about function, loose knobs and pulls create a real safety risk in households with young kids or curious pets. A pull that’s about to come off in a toddler’s hand, or a hinge that lets a heavy door swing shut on small fingers, turns a minor maintenance item into an injury risk.
Check hardware more frequently in homes with children or pets than the standard monthly schedule suggests, since these households put extra stress on drawers and doors through constant opening, closing, and occasional climbing. Soft-close hinges and drawer glides reduce slam injuries and are worth considering during any hardware upgrade or refinishing project. Cabinet locks on lower cabinets, especially those storing cleaning supplies, remain one of the simplest safety additions a homeowner can make, and they don’t interfere with the maintenance routine described throughout this guide.
If you’re planning a refinishing project in a home with young children, timing and ventilation both matter for safety during the work itself, which is covered in more detail in guidance on refinishing cabinets around young children.
Why a maintenance rhythm matters
Small, regular checks are what separate a kitchen that needs replacing at year twelve from one still going strong past twenty. Builder experience backs this up: households that wipe spills promptly and check hardware routinely rarely need major restoration within five to seven years. The five minutes you spend tightening a hinge this weekend is the reason you won’t be shopping for new cabinets next spring.
A Faster, Cheaper Path Than Replacing Your Cabinets
When maintenance stops being enough, and eventually it will, refinishing gives you a factory-quality finish without the cost or wait time of full replacement. Where new cabinets typically run $15,000 to $40,000 and take weeks, professional refinishing through Cabinetsrefinishing lands between $3,000 and $8,000 and wraps up in three to five days.

That price gap comes from the process itself: meticulous prep, careful sanding, and multiple sprayed protective layers instead of tearing out and rebuilding boxes that are often still structurally sound. If your cabinets are showing the finish failure or hardware wear covered above but the boxes themselves are solid, refinishing gets you a new-looking kitchen without the demolition. Ready to see what your kitchen could look like? Request a quote for cabinet refinishing in Denver and find out whether refinishing is the right next step for your cabinets.
Sources
- A Year-Round Maintenance Calendar for Kitchen Cabinets – Activepropertycare
- How to Care for Your Cabinetry: A Complete Maintenance Guide
- Daily Maintenance Tips for Custom Cabinetry | PineWood Cabinets
- BTB Guide to Cabinet Care & Maintenance – Beyond the Box