
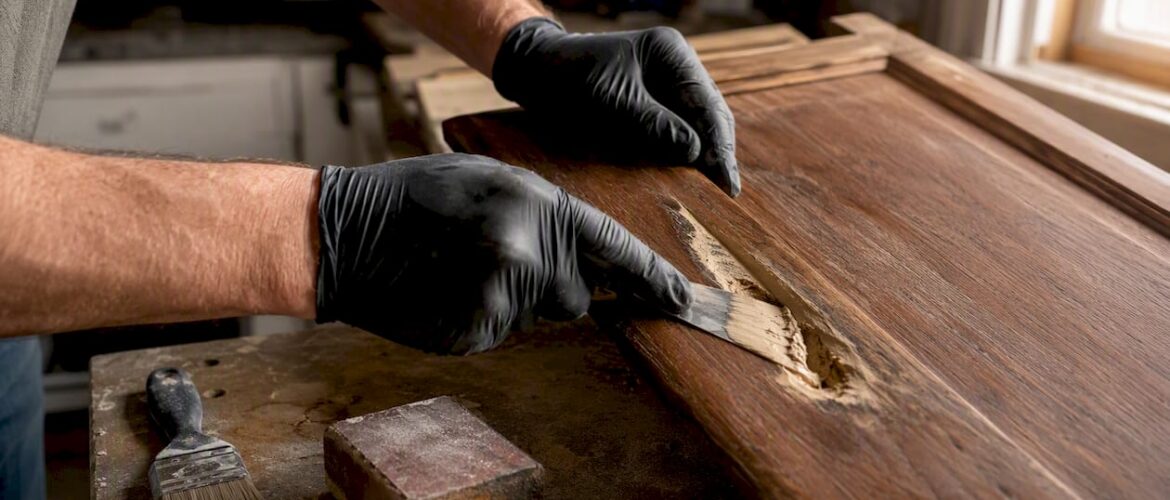
Most finish damage on kitchen cabinets can be repaired and refinished — as long as the cabinet boxes are structurally sound. If you’re looking at peeling paint, water stains, scratched veneer, or dinged edges, damaged cabinets refinishing is almost always the smarter call over replacement. The one exception: when moisture has softened the substrate, joints are failing, or mold is present. Those situations usually require component swaps or full replacement.
Before you do anything else, run three quick checks:
- Structural integrity: Press firmly on the cabinet box sides and floor. Solid and rigid means refinishable. Soft, spongy, or crumbling means replacement.
- Veneer and surface condition: Bubbling or lifting veneer that covers more than a small area is a red flag. Minor edge lifting can often be re-glued; widespread delamination cannot be reliably fixed.
- Moisture: If water damage is suspected, probe the MDF or particleboard edges. Swollen, crumbly, or discolored substrate usually signals replacement is needed.
Cost and timeline at a glance: DIY materials typically run $150–$400 for an average kitchen. Professional cabinet restoration runs $3,000–$8,000 for a full kitchen, compared to $15,000–$40,000 for replacement. A DIY project takes 2–4 weekends; a professional crew typically completes the job in 3–5 days.
Key Takeaways
Damaged cabinets can almost always be refinished when the substrate is structurally sound — the decision comes down to a three-point check, the right materials, and patience through the cure window.
| Point | Details |
|---|---|
| Diagnose before buying anything | Check for structural softness, veneer delamination, and moisture before committing to refinish vs. replace. |
| Prep determines durability | Degreasing and correct primer selection matter more than topcoat brand for long-term adhesion. |
| Full cure takes 7–14 days | Rehanging doors before full cure causes dents and scratches that undo the entire project. |
| DIY vs. pro cost gap is large | DIY materials run $150–$400; professional refinishing runs $3,000–$8,000 versus $15,000–$40,000 for replacement. |
| Cabinetsrefinishing for Denver homeowners | Cabinetsrefinishing completes factory-finish projects in 3–5 days across the Denver metro area. |
Table of Contents
- How do you decide between refinishing, repainting, refacing, or replacing?
- What tools and materials do you need before starting?
- How should you clean, sand, and prep cabinets before refinishing?
- How do you repair scratches, dents, veneer damage, and water-swollen MDF?
- Which primer works best for each cabinet surface?
- How do you apply topcoat for the best finish and durability?
- How long does the finish need to cure before you rehang doors?
- What does refinishing cost, and when should you hire a pro?
- What does a professional factory-finish process actually look like?
- What I’ve seen go wrong with damaged cabinet refinishing
- Cabinetsrefinishing brings a factory finish to Denver kitchens
- Sources
How do you decide between refinishing, repainting, refacing, or replacing?
Follow this decision sequence:
- Check the finish only. If the wood or MDF underneath is firm and the damage is surface-level — peeling topcoat, stains, scratches, faded color — refinishing is the right call. A properly done refinish lasts 8–15 years with normal kitchen use.
- Check if the finish is intact but just outdated. If the existing finish is adhering well and you simply want a color change, repainting (with proper prep and a bonding primer) is faster and cheaper than a full strip-and-refinish.
- Check the door fronts versus the boxes. If the cabinet boxes are solid but the door fronts are warped, delaminated, or beyond repair, refacing — replacing doors and drawer fronts while keeping the boxes — is the most cost-effective middle path. Comparing painting versus replacing doors can help clarify that decision.
- Check for soft substrate, failing joints, or mold. Tap the box sides and bottom. A hollow, soft, or crumbling response means the particleboard or MDF has lost structural integrity. Smell for mildew. If joints are separating or multiple hinges have pulled through the material, replacement is the only reliable fix.
- Document everything. Photograph each problem area before you touch anything. If water damage is involved, use a moisture meter and record the readings. These photos and numbers matter whether you’re doing the work yourself or getting a contractor estimate.
Photograph each door and label it with painter’s tape before removal. Door fronts can vary by up to 1/4 inch, and numbering each door and its corresponding opening prevents misalignment headaches at reinstallation.
What tools and materials do you need before starting?
Buying the wrong primer or skipping a deglosser is how most DIY refinishing projects fail within the first year. Get the right supplies before you open a single cabinet door.
Cleaners and surface prep:
- TSP substitute or liquid deglosser: Use a TSP substitute for heavy grease buildup; a liquid deglosser (such as Klean-Strip or similar) chemically etches the surface to improve adhesion without full sanding. Follow label dry times exactly.
- Murphy’s Oil Soap: Gentle enough for cleaning solid wood cabinets without raising the grain or stripping existing finish. Good for lightly soiled surfaces before scuff-sanding.
- Howard’s Restore-a-Finish or Watco Rejuvenating Oil: For cabinets with minor finish wear that don’t need a full strip, these penetrating products can revive the existing topcoat without repainting.
Sanding supplies:
- 120-grit sandpaper for removing sheen and creating mechanical bite
- 220-grit for smoothing before primer
- A random-orbit sander for flat panels; sanding blocks for profiles and edges
- Tack cloths and a shop vacuum with a fine-dust filter for dust control
Primers:
- Zinsser BIN (shellac-based primer): The go-to for severe stain bleed, tannin-rich woods like oak or cherry, and any surface with water stains or smoke damage. Bonds to nearly anything.
- Waterborne bonding primer: For previously painted wood, plywood, and pre-finished surfaces where you want lower odor and faster recoat.
- Oil-based stain-blocking primer: For heavy grease contamination or high-tannin substrates when shellac isn’t practical.
Topcoats:
- Sherwin-Williams Emerald Urethane Trim Enamel, ProClassic, or Urethane Trim Enamel: Recommended by Sherwin-Williams for cabinets because they offer improved scratch resistance, flow, and recoat properties versus standard wall paint.
- Rust-Oleum Cabinet Transformations: A complete kit system (deglosser, bond coat, decorative glaze, protective topcoat) that simplifies product selection for DIYers and enforces a compatible layering sequence.
- Waterborne alkyds for a hard, self-leveling finish with low odor.
Tools and equipment:
- HVLP sprayer (available at most tool rental shops) for a factory-smooth finish
- Foam rollers (4-inch) for flat panel sections if spraying isn’t an option
- Purdy angled sash brushes for edges, profiles, and detail work
- Respirator rated for organic vapors, safety glasses, nitrile gloves
- Painter’s tape, plastic sheeting for masking
- Screwdrivers, a drill, and labeled zip-lock bags for hardware storage
How should you clean, sand, and prep cabinets before refinishing?
Prep is where refinishing projects succeed or fail. Skipping degreasing and using a standard drywall primer is the single most reliable way to watch your new finish peel within months. Degreasing and correct bonding primer selection are the primary determinants of long-term adhesion, more than topcoat brand choice alone.
Start with cleaning, not sanding. Sanding before degreasing pushes kitchen grease and cooking residue deeper into the surface, where it will block adhesion from underneath. Wipe down every surface with a TSP substitute or liquid deglosser first. Let it dry completely per the product label — typically 30 minutes to an hour.
Remove all hardware and label everything. Take off hinges, pulls, and knobs. Place hardware in labeled bags that correspond to each door. Use painter’s tape to number each door and its opening before removal. Professionals follow this step because door fronts can vary by up to 1/4 inch, and reinstalling them out of order creates visible gaps and alignment problems.
Sanding sequence: Scuff the entire surface with 120-grit to break the existing sheen and give the primer something to grip. Follow with 220-grit to smooth out the scratches left by the coarser paper. For detailed sanding guidance, including how to handle profiles and routed edges, a step-by-step reference can save you from common grit-sequence mistakes. If the existing finish is peeling or chipping in sheets, strip to bare wood rather than sanding over failing material — you cannot build a stable new finish on top of an unstable old one.
Health and safety: Work in a ventilated space with windows open and a fan exhausting air out. Wear an organic-vapor respirator, not just a dust mask. Collect sanding dust with a shop vacuum rather than blowing it around. Dispose of solvent-soaked rags in a sealed metal container — oil-soaked rags can self-ignite.
Pro Tip: Never skip the tack cloth step between sanding and priming. Even invisible dust particles left on the surface will telegraph through your topcoat as tiny bumps that no amount of finish coats will hide.
How do you repair scratches, dents, veneer damage, and water-swollen MDF?
Not all damage looks the same, and the repair approach depends entirely on what’s underneath the finish. Here’s how to handle the most common problems, with clear pass/fail criteria for each.
1. Filling dents and gouges in solid wood or plywood
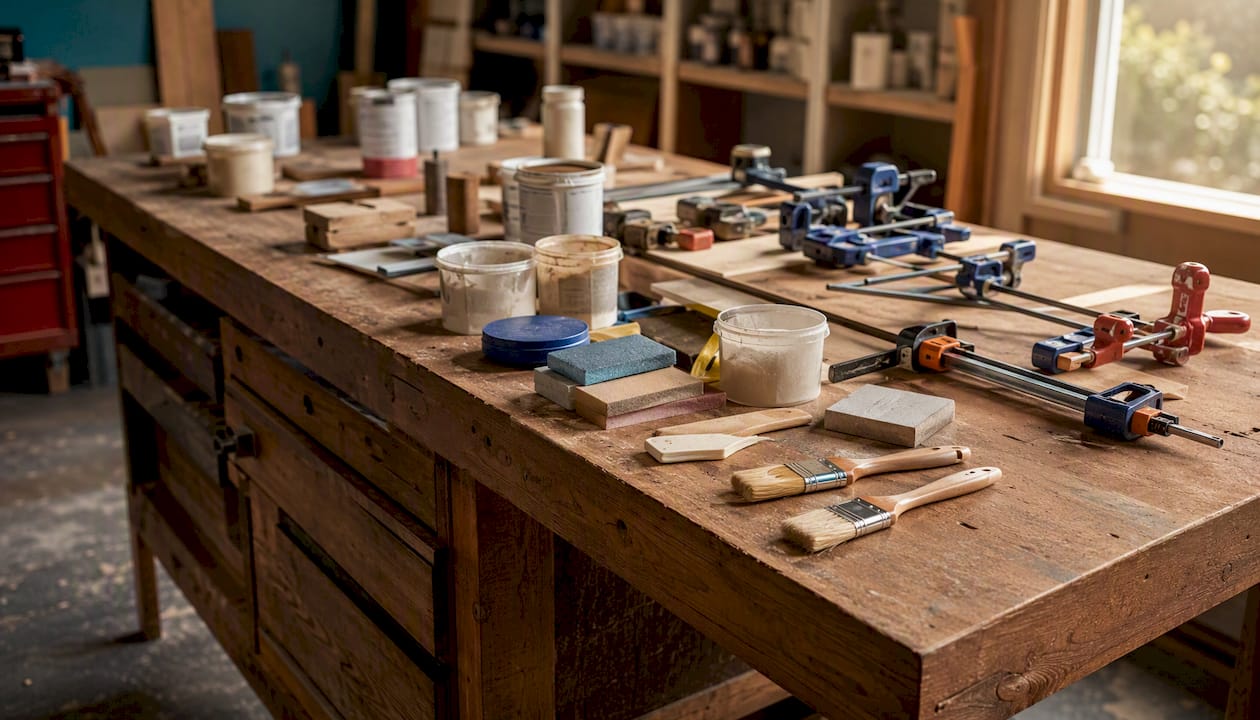
Use a two-part wood filler (Minwax High Performance Wood Filler or similar) for deeper gouges; lightweight spackling works for shallow scratches. Apply slightly proud of the surface, let it cure fully, then sand flush with 120-grit followed by 220-grit. Feather the edges so there’s no ridge at the repair boundary. Prime the filled area before topcoating — bare filler absorbs finish unevenly.
2. Repairing lifting veneer
Small areas of lifting veneer at edges can be re-glued with wood glue or contact cement, clamped flat, and allowed to cure overnight. Clean any old adhesive residue before applying fresh glue. If the veneer is bubbling across a large panel face, or if it tears when you try to press it back, the substrate underneath has likely failed. Re-gluing bubbled veneer over a compromised substrate will not hold — that door needs replacement.
3. MDF and particleboard water damage
Water-damaged cabinets can be refinished only when the damage is confined, fully dry, and the substrate remains stable. Swelling, delamination, or soft fibers usually require component replacement. Before any repair, the moisture source must be corrected and the material must be completely dry. Professionals use fans, dehumidifiers, and moisture meters before touching the surface. For shallow MDF edge swelling, remove the damaged fibers, fill and shape with a compatible filler, then seal with a shellac primer and appropriate filler system. Deeper swelling or crumbling MDF is not reliably repairable — replace the component.
4. Edge and corner repairs
Loose corner joints can be re-secured with wood glue and clamps. For profiled or routed door edges, use a flexible wood filler that can be shaped before it fully cures. Avoid over-clamping on MDF, which can crush the material.
5. When to replace rather than repair
Replace a door, drawer front, or entire box when you find: softness or crumbling when pressed, multiple failed joints on the same box, veneer delaminating across more than a small area, mold or persistent odor, or any substrate that stays soft after thorough drying. Simple repairs like tightening hinges, filling stripped screw holes, and re-gluing broken joints are feasible for most homeowners — but these red flags are the line where DIY repair stops making sense.
Worth knowing: Moisture damage is the most common reason a refinishing project fails before it starts. Painting over unresolved moisture traps the problem underneath and may hide active mold — address the source first, always.
Which primer works best for each cabinet surface?
Using a drywall primer on laminate or a standard bonding primer over a heavy tannin bleed is a reliable path to peeling finish within a year. Match the primer to the substrate.
| Surface | Recommended Primer Type | Key Reason |
|---|---|---|
| Solid wood (oak, maple, cherry) | Zinsser BIN shellac or oil-based stain-blocker | Blocks tannin bleed and grease; bonds to bare or previously finished wood |
| Plywood or pre-painted wood | Waterborne bonding primer | Good adhesion, low odor, fast recoat; compatible with most topcoats |
| Laminate or thermofoil | Bonding primer (waterborne or solvent-based) | Standard primers won’t grip slick surfaces; bonding primer chemically adheres |
| MDF (sealed edges) | Shellac primer (Zinsser BIN) + filler | MDF edges absorb heavily; shellac seals and stabilizes before topcoat |
| Previously painted (stable finish) | Waterborne bonding primer after scuff-sand | Scuff plus bonding primer avoids full strip while ensuring adhesion |
| Water-stained or smoke-damaged | Zinsser BIN shellac primer | Shellac is the only reliable stain-blocker for severe contamination |
A note on ventilation: shellac-based primers (Zinsser BIN) have strong alcohol fumes. Work with windows open, a fan exhausting outward, and an organic-vapor respirator. Waterborne bonding primers are much lower odor and dry faster, making them the practical choice when shellac isn’t specifically needed.
The Rust-Oleum Cabinet Transformations kit uses a proprietary bond coat and topcoat system that removes the guesswork around primer compatibility. If you’re a first-time DIYer and want a system where every product is pre-matched, it’s a reasonable starting point — just follow the sequence exactly, because skipping the bond coat step defeats the purpose.
How do you apply topcoat for the best finish and durability?
The topcoat choice and application method together determine whether your cabinets look factory-finished or obviously DIY. Both matter.
Sprayer vs. brush and roller
An HVLP sprayer produces the smoothest result because it atomizes the finish into a fine mist with no brush marks or roller stipple. Professionals use shop sprayers or on-site HVLP rigs for this reason. You can rent an HVLP sprayer from most tool rental shops for a weekend project, but plan to practice on cardboard first — runs and orange peel texture come from holding the gun too close or moving too slowly. For brush-and-roller application, foam rollers on flat panels and a Purdy angled sash brush on edges and profiles give the best result. Back-brush lightly after rolling to eliminate stipple texture.
Topcoat options
Sherwin-Williams ProClassic and Emerald Urethane Trim Enamel are the most commonly recommended products for cabinet work because they level well, cure hard, and resist scratching better than standard latex wall paint. Urethane trim enamels and hybrid acrylic-alkyd products offer improved scratch resistance, flow, and recoat properties. For a detailed comparison of alkyd, acrylic-alkyd, and waterborne options by durability and scratch resistance, the differences in real-world performance are significant. Waterborne alkyds are a strong middle-ground choice: they clean up with water, dry faster than oil-based products, and cure to a hard film.
Coat counts and sanding between coats
Two to three coats is standard. Apply thin coats rather than one thick one — thick coats sag, take longer to cure, and trap solvent underneath. Lightly sand between coats with 220-grit (or a gray scuff pad) to remove any dust nibs and improve adhesion between layers. Wipe with a tack cloth before each coat. Professionals fill holes, sand repaired areas flush, apply tinted primer for dark colors, and lightly sand between coats to achieve a consistent factory look.
Pro Tip: Paint upper cabinets before lower ones. Overspray and drips fall down, not up. Finishing the uppers first means you won’t contaminate work you’ve already completed.
How long does the finish need to cure before you rehang doors?
Dry-to-touch and fully cured are not the same thing, and confusing them is one of the most common ways a refinishing project gets damaged right at the finish line.
Most waterborne cabinet enamels feel dry within 2–4 hours and can be recoated after 4–6 hours. Full cure — the point at which the film reaches its rated hardness and scratch resistance — takes 7–14 days depending on the product, temperature, and humidity. A properly done refinish can last 8–15 years when the finish is allowed to cure fully before being put into service. Rushing this step by rehanging doors and loading shelves within 24 hours is a reliable way to dent, scratch, or mar a finish that hasn’t hardened yet.
Reinstallation and protection:
- Rehang doors using your labeled numbering system, matching each door to its original opening.
- Install soft-close bumpers or felt door bumpers on all doors before rehanging — they protect the finish at the contact points and reduce impact noise.
- Re-torque hinges gently; overtightening on MDF can strip the screw holes.
- Keep cabinet interiors unloaded for at least 48–72 hours after rehanging to avoid contact marks on the fresh finish.
Ongoing maintenance:
- Clean with a damp cloth and mild dish soap. Avoid abrasive scrubbers, bleach-based cleaners, or anything with ammonia — these degrade the topcoat over time.
- Wipe up spills immediately, especially near the sink and stove where moisture and grease concentrate.
- For minor scuffs after full cure, a light touch-up with the original topcoat (lightly scuffed first) blends well on most cabinet enamels.
- Understanding what affects long-term durability helps you set realistic expectations and catch early wear before it becomes a bigger repair.
What does refinishing cost, and when should you hire a pro?
The math here is straightforward, and it almost always favors refinishing over replacement.
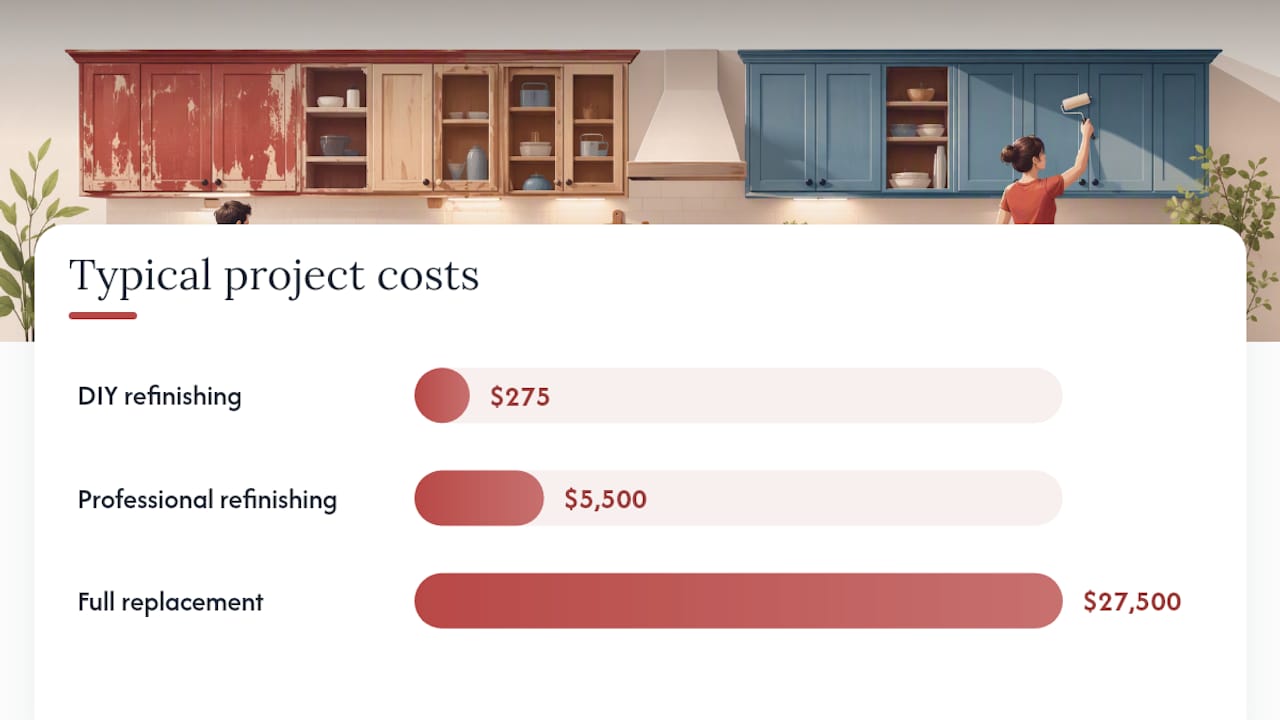
DIY cost estimate: Materials for an average kitchen run $150–$400, covering primer, topcoat, sandpaper, brushes, and basic supplies. Add $50–$100 for an HVLP sprayer rental if you go that route. Time investment is typically 2–4 weekends depending on kitchen size, damage extent, and drying time between coats.
Professional refinishing cost: For a full kitchen, professional cabinet refinishing typically runs $3,000–$8,000, which includes inspection, prep, repairs, spray application, and multiple protective coats. Smaller jobs or partial kitchens cost less.
Full replacement cost: New cabinet installation typically runs $15,000–$40,000 for an average kitchen, depending on material grade and layout complexity.
| Approach | Typical Cost Range | Timeline | Best For |
|---|---|---|---|
| DIY refinishing | $150–$400 in materials | 2–4 weekends | Sound cabinets, minor damage, budget-conscious |
| Professional refinishing | $3,000–$8,000 | 3–5 days | Extensive damage, factory finish, time-sensitive |
| Full replacement | $15,000–$40,000 | 2–6 weeks | Structural failure, layout change, complete renovation |
Red flags that mean you should hire a pro (or replace):
- Water damage that has spread beyond one cabinet or that you can’t fully dry out
- MDF or particleboard that crumbles when probed
- Finish failures that have recurred after a previous DIY attempt
- Mold or persistent odor inside the cabinet boxes
- More than two or three doors with warped or delaminated fronts
Questions to ask any refinishing contractor: What primer system do you use on laminate? Do you spray on-site or in a shop? What’s included in the warranty? How do you handle moisture testing before starting? A contractor who can’t answer these specifically is worth passing on.
What does a professional factory-finish process actually look like?
The gap between a DIY result and a professional factory finish usually comes down to process discipline, not just better equipment.
A professional workflow typically follows this sequence:
- Inspection and moisture testing: Every surface is checked for soft spots, delamination, hinge pull-through, and moisture readings before a single product is applied.
- Component repairs: Loose joints are re-glued, stripped screw holes are filled, and damaged MDF edges are stabilized or replaced before any finish work begins.
- Full degreasing and scuff prep: Every surface is cleaned with a commercial degreaser, then scuff-sanded to create mechanical adhesion.
- Shellac or bonding primer application: Applied by spray for even coverage, including inside edges and profiles that a brush misses.
- Multi-coat topcoat with intermediate sanding: Two to three coats of a trade-grade cabinet enamel, with light sanding between each coat to remove dust nibs and improve intercoat adhesion.
- Final quality check and touch-ups: Professionals fill holes, apply tinted primer for dark colors, and sand between coats to achieve a consistent factory look before the final coat goes on.
- Controlled curing: Doors are stored flat or hung in a controlled environment to cure before reinstallation.
Shop spraying in a controlled environment with multiple light topcoats and intermediate sanding produces a harder, longer-lasting finish than a single brushed coat applied on-site. That’s the core rationale behind a factory-finish workflow.
What I’ve seen go wrong with damaged cabinet refinishing
The most common mistake isn’t choosing the wrong topcoat. It’s skipping the diagnostic step entirely.
Homeowners see peeling paint and assume they need a better product. They buy a premium cabinet enamel, roll it over the existing surface with minimal prep, and within six months the new finish is peeling in the same spots. The product wasn’t the problem. The grease underneath the old finish, or the moisture that was never fully dried out, was always the real issue. No topcoat, regardless of price, bonds reliably to a contaminated or unstable substrate.
The other pattern worth naming: people underestimate MDF water damage. MDF looks fine on the surface after it dries out. The edges swell, you sand them back, and the face looks smooth again. But the internal fiber structure has been compromised. A finish applied over structurally weakened MDF will crack and peel as the material continues to move with humidity changes. The pass/fail criteria for MDF water damage are not cosmetic — they’re structural. If it crumbles when probed, no amount of filler and primer will give you a durable result.
The DIY-first approach in this guide is genuinely the right call for most homeowners with surface-level damage. But when moisture or structural failure is in the picture, calling a professional before you start saves you from doing the work twice.
Cabinetsrefinishing brings a factory finish to Denver kitchens
Refinishing damaged cabinets yourself is absolutely doable when the damage is surface-level and the substrate is sound. When moisture, structural damage, or a failed previous attempt is in the picture, the cost of getting it wrong twice exceeds the cost of hiring a professional the first time.

Cabinetsrefinishing serves homeowners across the Denver metro area with a full factory-finish process: on-site inspection and moisture testing, minor repairs, shop-quality spray application, custom color matching, and aftercare guidance. Projects are typically completed in 3–5 days, not weeks, at a fraction of replacement cost. Refinishing costs run $3,000–$8,000 for a full kitchen versus $15,000–$40,000 for new cabinets.
To schedule an on-site estimate or ask about your specific damage, contact Cabinet Refinishing Denver directly. If you’re still deciding whether your cabinets qualify for refinishing, the 7 signs your cabinets need refinishing guide walks through the exact criteria.
Sources
- Kitchen Cabinet Refinishing: The Complete DIY Guide
- Cabinet Refinishing: A Complete Guide
- How to Refinish Cabinets Like a Pro | HGTV
Recommended
- Kitchen Decor Refresh Ideas: High-Impact, Low-Cost Upgrades.
- 7 Signs Your Cabinets Need Refinishing (Not Replacing) – Cabinet Refinishing and Cabinet Painting Denver 720-219-9716
- Touch Up Paint for Kitchen Cabinets: When to DIY vs. Professional Refinishing in Denver – Cabinet Refinishing and Cabinet Painting Denver 720-219-9716