
Sanding is the mechanical bonding step that determines whether a cabinet refinishing project lasts two years or twenty. The role of sanding in cabinet refinishing is to strip the existing surface’s sheen and create microscopic peaks and valleys that give primer and paint a physical surface to grip. Without it, paint fails quickly through peeling, chipping, and bubbling within months. This guide covers the right grit progression, preparation sequence, and practical techniques that separate a lasting finish from a frustrating redo, using tools like sanding blocks, random orbital sanders, and 120-grit to 220-grit sandpaper.
What sanding techniques and grit progression work best for cabinet refinishing?
The industry-standard grit progression for repainting cabinets starts at 120-grit for scuff sanding to dull the existing clear coat, then moves to 220-grit to smooth the surface before priming. This two-step sequence is the foundation of a professional-looking finish. Skipping straight to 220-grit on a glossy surface leaves the finish too slick for primer to bond. Skipping straight to 120-grit and stopping there leaves a scratch pattern coarse enough to telegraph through your topcoat.
For restaining rather than repainting, the process is more aggressive. You need to strip the old finish down to bare wood, which means starting with 80-grit to cut through the existing stain and sealer. From there, you progress through 120-grit and finish with 180-grit or 220-grit before applying your new stain. Each grit step removes the scratch pattern left by the previous one, which is why skipping grit steps wastes time and creates uneven surface texture.
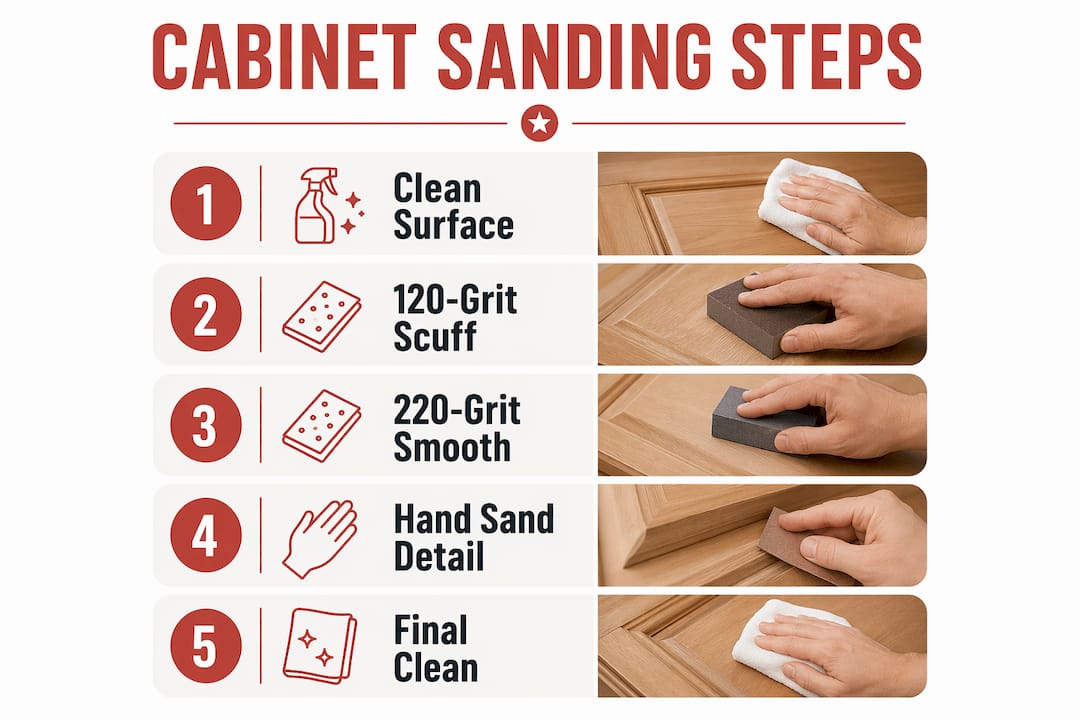
Here is the recommended sequence for a standard repaint project:
- Clean and degrease all surfaces with trisodium phosphate (TSP) or a liquid degreaser. Let dry completely.
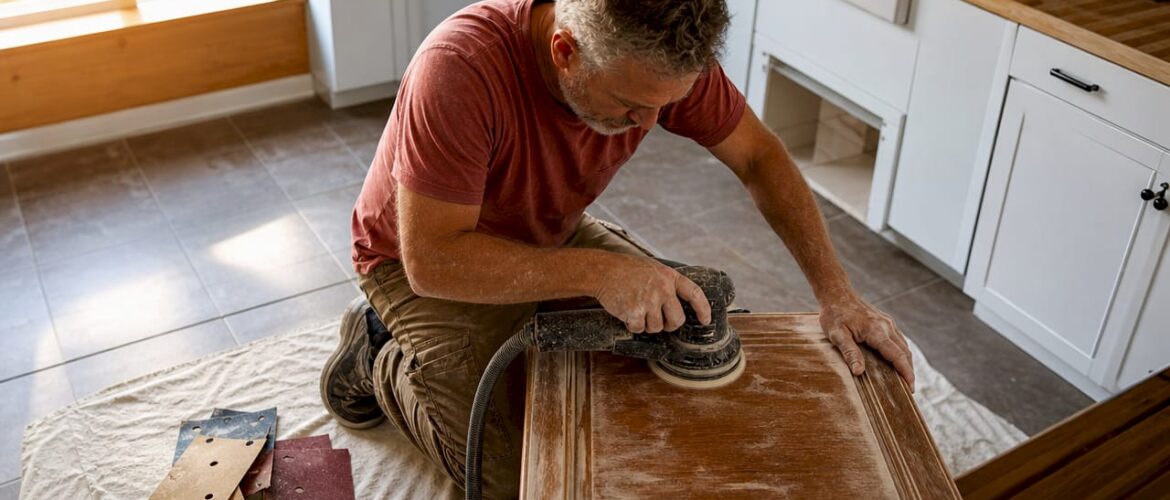
- Scuff sand with 120-grit using a random orbital sander on flat door panels and a sanding block on frames and profiles.
- Wipe down with a tack cloth to remove all dust before moving to the next grit.
- Finish with 220-grit by hand or with a detail sander to refine the surface and remove 120-grit scratches.
- Wipe again with a tack cloth, then apply your bonding primer within the same day.
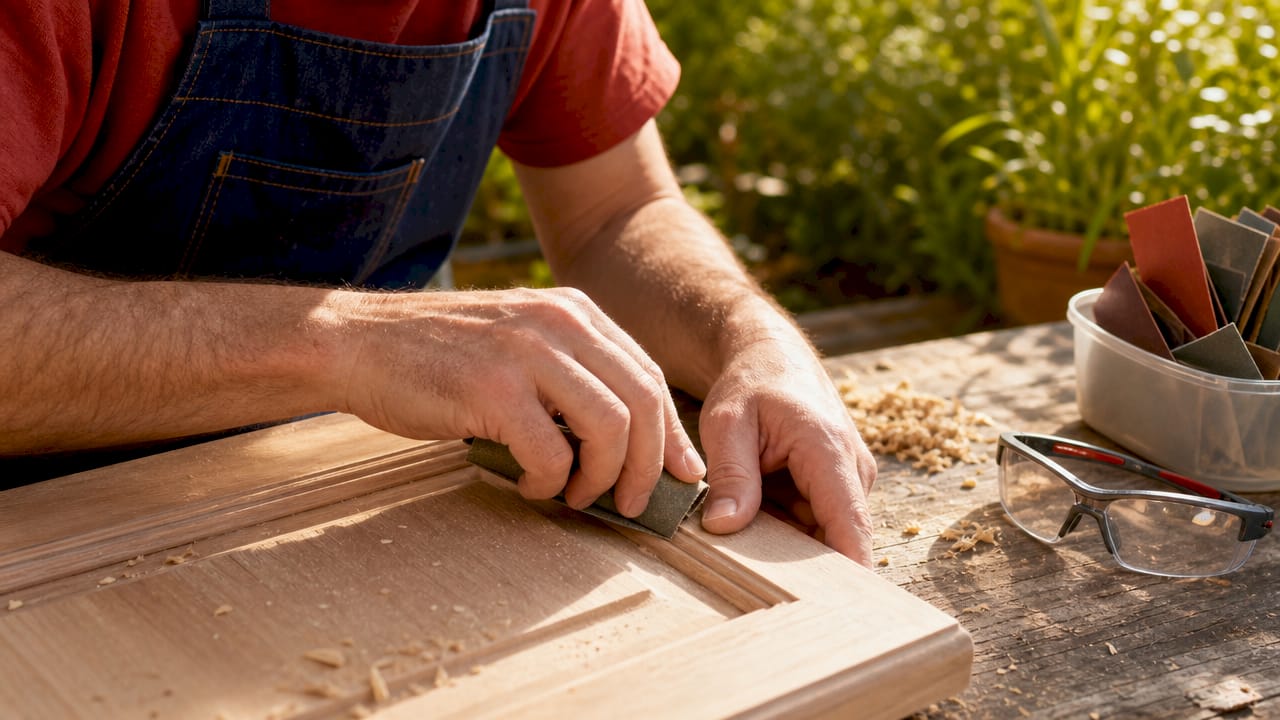
For hand sanding on detailed profiles, raised panels, and inside corners, a sanding block gives you consistent pressure across the surface. A random orbital sander like the Makita BO5041 or DeWalt DWE6421K handles flat cabinet doors efficiently without the swirl marks that come from a standard disc sander.
Pro Tip: Always sand in the direction of the wood grain on natural wood cabinets. On MDF or thermofoil, sand in consistent straight passes to avoid creating raised fibers or edge damage.
Why cleaning before sanding is critical to avoid adhesion failures
Sanding before cleaning is one of the most common and costly mistakes in cabinet refinishing preparation. When you sand a greasy or dirty surface, oils and grime embed deeper into the wood pores rather than being removed. The result is a contaminated substrate that causes primer to lift or peel weeks after the job looks finished.
Kitchen cabinets accumulate cooking grease, airborne oils, and cleaning product residue that are invisible to the naked eye. You cannot sand your way through that contamination. You have to dissolve it first with a proper degreaser, then let the surface dry before any abrasive touches it.
The correct preparation checklist before sanding cabinets:
- Remove all hardware, including hinges, pulls, and knobs. Tape off any areas you are not refinishing.
- Wash with TSP or a TSP substitute mixed per label instructions. TSP cuts through grease more effectively than dish soap or all-purpose cleaners.
- Wipe dry with clean rags, then allow surfaces to air dry for at least 30 minutes before sanding.
- Inspect for repairs: fill holes, dents, or gouges with wood filler and let cure fully before sanding.
- Sand in a well-ventilated space and wear an N95 respirator to avoid inhaling fine wood and finish dust.
Liquid deglossers like Wilbond or Krud Kutter Gloss-Off are sometimes used as a shortcut before painting. They do dissolve surface sheen, but light scuff sanding remains necessary even after using them because chemical deglossing does not create physical texture. Think of a deglosser as a cleaning step, not a sanding replacement.
Pro Tip: After degreasing, run your hand across the cabinet surface. If it still feels even slightly slick or waxy, clean it again. Primer applied over residual grease will fail regardless of how well you sand.
Does sanding actually outperform liquid deglossers for cabinet adhesion?
Liquid deglossers remove surface shine but do not create physical roughness. Sanding creates microscopic peaks and valleys that give primer a mechanical anchor. These are two fundamentally different processes, and only one of them produces a durable bond.
| Method | Surface texture created | Adhesion type | Durability in kitchens |
|---|---|---|---|
| Liquid deglosser only | None (chemical only) | Chemical bond | Low to moderate |
| Light scuff sanding only | Minimal | Mechanical bond | Moderate |
| Deglosser plus scuff sanding | Consistent micro-texture | Chemical and mechanical | High |
| Full grit progression (120 then 220) | Optimized micro-texture | Mechanical and chemical | Highest |
The table above reflects why skipping sanding leads to early paint failures, especially in high-touch, greasy kitchen environments. A chemical bond from a deglosser alone cannot withstand the daily abuse of cabinet doors being opened and closed hundreds of times per year.
“No-sand” products claim to simplify prep, but they often risk premature finish failure in kitchens due to the absence of mechanical adhesion. The time saved upfront is rarely worth the cost of redoing the job.
The most durable approach combines both methods. Use a liquid deglosser as part of your cleaning step, follow it with light scuff sanding at 120-grit, and finish with 220-grit before priming. This gives you both chemical and mechanical adhesion, which is exactly what the factory finish methodology used by professional refinishers relies on. For a deeper look at why skipping this step backfires, the guide on cabinet painting without sanding breaks down the science clearly.
Practical tips for sanding cabinets effectively without damaging them
The most common sanding mistake is applying too much pressure with a power tool. Excessive pressure damages cabinets and rounds over sharp edges and detailed profiles, which destroys the look of the finished piece. The tool’s weight and the abrasive do the work. Your job is to guide it.
Here are the practical techniques that separate a clean result from a damaged one:
- Use raking light to check your progress. Hold a flashlight at a low angle across the sanded surface. Hidden scratches and missed spots that are invisible under overhead lighting show up immediately. Only move to the next grit when the previous scratch pattern is completely gone.
- Use a sanding block on all edges and profiles. Foam sanding blocks from 3M or Norton conform to curved profiles without burning through the veneer or rounding over crisp edges the way a power sander does.
- Replace sandpaper before it feels dull. Worn sandpaper requires more pressure to cut, which increases the risk of damage and leaves an inconsistent scratch pattern. If you have to push harder, the paper is done.
- Try a crosshatch pattern on flat panels. Sand at a 45-degree angle to the grain, then sand again at the opposite 45-degree angle. This technique removes the existing finish more evenly than sanding in a single direction.
- Control dust with a shop vac attachment. Random orbital sanders like the Festool RO 150 accept direct vacuum connections, which keeps dust off the surface and out of your lungs simultaneously.
For wet sanding between coats of paint or primer, 400-grit wet/dry sandpaper used with a small amount of water produces an exceptionally smooth surface. This technique is standard in professional cabinet prep work and gives topcoats a glass-like foundation. Wet sanding is not necessary for the initial prep stage, but it makes a real difference between coats.
Pro Tip: Write the grit number on the back of each cut piece of sandpaper before you start. When you have multiple grits on the workbench, it is easy to grab the wrong one and undo progress you already made.
Key takeaways
Proper sanding is the single highest-return preparation step in cabinet refinishing, combining mechanical adhesion, surface smoothing, and contamination removal to produce a finish that holds up for years.
| Point | Details |
|---|---|
| Sanding creates mechanical adhesion | 120-grit scuff sanding creates the physical texture primer needs to bond to cabinet surfaces. |
| Clean before you sand | Degreasing with TSP before sanding prevents oils from embedding into wood pores and causing primer failure. |
| Follow grit progression | Moving from 120-grit to 220-grit removes scratch patterns progressively and produces a smoother final surface. |
| Deglossers do not replace sanding | Liquid deglossers remove shine chemically but cannot create the microscopic texture that mechanical sanding provides. |
| Use raking light to verify progress | Angling a flashlight across the surface reveals missed spots and confirms when each grit stage is complete. |
Why I think most DIYers underestimate sanding
I have seen dozens of cabinet refinishing projects where the homeowner did everything right except the prep. They bought quality paint, used a bonding primer, and applied careful coats. Six months later, the finish was peeling at the edges and chipping around the pulls. Every single time, the root cause was inadequate sanding.
The frustrating part is that sanding feels like the least glamorous part of the job. You spend an hour or two creating dust, and the cabinet looks almost identical to when you started. There is no visible reward. That psychological gap is why people rush it or skip it entirely.
What I have found after working through enough of these projects is that the sanding stage is where the actual finish quality is decided. Everything that comes after, the primer, the paint, the topcoat, is just building on the foundation you created with sandpaper. A poor foundation cannot be rescued by expensive paint.
The other thing most guides do not tell you is that over-sanding is also a real risk. Pressing too hard with a random orbital sander on a veneered cabinet door can cut through the veneer in under a minute. I have seen it happen. The fix is to use light, consistent pressure and let the abrasive do its job at its own pace. Patience during sanding is not a soft skill. It is the technical skill that separates a lasting finish from a redo.
If you are tackling a full kitchen, consider the kitchen cabinet painting process as a reference for sequencing your work. Getting the order right matters as much as the technique itself.
— Jesse
How Cabinetsrefinishing delivers a finish that holds
Sanding done right takes time, the right tools, and a disciplined sequence that most homeowners find harder to execute than expected. Cabinetsrefinishing applies a factory-finish methodology that includes full degreasing, proper grit progression, and bonding primer before a single coat of paint touches your cabinets.

The result is a finish that withstands daily kitchen use without peeling or chipping, completed in 3 to 5 days at a fraction of the cost of replacement. Projects typically run between $3,000 and $8,000, compared to $15,000 to $40,000 for full cabinet replacement. If you want the durability that comes from professional prep without the guesswork, explore the Denver cabinet refinishing process or reach out directly to Cabinetsrefinishing to discuss your kitchen.
FAQ
What grit sandpaper should I use for cabinet refinishing?
Start with 120-grit to scuff sand and dull the existing finish, then follow with 220-grit to smooth the surface before priming. For restaining down to bare wood, begin with 80-grit and work up through 120-grit and 220-grit progressively.
Can I skip sanding if I use a liquid deglosser?
No. Liquid deglossers remove surface shine chemically but do not create the physical texture that primer needs to bond. Skipping sanding leads to peeling, chipping, and bubbling, particularly in high-use kitchen environments.
How do I know when I have sanded enough?
Use a flashlight held at a low angle across the surface. When the scratch pattern from the previous grit is fully gone and the surface looks uniformly dull with no shiny spots remaining, you are ready to move to the next grit or apply primer.
Should I sand between coats of paint on cabinets?
Yes. Light sanding with 320-grit or 400-grit between coats removes dust nibs and surface imperfections, giving each subsequent coat a smoother surface to bond to. Wipe with a tack cloth after each sanding pass before recoating.
What happens if I sand before cleaning my cabinets?
Sanding before cleaning pushes cooking grease and grime deeper into wood pores rather than removing them. This contamination breaks primer adhesion and causes the finish to lift or peel weeks after the project is complete. Always clean and degrease first.
Recommended
- Cabinet Painting Without Sanding: Professional Truth vs. DIY Myths – Cabinet Refinishing and Cabinet Painting Denver 720-219-9716
- Denver Kitchen Cabinet Resurfacing: The Ultimate Guide to Professional Refinishing – Cabinet Refinishing and Cabinet Painting Denver 720-219-9716
- Painting Oak Cabinets White: The Professional Before and After Transformation Guide – Cabinet Refinishing and Cabinet Painting Denver 720-219-9716
- Kitchen Cabinet Painting Process: A Pro’s Step-by-Step Guide – Cabinet Refinishing and Cabinet Painting Denver 720-219-9716