
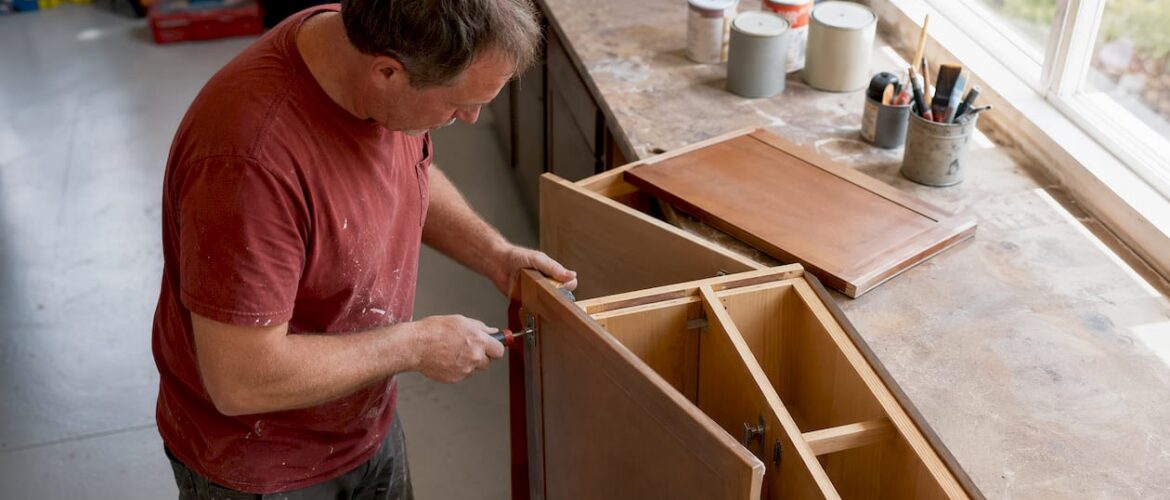
Most cabinet paint failures trace back to three root causes: poor surface preparation, invisible contamination, or an incompatible primer on a low-energy substrate. Before you repaint a single door, run two quick tests. Press a strip of painter’s tape firmly onto the failing area, then pull it fast. Next, rub a cloth dampened with denatured alcohol across the surface. What you find in the next five minutes will tell you more than any paint brand ever could.
Start here:
Cabinet Painting Service Areas in Denver & Surrounding Cities, Cabinet Refinishing in Denver County,
Serving Lakewood, CO, Littleton, CO, Golden, CO, Evergreen CO, Roxborough Park CO, Ken Carl Ranch CO,
Arvada, CO, Wheat Ridge, CO,
Serving Lakewood, CO, Littleton, CO, Golden, CO, Evergreen CO, Roxborough Park CO, Ken Carl Ranch CO,
Arvada, CO, Wheat Ridge, CO,
- Tape test: If paint lifts with the tape, adhesion failed at the substrate level.
- Solvent rub: If the existing finish softens or smears, it is incompatible with what was applied over it.
- Degrease first: Even if the cabinets look clean, wipe them down with a TSP substitute before any repair. Invisible cooking oils are the most common saboteur.
The fix almost always involves a bonding primer like Zinsser BIN and the 24/24/7 rule: 24 hours between coats, 24 hours before light handling, 7 days before full daily use.
Table of Contents
- Why does paint adhesion fail on cabinets?
- What are the most common causes of cabinet paint peeling?
- How do you diagnose a cabinet paint adhesion problem?
- How do you fix and prevent cabinet paint adhesion failure?
- Should you strip to bare wood or do a spot repair?
- When should you call a professional instead of DIYing?
- Why do bonding primers and waterborne alkyds outperform standard products?
- Key Takeaways
- The one thing most homeowners never think to check
- When DIY prep is not enough, there is a better option
- Useful sources for deeper reading
Why does paint adhesion fail on cabinets?
Paint sticks through two mechanisms: mechanical adhesion and chemical adhesion. Understanding both tells you exactly which step you skipped.

Mechanical adhesion happens when paint flows into microscopic scratches and pores in the surface, then locks in as it cures. Sanding creates that profile. On a factory-finished cabinet with a glass-smooth polyurethane or catalyzed lacquer, there is nothing for paint to grab. The new coat sits on top like a sticker on a wet window.

Chemical adhesion is what a primer delivers. A good bonding primer contains resins that fuse chemically with both the substrate and the topcoat, creating a bridge. The critical variable here is surface free energy: high-energy surfaces like bare wood pull paint in and wet out easily. Low-energy surfaces like thermofoil, laminate, and many plastics repel it. If the paint’s surface tension is higher than the substrate’s surface energy, the paint beads up rather than spreading flat, and adhesion fails before the first coat even dries.

Contamination defeats both mechanisms at once. A microscopic film of cooking oil or silicone sits between the substrate and the primer, so the primer bonds to the oil layer, not the wood. The oil layer then releases, and the whole finish peels in sheets. That is why skipped degreasing is responsible for so many DIY failures that look, at first glance, like a bad paint brand.
Moisture adds a third failure mode. Water vapor trapped beneath a paint film expands and contracts with temperature swings, physically pushing the coating off the substrate from underneath.
What are the most common causes of cabinet paint peeling?
The causes below are ranked by how often they appear in failed DIY and contractor jobs. Each one produces a recognizable symptom.
| Cause | Typical Signs | Most Likely Fix |
|---|---|---|
| Poor surface prep (no sanding/deglossing) | Peeling in large sheets, especially at edges | Sand with 120–180 grit, apply bonding primer |
| Grease and oil contamination | Paint rubs off with a fingernail; fisheye bubbles | Strip, degrease with TSP substitute, reprime |
| Incompatible existing finish (factory lacquer, thermofoil) | Solvent rub lifts the existing coat; new paint wrinkles | Shellac primer (Zinsser BIN) or strip to substrate |
| Moisture intrusion | Peeling near sink, dishwasher, or seams; blistering | Fix moisture source, dry substrate, bonding primer |
| Wrong or uncured primer | Tacky surface, soft finish, peeling within weeks | Use cabinet-specific primer; follow cure timeline |
| Wall paint used instead of cabinet-grade | Scratches easily, loses gloss quickly | Recoat with waterborne alkyd (Benjamin Moore Advance) |
| Coats applied too thick | Bubbling, cracking, uneven sheen | Thin coats; sand between coats |
Poor prep is the primary determinant of whether a finish lasts one year or fifteen, regardless of paint brand.
Environmental conditions and old paint
Temperature and humidity during application matter more than most homeowners realize. High humidity slows solvent evaporation, leaving a soft, gummy film that never fully hardens. High temperatures do the opposite: they accelerate evaporation so fast that a cured skin forms over an uncured underlayer, which then cracks as the film flexes. The ideal application window is 65–75°F with relative humidity below 50%.
Old or improperly stored paint is a separate problem. Paint that has been frozen, stored in extreme heat, or kept past its shelf life loses its resin integrity. The pigment may look fine when stirred, but the film it forms will be brittle and prone to early adhesion failure. If a can has been sitting in a garage through a Denver winter, replace it.
How do you diagnose a cabinet paint adhesion problem?
Run these checks in order. Each result narrows the cause before you commit to a repair path.
-
Visual inspection. Look for peeling at edges and corners, blistering near the sink or dishwasher, yellowing on white cabinets, or a tacky surface that collects fingerprints. Note where the failure is concentrated: edge failures usually mean moisture; widespread peeling usually means prep failure.
-
Tape adhesion test. Cut a small X into the paint with a utility knife (optional but more revealing). Press a strip of painter’s tape firmly over the area and pull it off sharply at a 45-degree angle. Paint that comes with the tape indicates poor adhesion at the substrate or primer layer. A clean tape means the bond is intact and the problem may be surface-level only.
-
Solvent rub test. Dampen a clean white cloth with denatured alcohol or mineral spirits. Rub firmly in a small area for 30 seconds. If the existing finish softens, smears, or transfers to the cloth, it is soluble and likely incompatible with whatever was painted over it. A finish that stays hard is oil-based or catalyzed and will need mechanical scuffing plus a shellac primer. Open a window and wear nitrile gloves for this step; both solvents are flammable and require ventilation.
-
Scrape and edge probe. Use a plastic scraper or your fingernail at a peeling edge. If the paint lifts in a single intact sheet, the bond failed at the substrate interface, which points to contamination or a low-energy surface. If it crumbles or powders, the paint film itself is degraded, often from UV, heat, or an expired product.
-
Moisture meter check. Press a pin-type moisture meter into the cabinet face frame or door. Wood above 15% moisture content will reject almost any coating. Anything above 12% near a sink warrants fixing the moisture source before repainting.
-
Material identification. Knock lightly on the door. A hollow sound often means MDF or a hollow-core door. Look at the edge: thermofoil wraps around and has a visible seam; laminate has a hard, plastic-like edge; solid wood shows grain on the edge. Each substrate needs a different primer strategy, covered in the next section.
How do you fix and prevent cabinet paint adhesion failure?
This is the complete workflow, from hardware removal to full cure. Skip any step and you are likely back here in six months.
Step 1: Remove hardware and doors
Take doors off their hinges and remove all hardware. Painting in place produces runs, missed edges, and hinge-point failures when you reattach hardware before the finish has cured.
Step 2: Deep degrease
Wipe every surface with a TSP (trisodium phosphate) solution or a TSP substitute such as Krud Kutter. Standard dish soap smears cooking oils rather than removing them. Kitchen cabinets accumulate microscopic cooking aerosols that are invisible to the eye but act as a release agent against new paint. Rinse with clean water and let the surface dry completely, at least two hours.
Step 3: Sand or liquid deglosser
For most factory-finished cabinets, sand with 120–150 grit to break the gloss, then follow with 180–220 grit to smooth the scratch pattern. For thermofoil or laminate where aggressive sanding risks delamination, use a liquid deglosser instead. Either way, the goal is a dull, uniform surface with no shiny patches. Wipe off all dust with a tack cloth before priming.
Pro Tip: Scuff-sand between every coat with 220 grit. It removes dust nibs, improves intercoat adhesion, and gives the next layer something to grip. This single habit separates a finish that lasts two years from one that lasts fifteen.
Step 4: Choose the right primer
Primer selection is where most DIY projects go wrong. Here is the substrate-to-primer match:
- Thermofoil and laminate: Zinsser BIN (shellac-based) is the strongest option for low-energy surfaces. Shellac bonds to almost anything and blocks tannins. KILZ Adhesion (water-based bonding primer) is a solid second choice and easier to clean up.
- Raw wood and MDF: Zinsser Bulls Eye 1-2-3 works well for raw or lightly sanded wood. For MDF, seal the edges first with an extra coat because MDF absorbs primer aggressively at cut edges.
- Previously painted surfaces (oil-based over latex or vice versa): Zinsser BIN again, or KILZ Adhesion. Both bridge the oil-latex compatibility gap. A simple solvent rub tells you which base the existing coat uses: denatured alcohol lifts latex; mineral spirits lift oil-based.
For thermofoil and laminate, the surface prep and primer choice are especially critical because the substrate offers almost no mechanical grip on its own.
Step 5: Apply cabinet-grade paint in thin coats
Wall paint is too soft for cabinets. The right choice is a waterborne alkyd or hybrid alkyd: Benjamin Moore Advance and Sherwin-Williams ProClassic are the two most widely recommended options. Both level like an oil paint, cure to a hard, washable film, and resist yellowing on white cabinets. Apply two to three thin coats rather than one heavy coat. Thick coats trap solvents, cure unevenly, and are the direct cause of the bubbling and cracking described in the causes table above.
For brush-and-roller application, use a fine-nap roller (3/16") on flat surfaces and a quality synthetic brush for detail work. Spray application produces the most even film and is what professionals use for a factory-level finish, but it requires proper masking and a controlled environment.
Step 6: Follow the 24/24/7 cure timeline
| Stage | Minimum Wait |
|---|---|
| Between primer and first topcoat | 24 hours |
| Between topcoats | 24 hours |
| Before light handling (closing doors gently) | 24 hours after final coat |
| Before rehanging doors and hardware | 48–72 hours |
| Full daily use (cleaning, heavy contact) | 7 days |
Reattaching hinges before the 7-day mark is one of the most common causes of fractures at hinge points. The paint looks dry but has not yet reached its full hardness.
Should you strip to bare wood or do a spot repair?
The answer depends on how widespread the failure is and what the existing finish is made of.
Spot repair is viable when:
- Adhesion failure is isolated to one or two doors or a small area near the sink.
- The solvent rub test shows the existing finish is compatible (it stays hard).
- The substrate is solid wood or MDF with no moisture damage.
- The tape test passes on most surfaces.
In those cases, sand the failing area back to a stable layer, feather the edges, apply a bonding primer, and repaint. The repair will be nearly invisible if you scuff the surrounding area before topcoating.
Strip to bare substrate when:
- More than 20–30% of the doors show adhesion failure.
- The solvent rub test lifts the existing finish, indicating a factory-catalyzed lacquer or thermofoil that is incompatible with what was applied over it.
- There is visible moisture damage, soft spots, or mold.
- A previous DIY repair already failed once.
Painting over a failed finish is the single most expensive mistake a homeowner can make. Every new coat adds weight and stress to a bond that has already given up. The result is not a repaired cabinet — it is a thicker version of the same problem, and stripping it later costs more in labor than careful prep would have cost upfront.
Full stripping is labor-intensive and involves chemical strippers or heat guns, both of which require proper ventilation and PPE. For thermofoil with delaminating edges, stripping the foil and priming the MDF substrate underneath is often the cleanest path forward. Budget more time than you think: a full strip-and-refinish on a standard kitchen takes two to four days of prep alone.
When should you call a professional instead of DIYing?
Some situations genuinely exceed what careful DIY can fix. Knowing which ones saves money in the long run.
Call a pro when you see any of these:
- More than 20 cabinet doors with adhesion failure.
- Thermofoil or laminate where the solvent rub test fails and the foil is already lifting at edges.
- Visible moisture damage, soft substrate, or mold behind the cabinet face frame.
- Structural damage: warped doors, delaminating MDF, or failing hinges.
- A previous DIY repaint that failed within a year despite following the right steps.
Questions to ask any contractor before hiring:
- Do you remove doors and hardware before painting?
- What primer brand and type do you use on this substrate?
- What paint product and application method (spray or brush/roller)?
- What is your cure timeline before rehanging hardware?
- Can you show a portfolio of completed cabinet jobs and provide references?
Red flags in contractor quotes:
- “We can finish your kitchen in one day.” (No cure time built in.)
- “No sanding needed — our paint sticks to anything.” (It does not.)
- Single-coat claims with no mention of primer.
- No degreasing step in the quoted process.
- Unusually low price with no itemized prep steps.
A contractor who follows a professional cabinet painting process will always mention degreasing, bonding primer, and a multi-stage cure timeline without being prompted. If they do not, keep looking.
Why do bonding primers and waterborne alkyds outperform standard products?
The professional consensus on cabinet finishing has converged on a specific system for good reason. It is not brand loyalty; it is chemistry.
Bonding primers like Zinsser BIN and KILZ Adhesion are formulated with resins that adhere to low-energy surfaces where standard primers fail. Zinsser BIN uses shellac, which has been used as a sealer for over a century and bonds to virtually any substrate, including thermofoil, glossy factory finishes, and even previously failed paint. KILZ Adhesion uses a water-based bonding resin that achieves similar results with easier cleanup. Zinsser Bulls Eye 1-2-3 is a reliable choice for raw or lightly sanded wood where extreme adhesion is less critical.
Hybrid waterborne alkyds solve the longstanding problem with cabinet paint: oil-based paints yellow and are slow to cure, while standard latex acrylics stay soft and scratch easily. Waterborne alkyds like Benjamin Moore Advance and Sherwin-Williams ProClassic combine oil-like leveling and hardness with the non-yellowing properties of modern waterborne resins. They cure to a film hard enough to withstand daily cleaning, which is exactly what kitchen cabinets need. For white cabinets specifically, this matters enormously because yellowing from oil-based paint is one of the most common complaints after a refinish.
The 24/24/7 rule exists because waterborne alkyds continue cross-linking for days after they feel dry to the touch. A finish that passes the fingernail test at 24 hours may still be soft enough to fracture at hinge points under door weight. Seven full days of cure before daily use is not overcautious — it is the minimum the chemistry requires.
Mechanical scuffing and a bonding primer work together: scuffing alone on a glossy surface is not enough, and primer alone on an unscuffed gloss is not enough. Both steps are required for durable adhesion on factory-finished cabinets.
Key Takeaways
Cabinet paint adhesion fails when even one step in the prep-prime-paint-cure sequence is skipped or rushed — and fixing it correctly requires addressing the actual cause, not painting over it.
| Point | Details |
|---|---|
| Degrease before everything | TSP or a TSP substitute removes invisible cooking oils that standard soap leaves behind. |
| Match primer to substrate | Use Zinsser BIN for thermofoil and laminate; KILZ Adhesion or Bulls Eye 1-2-3 for wood and MDF. |
| Use hybrid alkyd paint | Benjamin Moore Advance or Sherwin-Williams ProClassic cure hard and resist yellowing on cabinets. |
| Follow the 24/24/7 rule | Wait 24 hours between coats, 24 hours before light handling, and 7 full days before daily use. |
| Cabinetsrefinishing | For complex cases (thermofoil, moisture damage, large kitchens), Cabinetsrefinishing follows a factory-finish methodology with meticulous prep and multi-stage protective layers. |
The one thing most homeowners never think to check
The invisible culprit in most cabinet paint failures is not the paint. It is the surface energy of the substrate, and it is something you cannot see, feel, or smell.
Every kitchen surface accumulates a microscopic layer of aerosolized cooking oils over time. These oils do not look like grease. They do not feel greasy. But they lower the surface energy of the substrate enough that even a good primer cannot wet out properly. The primer bonds to the oil layer instead of the wood, and the oil layer eventually releases. The whole finish comes with it.
The other thing homeowners consistently underestimate is cure time. A cabinet door that feels dry after 24 hours is not cured. It is skinned over. Rehanging it, closing it firmly, or wiping it down with a cleaner before the 7-day mark can fracture the film at hinge points or leave permanent marks in a finish that looked perfect the day before. The paint did not fail. The timeline did.
Prep and patience are the two things that separate a finish that lasts fifteen years from one that fails in six months. No paint brand, no matter how good, compensates for skipping either one.
When DIY prep is not enough, there is a better option
For homeowners dealing with thermofoil delamination, widespread adhesion failure, or kitchens with more than 20 doors, the math on DIY often stops adding up. Stripping, repriming, and repainting a full kitchen correctly takes days of prep, controlled drying conditions, and the right spray equipment for a truly even film.

Cabinetsrefinishing uses a factory-finish methodology built around the same prep-prime-cure sequence described in this guide, with industrial degreasers, shellac-based primers, and multi-stage protective topcoats applied in a controlled environment. Projects typically complete in 3–5 days, and the result is a finish durable enough to handle daily kitchen use without the peeling, chipping, or yellowing that ends most DIY jobs early. Refinishing costs $3,000–$8,000 for most kitchens, compared to $15,000–$40,000 for full cabinet replacement.
If your cabinets have already failed once or the substrate is beyond what spot repair can fix, get a professional assessment from Cabinetsrefinishing before investing more time and money in a second attempt.
Useful sources for deeper reading
Diagnostics and adhesion science
- Why is My Paint Peeling? The Science of Adhesion — Biolinscientific; clearest explanation of surface free energy and wetting available online.
- Mastering Paint Adhesion | PCI Magazine — Industry-level coverage of degreasing protocols and the tape and solvent rub tests.
- Why Your Paint Isn’t Sticking to the Surface — Rawlins Paints; practical DIY test interpretation.
Common causes and fixes
- Painted Cabinets Peeling, Chipping, or Yellowing? Fix It — Best single source on hybrid alkyd paints and why factory finishes resist adhesion.
- Why Painted Cabinets Fail: The 5 Root Causes — PaintLikePro; source for the 24/24/7 rule and bonding primer guidance.
- Coating and Paint Failure Guide — ATRIA Innovation; explains thick-coat and rapid-evaporation failures.
- Why Cabinet Paint Peels After Just a Few Months — Environmental factors and humidity controls.
Professional methodology
- How Cabinet Paint Adhesion Works for Lasting Results — Explains why scuffing and bonding primer must be used together.
- Common Kitchen Cabinet Painting Mistakes — Cabinetsrefinishing; factory-finish methodology and professional prep standards.
Recommended
- Common Kitchen Cabinet Painting Mistakes: How to Avoid a Remodeling Disaster in 2026
- What Is Cabinet Paint Bonding: A DIY Guide – Cabinet Refinishing and Cabinet Painting Denver 720-219-9716
- Fixing Chipped Paint on Cabinets in Denver: Why Spot Repairs Often Fail – Cabinet Refinishing and Cabinet Painting Denver 720-219-9716
- How to Avoid Brush Marks When Painting Cabinets: A Pro’s Guide – Cabinet Refinishing and Cabinet Painting Denver 720-219-9716