
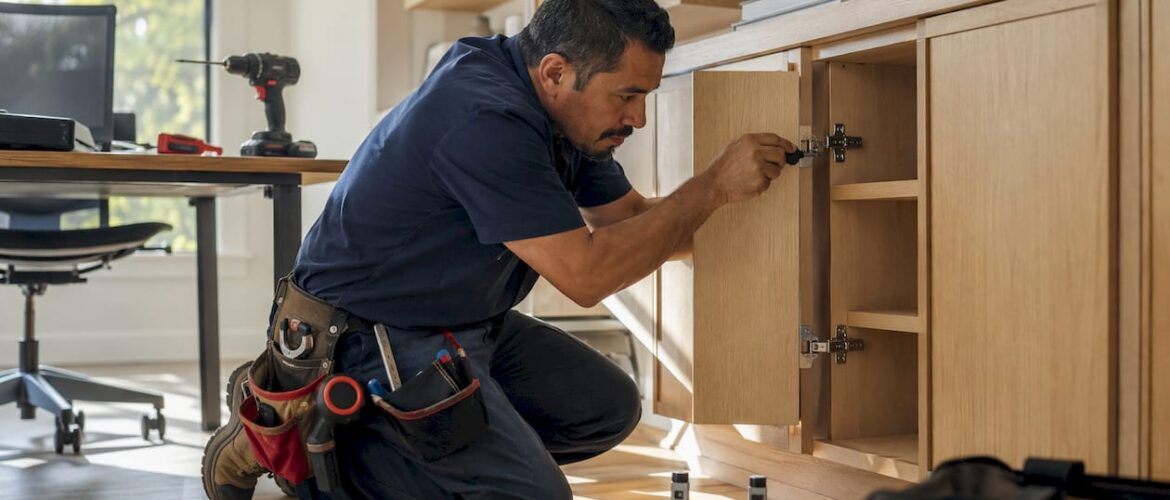
A cabinet door hanging system is the hardware assembly — hinge cup, mounting plate, and multi-axis adjustment screws — that attaches a door to the cabinet box and controls how it sits, swings, and closes. For anyone planning a refinishing project, this system is the difference between doors that reinstall cleanly and doors that bind, gap unevenly, or need re-boring. Blum soft-close hinges are the professional standard in most Denver kitchens, and shops like Cabinetsrefinishing use vertical hanging racks during spray finishing specifically because the hanging method affects how durable the final coat turns out. Get the hardware right, and refinishing typically finishes in 3–5 days. Get it wrong, and you’re looking at rework or replacement.
Table of Contents
- What does a cabinet door hanging system actually include?
- What hinge types exist and when does switching them matter?
- How do professionals install and align cabinet doors?
- How does the hanging method affect your refinishing results?
- How do hinge choices affect your project cost and timeline?
- What questions should you ask a refinishing contractor?
- How Cabinetsrefinishing handles door hanging on every Denver project
- Key Takeaways
- Why hanging systems are the detail most homeowners overlook
- Get a written estimate from Cabinetsrefinishing before your next contractor call
- Useful sources
What does a cabinet door hanging system actually include?
The term “cabinet door hanging system” is a descriptive phrase, not a formal industry term. Professionals call the individual pieces by their component names: hinge cup, hinge arm, mounting plate, and adjustment screws. Together, they form the door’s complete hinge assembly.
Here’s what each part does:
- Hinge cup: A round cup (typically 35mm diameter) bored into the back face of the door. The hinge body snaps or screws into it.
- Hinge arm: The metal arm connecting the cup to the mounting plate; its length determines how far the door swings open.
- Mounting plate: Screws to the cabinet face frame or interior wall; the hinge arm clips onto it for easy door removal.
- Adjustment screws: Three axes of movement. Vertical screws shift the door up or down. Lateral screws move it left or right. In/out screws control the gap between door face and frame.
- Bumpers: Small rubber pads that cushion the door at close and protect the finish.
- Soft-close damper: Built into the hinge arm on upgraded models; slows the door in the last inch of travel to eliminate slamming.
A quick mental check: open a cabinet door and look at the inside edge. You’ll see the round cup in the door and the plate on the frame. Those three screws on the hinge body are your adjustment points.
Pro Tip: A hinge jig makes re-boring hinge cups consistent across multiple doors. Professionals use them routinely; homeowners attempting re-boring without one risk off-center holes that weaken the door edge.
Professional installers bring a power drill, measuring tape, level, and screwdriver to every job. The hinge jig is optional for single doors but close to mandatory when you’re working through an entire kitchen.
What hinge types exist and when does switching them matter?
Not all hinges are interchangeable. The style you have determines what a refinisher can do without additional structural work.

| Hinge Type | Visibility | Door Position | Re-Boring Needed to Switch? |
|---|---|---|---|
| Concealed / European | Hidden when closed | Full or partial overlay | Yes, if switching from exposed |
| Exposed / traditional | Visible on face frame | Inset or overlay | Yes, if switching to concealed |
| Full overlay | Hidden | Covers full frame opening | Cup re-bore if changing overlay |
| Partial overlay | Hidden | Covers partial frame | Cup re-bore if changing overlay |
| Inset | Exposed or pivot | Flush with frame face | Structural routing required |
Switching from exposed hinges to concealed European-style hinges requires re-boring hinge cups in the door. That work should be done professionally to preserve door structural integrity. A door edge that’s been drilled off-center or too close to the edge can crack under normal use.
The practical rule: if you want to change hinge style at the same time as refinishing, budget for professional re-boring and possibly new doors if the existing ones are thin or damaged. If you’re keeping the same hinge style, the refinisher removes, finishes, and reinstalls without any structural changes.
A short checklist to hand your contractor before the project starts:
- Desired hinge style (concealed, exposed, inset)
- Soft-close preference (yes/no, and brand if you have one)
- Overlay amount (full, half, or inset)
- Whether drawer pull placement needs to match door hardware
- Any doors that already bind or show uneven gaps
For a deeper look at soft-close hinge options and how they compare, that’s a useful reference before your contractor conversation.
How do professionals install and align cabinet doors?
Alignment is where most homeowners underestimate the work involved. The reveal — the uniform gap between door edges and the frame — doesn’t happen automatically. It requires incremental hinge adjustments, alternating between top and bottom hinges until the door hangs plumb and the gap is even on all sides.
The professional sequence:
- Attach mounting plates to the face frame at the marked overlay position.
- Snap the door (with hinge cups already installed) onto the mounting plates.
- Check vertical alignment first — use the elongated slots in the mounting plate to shift the door up or down in small increments.
- Adjust lateral position with the screw closest to the door face; move left or right until the gap between adjacent doors is even.
- Set in/out position with the screw farthest from the door; this controls how flush the door sits against the frame and accounts for bumper thickness.
- Alternate small turns between top and bottom hinges rather than fully tightening one before touching the other.
- Final tighten, then test the full swing and soft-close action.
Labeling matters before any of this starts. Failing to label doors and their matching hardware before removal is one of the most common mistakes in refinishing. Even in a single kitchen, hinge configurations vary enough that mixing up doors creates alignment problems that take hours to sort out.
Pro Tip: Mark each door and its corresponding cabinet opening with painter’s tape and a number before removal. Keep the hinge screws and mounting plates in a labeled bag with that door. Reinstallation goes from a puzzle to a straightforward task.

Red flags during a site visit: doors with an uneven bottom line across a run of cabinets, inconsistent gaps between adjacent doors, or any door that binds on the frame when closing. These signal either poor original installation or a previous refinisher who didn’t calibrate after reinstall.
How does the hanging method affect your refinishing results?
This is the detail that separates professional shops from contractors who cut corners. Vertical hanging racks and specialized hinge hooks allow uniform spray coverage on both door faces without marring the finish or creating shadowing in the spray pattern.
- Vertical racks: Doors hang suspended by their hinge cup holes, face fully exposed, with no surface contact. The spray hits evenly from edge to edge.
- PaintLine Hinge Hooks: Single high-carbon steel wire design that holds the door by the hinge cup hole; each hook supports up to 25 lbs, and two hooks together handle 50 lbs. The single-wire design eliminates the shadowing that double-wire clips create.
- Improvised hangers (cup hooks, wire, sawhorses): Create contact points that leave marks, cause uneven coverage, and often require touch-up passes that add handling time and risk.
Professional shops use vertical hanging racks and specialized hinge hooks to allow uniform spray coverage without marring. In a refinishing workflow, specialized hinge hooks let technicians spray both faces of a door in one pass without re-mounting, reducing handling marks and delivering a more uniform factory-like finish.
Hardware condition matters too. Worn hinge cups or stripped mounting plate screws will cause poor alignment after the finish is applied, even if the spray work is perfect. A good refinisher inspects every hinge before removal and flags any that need replacement. Adding soft-close dampers during a refinishing project is also the smartest time to do it: the doors are already off, the hardware is already being handled, and the incremental cost is low compared to doing it as a separate job later.
How do hinge choices affect your project cost and timeline?
The cost difference between refinishing and replacement is substantial. Professional refinishing typically runs $3,000–$8,000. Full cabinet replacement commonly costs $15,000–$40,000. When the cabinet boxes are structurally sound, refinishing is almost always the smarter financial decision.
| Scenario | Typical Timeline | Cost Impact |
|---|---|---|
| Refinish with existing hinges | 3–5 days | Base refinishing cost only |
| Refinish + soft-close upgrade | 3–5 days | Small add-on per hinge |
| Refinish + hinge type change (re-boring) | Add 1–2 days | Re-boring labor + new hinges |
| Refinish + door repair or replacement | Add 2–3 days | New door material + labor |
Hinge re-boring is a small add-on when it’s planned. It becomes expensive when a contractor discovers mid-project that the existing doors can’t accommodate the new hinge style without cracking. Ask about this in the bid, not after the doors are off.
What questions should you ask a refinishing contractor?
Use this checklist when comparing bids. A contractor who can’t answer these clearly is a red flag.
Questions to ask:
- How do you hang doors during spray finishing? (Look for: vertical racks, hinge hooks — not sawhorses or flat surfaces.)
- Do you label each door and its hardware before removal? What’s your system?
- If a mounting plate is stripped or a hinge cup is worn, do you replace it or reinstall as-is?
- Have you done hinge cup re-boring? Do you use a jig?
- Which soft-close hinge brands do you typically install?
- Can you provide a line-item for hinge and hardware work separately from the finish cost?
Red flags:
- Contractor says labeling “isn’t necessary” or doesn’t have a system for it.
- Doors are sprayed flat on a surface or hung on improvised hooks.
- No mention of hinge inspection before reinstallation.
- Bid has no line for hardware assessment or hinge compatibility.
- Contractor quotes a hinge-style change with no mention of re-boring.
For full overlay hinge details and installation specifics, that’s worth reading before your contractor calls so you can speak the same language.
How Cabinetsrefinishing handles door hanging on every Denver project
Cabinetsrefinishing follows a structured process on every job that addresses each point in this article:
- Door removal and labeling: Every door is numbered and matched to its cabinet opening before removal. Hardware stays with its door in labeled bags.
- Hardware assessment: Hinge cups, mounting plates, and screws are inspected. Worn or stripped components are flagged and replaced before finishing begins.
- Vertical rack hanging: Doors are hung on vertical racks in a shop environment for spray finishing, eliminating contact marks and ensuring even coverage on both faces.
- Factory-style spray finishing: Multiple protective layers applied in a controlled environment, not on-site where dust and humidity affect adhesion.
- Reinstallation and three-axis calibration: Every door goes back with full vertical, lateral, and in/out adjustment before the job is called complete.
Most projects finish in 3–5 days. The shop environment for spray work means the finish cures properly before doors return to the kitchen, which is why the professional refinishing process produces results that hold up to daily use. Batching door work efficiently also keeps the project on schedule without cutting corners on alignment.
Key Takeaways
A cabinet door hanging system — hinge cup, mounting plate, and three-axis adjustment screws — directly determines whether a refinishing project delivers clean, lasting results or requires costly rework.
| Point | Details |
|---|---|
| Define your hinge style early | Tell your contractor the desired hinge type before work starts to avoid mid-project re-boring surprises. |
| Ask about the hanging method | Vertical racks and hinge hooks are the professional standard; improvised hangers cause shadowing and touch-up marks. |
| Require door labeling | Every door and its hardware must be labeled before removal to prevent alignment problems on reinstall. |
| Budget for re-boring if changing hinge types | Switching from exposed to concealed hinges requires professional re-boring; plan for it in the bid. |
| Cabinetsrefinishing | Completes most Denver projects in 3–5 days at $3,000–$8,000, with full hardware assessment and vertical rack finishing included. |
Why hanging systems are the detail most homeowners overlook
Most homeowners focus on color and finish sheen when planning a cabinet project. The hinge system is an afterthought — until doors don’t close right after the refinisher leaves. That’s the moment people realize alignment isn’t automatic.
The contractors who do this well treat hardware handling as part of the finish work, not a separate task. Proper labeling, hinge inspection, vertical suspension during spray, and three-axis calibration after reinstall are all connected. Skip one step and the others don’t fully compensate. A factory-like finish on a door that binds or sits crooked is still a bad result.
Denver homeowners comparing bids should weight the hardware process as heavily as the finish quality. The two aren’t separable.
Get a written estimate from Cabinetsrefinishing before your next contractor call
Knowing your hinge system puts you in a much stronger position when comparing bids. Cabinetsrefinishing gives Denver homeowners a written, line-item estimate that breaks out hinge assessment, hardware replacement, and finish work separately, so you can compare apples to apples.

Projects complete in 3–5 days and cost $3,000–$8,000, significantly less than full cabinet replacement for kitchens with sound cabinet boxes. The factory-finish process, vertical rack hanging, and full three-axis reinstallation are standard on every job, not upgrades you have to ask for.
Request your estimate today, or call/text 720-219-9716 to ask hinge-specific questions before you commit to any contractor.
Useful sources
- DIY: Installing cabinet doors yourself — CabinetDoors.com: Covers hinge cup installation, three-axis alignment, and when to call a professional for re-boring.
- Cabinet door replacement guide — Eagle Woodworking: Practical alignment steps and the importance of labeling doors before removal.
- PaintLine Hinge Hook — Woodshop News: Details on the single-wire hinge hook design that eliminates shadowing during spray finishing.
- Step-by-step cabinet door installation — CabinetDoorFactory: Explains hinge jig use and why professionals handle re-boring to avoid door damage.
- Cabinet door refinishing Denver — Cabinetsrefinishing: The client’s factory-finish process, project timelines, and cost ranges for Denver homeowners.
Recommended
- Cabinet Box vs Door: What Every Homeowner Should Know – Cabinet Refinishing and Cabinet Painting Denver 720-219-9716
- Best illuminatecabinetpainting Alternatives in Denver, 2026.
- Cabinet Door Refinishing Denver: Professional Factory-Like Finishes for Your Kitchen – Cabinet Refinishing and Cabinet Painting Denver 720-219-9716
- Update Cabinets Without Replacing: The 2026 Denver Homeowner’s Guide