
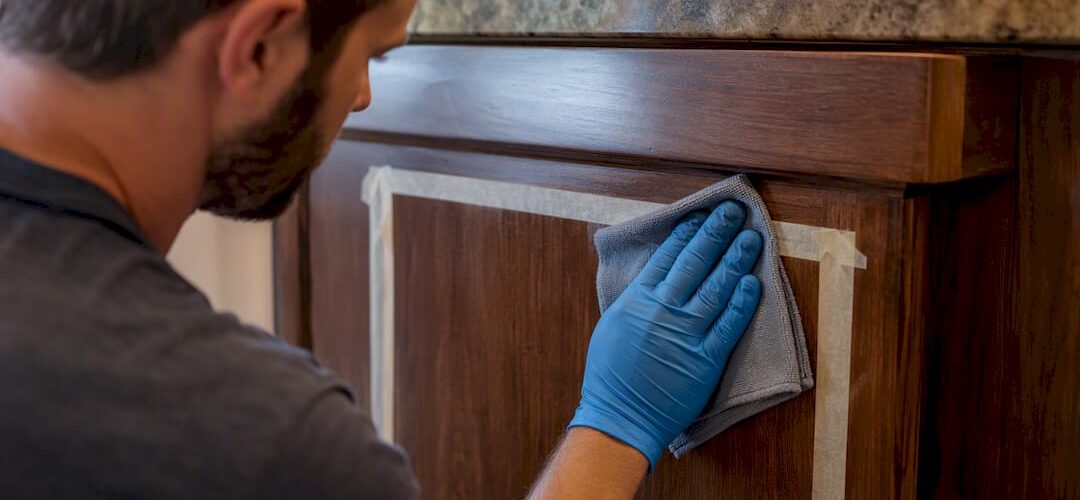
You can absolutely refinish just your kitchen island without touching another cabinet in the room. Most islands are a solid weekend-to-week DIY project if the base structure is sound, no water damage, no swollen particleboard. Expect to spend a few days of actual work spread across a week or two when including dry and cure times, achieving durable results with the right topcoat. If the piece has structural issues or you want a true factory-sprayed finish, that’s your cue to call a professional instead.
TL;DR:
- Refinishing a kitchen island is feasible as a DIY project if the base is sound and free of water damage or particleboard swelling, usually taking a few days of work.
- Proper preparation involves removing and labeling hardware, thorough cleaning, repairing damages, and choosing between stripping or sanding based on the old finish’s condition.
- Using the right tools, primers, and topcoats, along with patience for drying and curing times, is crucial for durable and professional-quality results.
- Common issues like grease stains or uneven finishes can be fixed with targeted priming and sanding, but swollen particleboard requires reconstruction rather than refinishing.
- For islands with structural issues, complex damage, or desire for factory-smooth finishes, hiring a professional offers better results and less risk of costly mistakes.
Table of Contents
- What You Need to Refinish a Kitchen Island
- How Do You Prep, Repair, and Finish an Island Step by Step?
- Which Finish Is Right for Your Island?
- What Do You Do When the Finish Goes Wrong?
- What Does It Cost and How Long Does It Take?
- When Does It Make Sense to Hire a Pro Instead?
- A Few Honest Words Before You Start
- Some islands are straightforward weekend projects. Others have layers of old paint hiding grease stains, water damage near the sink cutout, or a top you want sprayed to a true factory finish, and that’s where a DIY approach hits its ceiling. Professional services specialize in these cases, offering factory-finish spray techniques, custom color matching, and repair work beyond typical home capabilities.
- Sources
What You Need to Refinish a Kitchen Island
Before you touch a sander, gather everything so you’re not mid-project driving to the hardware store with wet primer on your hands. Here’s the realistic shopping and rental list for an island-only job.
Tools and safety gear:
- Orbital sander (a $40 to $80 rental beats buying if this is a one-time project)
- Respirator rated for organic vapors, not just a dust mask, plus safety glasses and nitrile gloves
- Plastic putty knife, tack cloths, and painter’s tape
- Drop cloths for the floor and painter’s plastic to seal off nearby cabinetry
Consumables:
- Citristrip or a citrus-based deglosser for stubborn old finishes
- Mineral spirits for wiping down stripped surfaces
- A shellac-based primer such as Zinsser B-I-N to block grease and stains before painting
- Wood filler for gouges and dents
- Sandpaper in a full grit range from coarse to fine
- Paint, stain, or oil depending on your finish choice
- Polyurethane or conversion varnish for the topcoat
If you’re stripping rather than sanding, work in a garage or with windows open and a box fan pulling air out, not in. Citristrip fumes are milder than traditional strippers, but you still want cross ventilation. Cover countertops and floors completely. A single drip of stripper on a laminate counter or hardwood floor turns a one-day job into a two-day repair job.
How Do You Prep, Repair, and Finish an Island Step by Step?
Refinishing furniture rewards patience more than skill. Rush the drying times and every later step fights you. Here’s the order that actually works.
- Remove doors, drawers, and hardware. Label everything with painter’s tape and a marker so reassembly doesn’t turn into a puzzle. Set hinges and pulls aside in a labeled bag.
- Degrease and clean. Kitchen islands collect cooking grease that regular cleaner won’t cut. Use a degreasing cleaner or diluted TSP substitute, then let the surface dry fully.
- Repair dents and gouges. Pack wood filler into damage, overfilling slightly since it shrinks as it cures. Most fillers need 30 minutes to a few hours before you can sand them, so check your product’s label and don’t rush it.
- Choose strip or sand. If the old finish is thick, alligatored, or you want to avoid inhaling a cloud of old paint dust, chemical stripping works well: apply Citristrip, cover it with plastic wrap for 30 to 60 minutes to keep it from drying out, then scrape the softened finish with a plastic putty knife and wipe the surface with mineral spirits. If the existing finish is thin or you’re just deglossing for paint, sanding alone is faster.
- Sand in a grit progression. Move through the grits in order, coarse to fine. A 120 to 220 to 320 sequence removes old finish and scratches, then smooths them out so the final coat lays flat. Slow down on edges and corners on veneered pieces. Sanding through a thin veneer layer means patching or living with a bare spot, and there’s no undo button once you’ve cut through it.
- Prime and stain or paint. Test your stain or paint on a hidden spot first, the inside of a door or the underside of the top, since old wood absorbs unevenly. For painted finishes, a high-adhesion primer paired with cabinet-grade urethane enamel applied in thin coats holds up far better than a wall paint pulled from the garage shelf. Our guide to choosing cabinet paint breaks down sheen and formula options in more depth.
- Seal with a topcoat. Thin, even coats beat one thick coat every time. Sand lightly with 320 grit between coats to knock down dust nibs, and let each coat cure fully. Water-based polyurethane dries faster and resists yellowing better than oil-based versions, which matters on a light-colored island top.
- Reassemble once fully cured. Rehang doors and reattach hardware only after the topcoat has hit its full cure time, not just dry-to-touch. Loading a still-curing surface with heavy pots is how you get permanent scuff marks in month one.
Pro Tip: Keep a spare offcut of similar wood or a hidden test panel through every step. Test your stain, your primer, and your topcoat on it before committing to the actual island. It costs you five minutes and saves you from redoing an entire surface.
Which Finish Is Right for Your Island?
The right finish depends more on how the island gets used than on what looks best in a paint swatch. A few guidelines:
- Painted cabinets and faces: Cabinet-grade enamel over a bonding primer holds up to daily bumps far better than flat wall paint. A satin or semi-gloss sheen wipes clean easier than matte, a point echoed in sheen guidance from One Day Doors & Closets on interior door finishes.
- Stained wood: Use a pre-stain conditioner on porous woods like pine to prevent blotchy absorption, then seal with polyurethane once the stain has cured.
- Butcher-block tops: Food-safe mineral oil needs reapplication every few weeks, while polyurethane gives a harder, longer-lasting surface but isn’t food-safe for direct cutting.
- Epoxy countertops: These look striking in photos, but achieving a bubble-free, dust-free pour at home is genuinely difficult. Epoxy kits require dust-free curing conditions and specific technique that most home garages can’t provide, so a poly-sealed butcher block or a laminate refresh is often the safer bet for a first-timer.
One honest note: chalk paint and milk paint are popular for their low-prep appeal, no sanding, no priming, straight from the can. But on an island that gets daily use, they don’t hold up like a proper primer-and-enamel system without a hard wax or poly topcoat layered on afterward.
What Do You Do When the Finish Goes Wrong?
Every DIY refinish hits a snag somewhere. Most are fixable without stripping the whole piece back down.
- Grease or stain bleeding through paint: This is almost always a primer problem. Spot-prime the bleeding area with a shellac-based primer like Zinsser B-I-N, which seals grease and tannin stains that regular primers let through, then repaint that section.
- Blotchy stain: If you skipped a pre-stain conditioner, you likely can’t fully fix it without sanding back to bare wood and starting the stain step over.
- Dust nibs in the topcoat: Sand lightly with 320 grit, wipe with a tack cloth, and apply a thinner final coat in a cleaner space, away from foot traffic and ceiling fans.
- Deep gouges found after finishing: Fill, sand, and feather in a fresh coat over just that section, blending the sheen line with a light scuff sand.
Pro Tip: If you push a screwdriver into the particleboard base and it feels soft or crumbly, stop. Swollen or water-damaged particleboard can’t be sanded or primed back to strength. That’s a rebuild, not a refinish.
What Does It Cost and How Long Does It Take?
A DIY paint job on a single island typically runs $50 to $150 in materials for economy products, or $150 to $300 if you go with quality cabinet-grade enamel and primer. A stain-and-poly route lands in a similar range, with better wood stains and finishes on the higher end.
- Sander rental: roughly $30 to $50 for a day, though buying a mid-range orbital sander for $60 to $100 pays off if you’ll tackle other furniture later.
- Total DIY time: 8 to 15 hours of hands-on work, stretched across 4 to 7 calendar days once you account for dry and cure times between coats.
- Professional refinishing through a service like Cabinetsrefinishing typically runs $3,000 to $8,000 for full cabinet projects, a fraction of the $15,000 to $40,000 replacement often costs, with turnaround in 3 to 5 days for a full kitchen.
For an island alone, professional pricing scales down proportionally, and it’s worth asking for a specific quote rather than assuming a fraction of the whole-kitchen number.
When Does It Make Sense to Hire a Pro Instead?
DIY gets you a genuinely good result. A professional factory finish gets you a different tier of result, and it’s worth knowing what separates the two before you commit to either.
- Multi-coat spray systems: Professionals apply finish with HVLP sprayers in controlled, dust-minimized environments, producing a glass-smooth surface that brush and roller work can’t fully replicate.
- Cure environments: Climate-controlled spaces speed cure times and reduce the dust-nib and bubbling issues common in a home garage.
- Repair scope: Structural damage, water-swollen substrate, or extensive veneer failure often needs skills and materials beyond a typical DIY toolkit.
A simple decision checklist: if your island has cosmetic wear but a sound structure, DIY is a reasonable call. If you want a flawless sprayed finish, have deep structural damage, or your timeline can’t absorb multiple dry-and-cure cycles, a professional refinish is the more practical route.
A Few Honest Words Before You Start
Every island refinish surprises you somewhere, usually a stain that dries three shades darker than the can promised, or a “quick” gouge repair that eats an entire evening. That’s normal. The projects that turn out well share one trait: patience with dry and cure times, not raw skill.
Before you start, run this checklist: measure the island and doors, test your stain or paint on a hidden patch, set up ventilation, put on your respirator, and organize your hardware in labeled bags. Then let each step cure fully before moving to the next. Rushing cure time is the single most common reason a DIY refinish looks great on day one and shows scratches by week three.
— Jesse
Some islands are straightforward weekend projects. Others have layers of old paint hiding grease stains, water damage near the sink cutout, or a top you want sprayed to a true factory finish, and that’s where a DIY approach hits its ceiling. Professional services specialize in these cases, offering factory-finish spray techniques, custom color matching, and repair work beyond typical home capabilities.

If your island needs more than a fresh coat, whether that’s structural repair, stubborn stain bleed-through no amount of primer seems to fix, or you simply want the smooth, durable result of a sprayed multi-coat system, reach out for a refinishing estimate. It’s a practical middle ground between a full replacement and a DIY project that’s outgrown your patience, and getting a quote costs you nothing but a phone call or text.
Sources
- How to Use Citristrip — The Craftsman Blog
- Zinsser B-I-N shellac-based primer — TileThis product guidance
- How to sand and refinish wooden kitchen islands (120–320 grit) — eQualle Sandpaper
- How to paint a kitchen island — Sherwin‑Williams
- How to refinish a wood kitchen island like a pro — Kitchen and Home Store