
Yes, you can refinish maple cabinets successfully, and in most kitchens it beats replacement outright. Paint gives you the most predictable, uniform result because it hides maple’s tendency to blotch. Staining preserves the grain but demands conditioning or gel stains to avoid patchy color. If you want a sprayed, factory-like finish with minimal risk of a redo, hiring a professional is often the smarter trade.
- Maple refinishes well when doors are solid and structurally sound.
- Paint beats stain for consistency; stain wins for anyone who wants to keep the wood grain visible.
- Spraying produces a smoother finish than brushing, but it takes the right setup or the right contractor.
Key Takeaways
Maple cabinets refinish well when prep and priming address the wood’s grain and tannin behavior, and paint delivers more predictable results than stain for most homeowners.
| Point | Details |
|---|---|
| Refinish over replace | Solid doors and good hardware make refinishing the smarter, lower-cost choice over full replacement. |
| Prime with shellac | Shellac-based primer blocks tannin bleed and bonds to old factory finishes better than latex. |
| Test before committing | Run stain, conditioner, and topcoat together on a hidden panel before touching the full kitchen. |
| Spray for factory results | Off-site or rented HVLP spraying produces smoother, more even coats than brushing or rolling. |
| Hire a pro for full kitchens | Cabinetsrefinishing completes most maple refinishing projects in 3 to 5 days with a warrantied factory finish. |
Table of Contents
- When to Refinish Maple Cabinets vs. Replace Them
- Prepping Maple Cabinets for Paint or Stain
- Stain or Paint: What Actually Works on Maple
- Spraying vs. Brushing: How to Get a Factory-Like Finish
- Staining Maple Without the Blotchy Look
- Fixing Common Maple Refinishing Failures
- What to Budget: Time and Cost for DIY vs. Pro
- When Hiring a Pro Beats DIY on Maple
- Get a Professional Maple Cabinet Refinish in Denver
- Sources
When to Refinish Maple Cabinets vs. Replace Them
Maple cabinet refinishing makes sense when the bones are good and the look is dated. Run through this before buying a single can of primer:
- Doors and boxes are solid wood or intact veneer with no delamination.
- Hardware and hinges still function, even if the finish looks tired.
- Water damage is cosmetic (surface staining), not structural swelling.
- You want a new color or sheen but like your current layout.
Replace instead of refinish if you see severe warping, veneer peeling off in sheets, or you’re changing the kitchen’s footprint. Refinishing typically runs a fraction of replacement cost, so unless the layout itself is the problem, restoring what’s there is usually the better return.
Prepping Maple Cabinets for Paint or Stain
Prep decides whether your finish lasts five years or five months. Skip a step here and you’ll be sanding it all back down later.
- Label everything. Number each door, drawer, and its matching hinge location with painter’s tape before removal. You will not remember which door came from where.
- Remove hardware and stage it. Bag screws and pulls by location so reassembly doesn’t turn into a scavenger hunt.
- Deep clean and degrease. Kitchen cabinets accumulate a film of cooking oil that repels paint and stain alike. A degreaser or TSP substitute cuts through it, and everything needs to dry completely before sanding starts.
- Identify the existing finish. Rub a hidden spot with denatured alcohol, then with lacquer thinner, to figure out whether you’re dealing with lacquer, oil, or conversion varnish. That tells you whether you can degloss and go, or whether stripping is unavoidable.
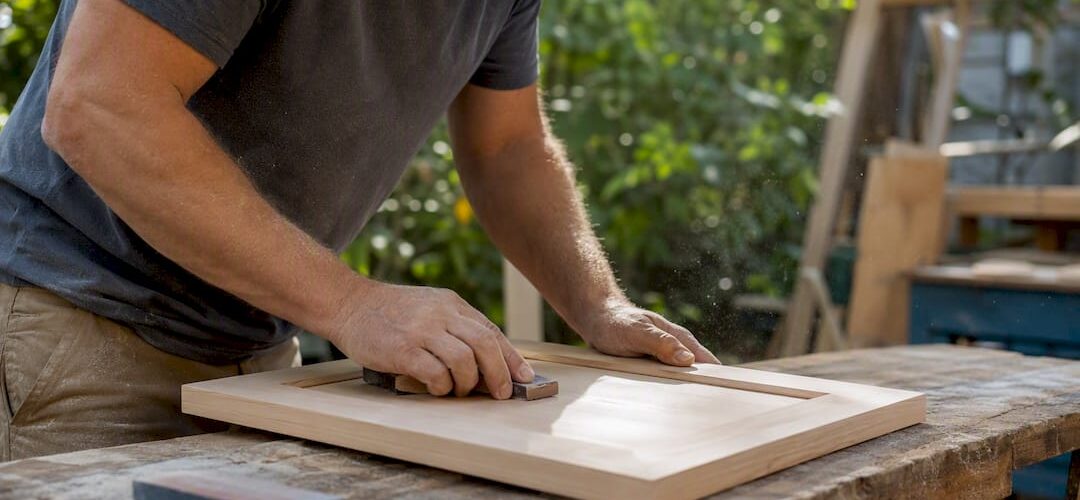
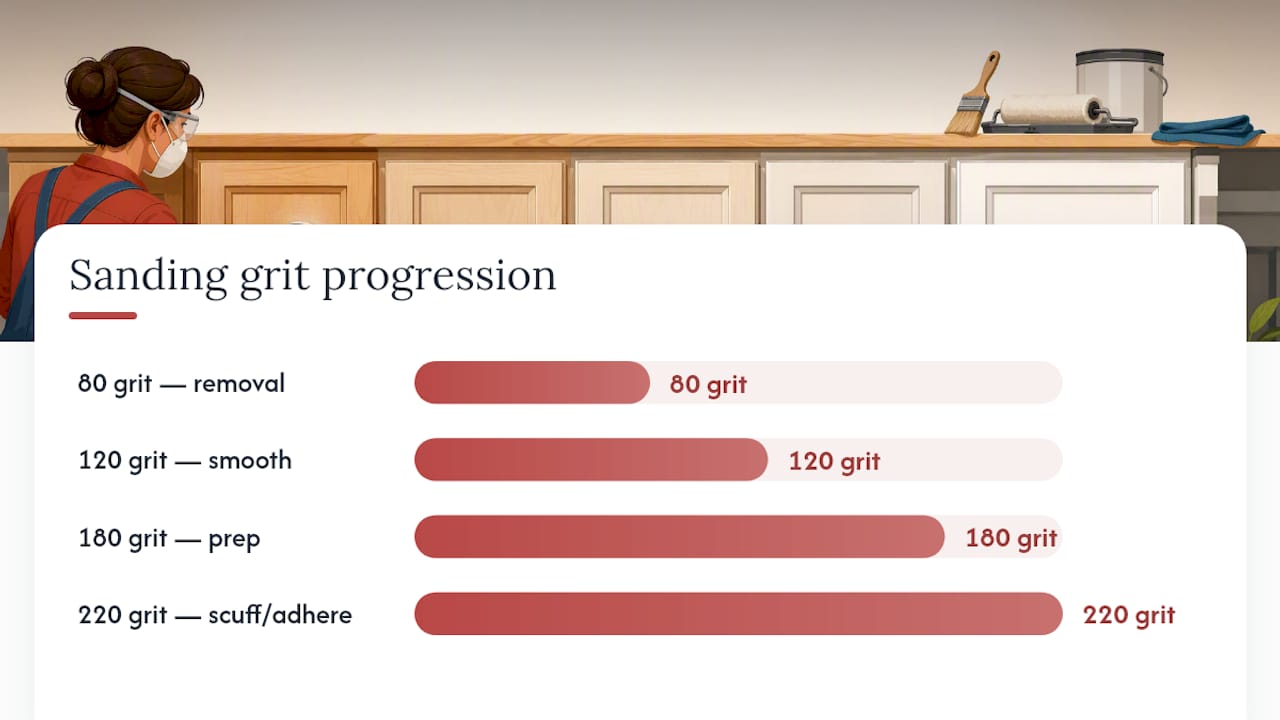
- Sand strategically. Maple is dense and closes up fast under a sander, so a light scuff with 220 grit is usually enough for adhesion. If any doors are veneer rather than solid maple, go easy. Aggressive sanding can burn through veneer in seconds.
- Fill and re-sand. Wood filler on dents or old hardware holes needs a light pass once dry, matched to the surrounding sheen.
- Control dust. Vacuum, then wipe every surface with a tack cloth right before primer goes on. Airborne dust is the number one cause of a gritty, unprofessional-looking finish.
Pro Tip: Don’t trust your eyes alone to judge “clean.” Wipe a white cloth across a cabinet face after degreasing. If it comes away with any tint, clean again before you sand.
For a deeper breakdown of grit progressions and technique, this guide to sanding cabinets for refinishing walks through the details step by step.
Stain or Paint: What Actually Works on Maple
Maple is a tight, closed-grain hardwood, and that grain structure is exactly why it gives DIYers trouble with stain. Paint sidesteps the problem entirely, which is why most maple cabinet refinishing projects end up painted rather than stained.
- Paint hides grain irregularities and blotch risk almost completely. Prime with a shellac-based or stain-blocking primer, since maple can bleed pink or amber discoloration through lighter topcoats without one.
- Stain shows off the wood but needs help getting there evenly. A pre-stain conditioner opens the grain uniformly before color goes on, and gel stains sit on the surface rather than penetrating unevenly the way liquid stains do.
- Primer choice matters more on maple than on most woods. Shellac-based primers like Zinsser B-I-N seal tannins and bond to old factory finishes better than most latex primers.
- Topcoats should be a hard-wearing option: waterborne cabinet-grade urethane for low odor and quick cure, or urethane alkyd if you want more open working time and a harder final film.
If you’re leaning toward paint, this walkthrough of the cabinet painting process lays out the primer-to-topcoat sequence in order.
Spraying vs. Brushing: How to Get a Factory-Like Finish
The difference between a DIY-looking cabinet and a factory-looking one usually comes down to application method, not paint quality.
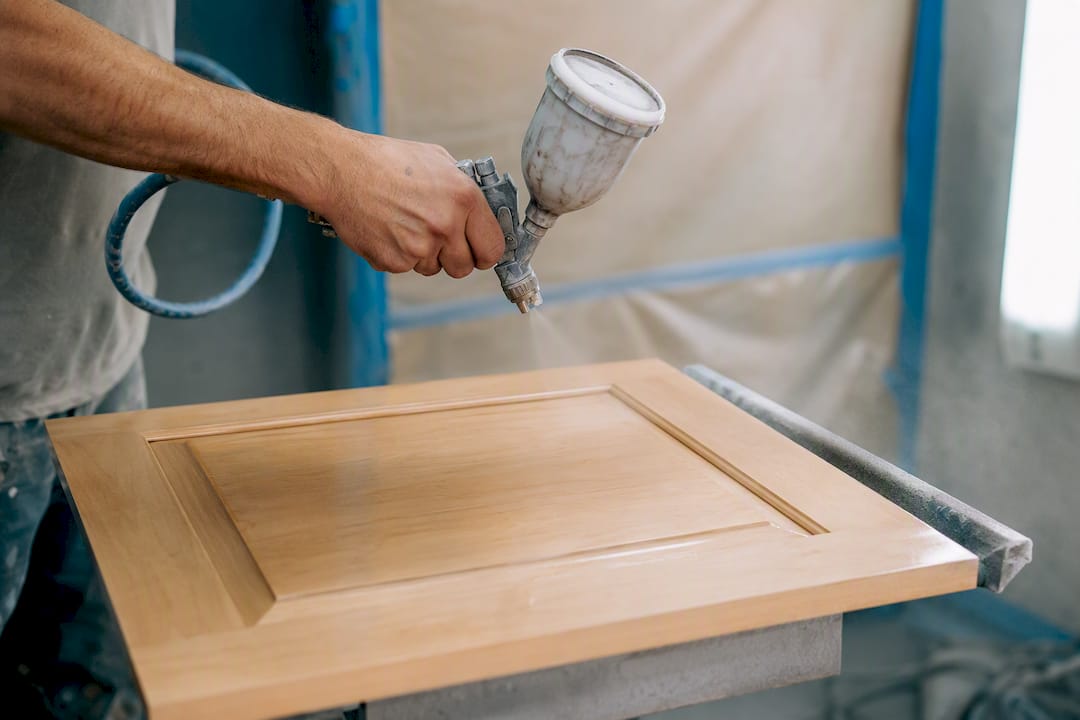
- Off-site spraying is the pro standard. Contractors pull doors and drawers to a controlled shop environment to spray, which keeps dust out of the finish and contains overspray and fumes. It’s a big reason professional results look flatter and smoother than most onsite jobs.
- HVLP sprayers work for DIYers too. These units are commonly available to rent for roughly $100 a day, and they atomize paint into a fine mist that lays down thin, even coats. Hold the gun 6 to 8 inches from the surface, overlap each pass by 50%, and let each coat flash dry before the next.
- No sprayer? Use a foam roller and an angled brush. Roll the flats, then tip off with a brush to knock down roller texture while the paint is still wet. It won’t match spray quality, but it closes the gap significantly.
- Sand lightly between coats with 320 grit to knock down dust nibs, and plan on two to three coats of paint plus a dedicated topcoat for durability.
Pro Tip: Thin coats dry faster and level better than thick ones. If you’re fighting drips or brush marks, the fix is almost always to thin your paint slightly and apply more coats, not fewer thicker ones.
More on spray methods and equipment choices is covered in this guide to cabinet spraying techniques, and this practical spraying walkthrough covers setup basics worth reading before you rent equipment.
Staining Maple Without the Blotchy Look
Maple’s tight grain absorbs stain unevenly, which is why straight penetrating oil stains so often turn out patchy or splotched on this wood specifically.
- Pre-stain conditioner evens out absorption by partially sealing the wood before color goes on, so the grain doesn’t drink stain unevenly in random patches.
- Gel stains sit on the surface instead of soaking in, which makes them far more forgiving on maple than traditional penetrating stains.
- Dyes give the most uniform color of any stain option, since they’re absorbed at a molecular level rather than sitting in the wood’s pores. Seal with a washcoat before topcoating.
- Always test on a real cabinet door or a hidden panel first. Cabinet forums are full of stories of full kitchens gone blotchy because someone skipped this step, and it costs you nothing but a little patience.
Pro Tip: Test your full system, not just the stain. Apply conditioner, stain, and topcoat together on your sample door, since the topcoat can shift the final color noticeably.
Fixing Common Maple Refinishing Failures
Even careful projects hit snags. Here’s how to correct the most common ones.
- Blotchy stain: Sand back to bare wood, apply a pre-stain conditioner you skipped the first time, and switch to a gel stain for the retry.
- Peeling paint: This is almost always an adhesion failure. Strip the failed area, degloss the surrounding surface, and reprime with a shellac-based primer before repainting.
- Pink or yellow tannin bleed: Spot-prime the affected area with a shellac primer like Zinsser B-I-N before your next coat. This is the single most reliable fix for tannin problems on maple.
- Uneven touch-ups after reassembly: Keep leftover paint and stain labeled by batch, and blend touch-ups while the surrounding finish is still slightly soft for a seamless match.
What to Budget: Time and Cost for DIY vs. Pro
A weekend project this is not, at least not for a full kitchen. Set your expectations before you start pulling doors off hinges.
- DIY small projects (a single vanity or a few doors) can wrap in a weekend.
- DIY full kitchens typically stretch across two weekends once you factor in dry time between coats.
- Professional shop-spray projects are often completed in about 3 to 5 days since doors cure off-site while your kitchen stays usable.
- DIY supply costs for a small project can run under a few hundred dollars, while a professional kitchen refinish commonly falls in the $3,000 to $8,000 range, a small fraction of the $15,000 to $40,000 that full cabinet replacement typically costs.
Costs climb with extensive repairs, veneer replacement, or a high door count, so get a firm quote before assuming the low end applies to your kitchen.
When Hiring a Pro Beats DIY on Maple
Maple punishes shortcuts more than most cabinet woods, which is exactly where Cabinetsrefinishing’s factory-finish approach earns its keep. The method leans on off-site spraying, multiple protective coats, and the kind of methodical prep that keeps tannin bleed and adhesion failures from showing up six months later. Most projects wrap in 3 to 5 days, not weeks, which matters when your kitchen is out of commission.
Hiring out makes the most sense when you’re dealing with veneer repairs, matching a custom color across dozens of doors, or you simply want a warrantied result instead of a learning curve. DIY is a fine choice for a small bathroom vanity. A full kitchen of maple cabinets is where professional experience and equipment tend to pay for themselves.
— Jesse
Get a Professional Maple Cabinet Refinish in Denver
The DIY route works, but it asks a lot: rented sprayers, test panels, multiple weekends, and the risk of tannin bleed showing up after you’ve already reassembled the kitchen. Cabinetsrefinishing exists for homeowners who want the factory-finish result without absorbing that risk themselves.

Cabinetsrefinishing specializes in exactly the maple-specific challenges covered above: shellac priming for tannin control, off-site spraying for a smooth factory finish, and multiple protective topcoats built to hold up in a working kitchen. Projects typically finish in 3 to 5 days, and clients in the Denver metro area routinely save tens of thousands of dollars compared to full cabinet replacement. If your maple cabinets are solid but tired looking, request a quote for cabinet refinishing in Denver and get a firm timeline and price before you commit to anything.
Sources
For readers who want manufacturer-specific guidance or expanded how-to detail, a few sources are worth bookmarking. HGTV’s cabinet refinishing walkthrough covers the sprayed factory-finish approach in more visual detail. Lowe’s cabinet refinishing guide is useful for product selection at the cleaning and stripping stage. Sherwin-Williams’ cabinet refinishing resource goes deeper on primer and topcoat chemistry for hardwoods like maple. Whatever source you follow, always check the manufacturer’s specific application instructions and run a test panel before committing to a full kitchen.
Recommended
- Cabinet Refinishing, Painting Preparation Steps: A DIY Guide
- Sanding Cabinets for Refinishing: A DIY Success Guide – Cabinet Refinishing and Cabinet Painting Denver 720-219-9716
- Kitchen Decor Refresh Ideas: High-Impact, Low-Cost Upgrades.
- Kitchen Cabinet Painting Process: A Pro’s Step-by-Step Guide – Cabinet Refinishing and Cabinet Painting Denver 720-219-9716