
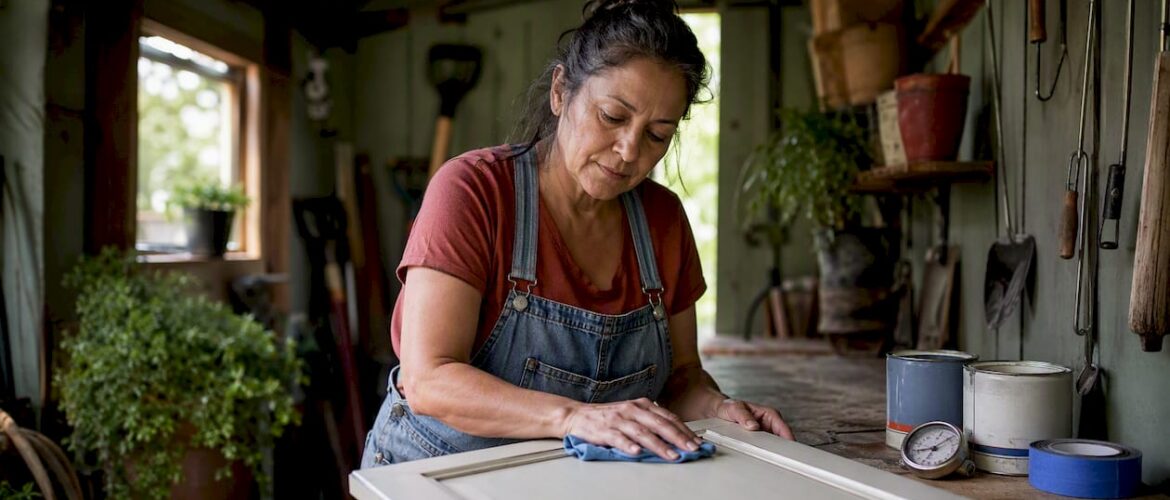
How humidity affects cabinet paint application is the #1 reason DIY cabinet jobs fail in Denver. If you want to know how humidity affects cabinet paint application, ideal humidity is 40-50% for how humidity affects cabinet paint application to cure perfectly without bubbling or cracking. This guide on how humidity affects cabinet paint application covers ideal levels, tools, and mistakes. Keep interior relative humidity near 40–50% RH before and during cabinet painting. That single number controls whether your finish dries hard and bonds properly, or stays soft, bubbles, and peels weeks after you’ve put the brushes away.
Before you open a can, grab a hygrometer and check the room. If RH reads above 60%, postpone or run a dehumidifier until conditions stabilize. Ideal indoor humidity for interior painting sits at 40–50% RH; above 60% you risk tacky surfaces, and above 80% many paints cannot form a defect-free film at all.
Three steps before you touch a brush:
- Measure: record RH and surface temperature with a hygrometer and moisture meter.
- Control: run your HVAC or a dehumidifier to reach the 40–50% target; hold it there for at least 24 hours before painting.
- Acclimate: let cabinet doors and parts sit in the painting space for 48 hours so the wood reaches equilibrium with the room.
Table of Contents
- How does humidity affect cabinet paint application?
- What RH range is safe for cabinet painting?
- What finish defects does humidity cause on cabinets?
- How to control humidity for a cabinet painting project
- Which paint chemistry handles humidity best for cabinets?
- How to diagnose and repair humidity-related cabinet finish failures
- What pros know about humidity and long-term cabinet durability
- Key Takeaways
- The part most guides skip
- Skip the humidity guesswork with Cabinetsrefinishing
- Useful sources and further reading
How does humidity affect cabinet paint application?
Humidity governs two separate processes that both have to go right for a cabinet finish to last: evaporation-driven drying and chemical cure.

Waterborne paints, including most modern cabinet-specific acrylics and waterborne alkyds, dry when water evaporates from the wet film. High relative humidity slows that evaporation because the air is already saturated. The surface may feel dry to the touch in a few hours, but the film beneath stays soft and water-laden far longer than the label suggests.
Solvent-borne and oil-based alkyds work differently. They cure through oxidation, a chemical cross-linking reaction where polymer chains bond together to form a hard film. Humidity matters here too, because moisture on the substrate surface or trapped beneath the film interferes with adhesion and can disrupt the cross-linking chemistry. The result is a finish that looks fine on day one but never reaches its intended hardness.
High-end cabinet enamels require stable conditions to properly cross-link. In humid environments, the internal structure often never reaches intended hardness, leaving a finish that scratches and wears sooner than it should.
Temperature adds another layer. The recommended painting window for cabinets sits near 65–75°F with 40–50% RH. Drop below 65°F and evaporation slows even at moderate humidity. Push above 80°F and the surface skins over before the solvents underneath can escape, trapping them in the film.
One concept worth understanding is the difference between surface skinning and internal cure. A cabinet door can feel firm to the touch while the layers underneath remain chemically incomplete. That soft underlayer is what causes delayed failures: a door that seemed fine at installation starts showing scratches, dents, or adhesion loss within months. Full chemical cure for many cabinet enamels can take 3–6 weeks in high humidity, even when the surface passed a fingernail test days earlier.
What RH range is safe for cabinet painting?
The table below maps common relative humidity bands to what actually happens to your finish and what you should do about it.

| RH Band | Drying Behavior | Common Cabinet Risks | Recommended Action |
|---|---|---|---|
| Below 30% | Very fast surface dry | Lap marks, brush drag, raised grain on wood | Slow down; use a flow additive; mist lightly |
| 30–40% | Fast evaporation | Minor lap marks; manageable with thin coats | Proceed; work in smaller sections |
| 40–50% | Balanced, consistent | Minimal risk; best window for cross-linking | Ideal; proceed normally |
| 50–60% | Slightly slowed | Longer recoat windows; minor sheen variation | Proceed with thin coats; add 20–30% to recoat time |
| 60–70% | Noticeably slowed | Tackiness, soft film, trapped moisture risk | Dehumidify before starting; postpone if unable to control |
| Above 70% | Severely slowed | Blistering, peeling, mildew, adhesion failure | Postpone; do not apply finish until RH is controlled |
Temperature adjustments: If the room is below 65°F, treat it as one RH band worse than the reading shows. Cold air holds less moisture, but cold surfaces slow evaporation and cross-linking independently. At temperatures above 80°F, reduce coat thickness and extend flash times even at moderate RH, because rapid surface skinning traps solvents.
Recoat timing rule of thumb: at 40–50% RH and 70°F, follow the label. At 55–60% RH, add 30–50% to the stated recoat window. At 65–70% RH, double it. These are conservative estimates; always do a thumbnail-press test on an inconspicuous edge before applying the next coat.
What finish defects does humidity cause on cabinets?
Most humidity-related failures share one root cause: moisture in the wrong place at the wrong time. Knowing which defect you’re looking at tells you whether a spot repair will hold or whether you need to start over.
Tackiness and soft film appear when the finish dries at the surface but stays chemically incomplete underneath. You’ll notice it first on horizontal surfaces like the tops of upper cabinet boxes and on door backs that didn’t get as much airflow. Pressing a fingernail into the surface leaves a mark even days after application.
Blistering and bubbling happen when trapped water vapor beneath the paint film tries to escape. The bubbles often appear at edges, inside panel grooves, and on drawer fronts where the finish is thicker. They can show up immediately or emerge weeks later as the substrate continues to off-gas moisture.
Poor adhesion and peeling usually trace back to surface moisture at application time. Even a thin layer of condensation on a cabinet door, invisible to the eye, breaks the mechanical bond between primer and substrate. Edges and inside corners are the first places to peel because they collect moisture and see the most mechanical stress.
## How Humidity Affects Cabinet Paint Application in Denver Homes
If you’re wondering how humidity affects cabinet paint application, Denver’s dry air actually helps. But summer monsoon season is when how humidity affects cabinet paint application the most — humidity over 60% causes bubbling. Professional painters know how humidity affects cabinet paint application by using dehumidifiers to keep 40-50% levels.
### Why How Humidity Affects Cabinet Paint Application Matters for DIY
Learning how humidity affects cabinet paint application saves you $3,000 in redo costs. When how humidity affects cabinet paint application is ignored, paint cracks in 3 months. Our Denver team monitors how humidity affects cabinet paint application daily with hygrometers.
Related: low-VOC cabinet painting Denver guide at https://cabinetsrefinishing.com/
Lap marks and sheen inconsistency result from uneven drying. When humidity is high, wet edges stay open longer and the painter inadvertently works back into a partially dried section, leaving visible ridges or dull patches. This shows up most on large flat door faces.
Mold and mildew under the finish are the worst outcome. Moisture trapped between the substrate and the finish layer creates an ideal environment for growth. By the time you see discoloration, the problem is already in the wood or MDF, and spot repairs won’t fix it.
Orange peel texture can worsen in humid conditions when spray atomization is disrupted by moisture-laden air, preventing droplets from leveling properly before they set.
How to control humidity for a cabinet painting project
Getting conditions right before you spray is worth more than any product upgrade. Here’s how to approach it systematically.
Pre-job setup
- Measure baseline RH and surface moisture in the work area at least 24 hours before painting. A digital hygrometer costs under $20; a pin-type moisture meter runs $30–$60 and tells you whether the cabinet substrate itself holds excess moisture.
- Acclimate all cabinet doors, drawer fronts, and loose parts in the painting space for at least 48 hours. Wood and MDF move with humidity changes; painting before the substrate stabilizes leads to finish cracking as the material expands and contracts.
- Record your readings. A simple log (time, RH, temp, surface moisture) takes two minutes and gives you a paper trail if something goes wrong.
Environmental controls
Refrigerant dehumidifiers work well in warm spaces above 65°F; they pull moisture from the air efficiently and are the standard choice for most interior cabinet projects. Desiccant dehumidifiers handle colder spaces better and are worth renting if you’re working in an unheated garage in winter.

Running your HVAC in cooling mode also dehumidifies the air. Set it to maintain 68–72°F and let it run for several hours before you start. Avoid using open-flame heaters in the work area; they produce combustion moisture and can spike RH.
In humid conditions, thin coats, increased ventilation, and longer wait times between coats reduce risk significantly. Professionals often seal the work area with plastic sheeting and run a dehumidifier continuously for 72 hours during the curing phase.
- Keep bathroom doors closed and avoid running dishwashers, cooking, or showering in adjacent rooms for at least 72 hours after the final coat.
- Space doors on drying racks with at least 2 inches of clearance on all sides. Never stack freshly painted doors, even with paper between them.
Pro Tip: Set your hygrometer alarm at 55% RH. If it triggers overnight, you’ll know before you walk in and apply a second coat over a compromised first one.
For a full walkthrough of the painting workflow, the cabinet painting process guide covers staging, sequencing, and handling in detail.
Which paint chemistry handles humidity best for cabinets?
Paint type changes how much humidity tolerance you have to work with, and it changes the cure timeline significantly.
Waterborne alkyds (hybrid alkyds) are the current professional standard for cabinet work. They apply like latex, clean up with water, and cure through the same oxidative cross-linking as oil-based alkyds. In controlled conditions (40–50% RH), they produce a hard, furniture-grade film. In high humidity, they’re more forgiving than straight acrylics because the cross-linking reaction is less dependent on rapid evaporation. Waterborne systems are more RH-sensitive during the initial drying phase, but a waterborne alkyd’s cure chemistry gives it an edge over straight latex once the water has left the film.
Traditional oil/alkyd enamels are less sensitive to ambient RH during application because they don’t rely on water evaporation. The trade-off is longer dry times, stronger solvent odor, and the need for mineral spirits cleanup. They remain a solid choice when humidity is borderline and you can’t fully control the environment.
Acrylic/latex cabinet enamels are the most humidity-sensitive category. They need consistent RH below 60% and good airflow to coalesce properly. In a well-controlled space they produce excellent results; in a humid kitchen or bathroom, they’re the highest-risk option.
| Paint Type | Ideal RH Range | Dry-to-Recoat (at 70°F, 50% RH) | Full Cure Window |
|---|---|---|---|
| Waterborne alkyd | 40–55% | 4–6 hours | 3–6 weeks |
| Oil/alkyd enamel | 40–60% | 8–24 hours | 30 days |
| Acrylic/latex enamel | 40–50% | 2–4 hours | several weeks (longer in humidity) |
For a deeper comparison of product categories, the best paint for kitchen cabinets guide covers formulations, sheen levels, and durability in detail.
Primer guidance: Use an adhesion primer on any slick or previously painted surface. In high-humidity environments or on MDF, a solvent-based primer creates a moisture-resistant barrier that waterborne topcoats can’t match. The best primer for kitchen cabinets guide covers specific product choices for Denver’s climate. Always check the manufacturer’s technical data sheet for the RH and temperature limits specific to the product you’re using.
- Apply thin coats. A thick coat in humid conditions traps moisture and extends cure time dramatically.
- Spray application produces thinner, more even films than brush or roller, reducing the risk of trapped solvents.
- Check the manufacturer’s tech data sheet for the specific RH ceiling; Rust-Oleum’s cabinet enamel, for example, specifies application below 80% RH with adequate ventilation.
How to diagnose and repair humidity-related cabinet finish failures
Not every humidity problem requires stripping and starting over. The decision depends on how deep the failure goes.
Step 1: Test adhesion. Score a small X through the finish with a utility knife in an inconspicuous spot, apply painter’s tape firmly, and pull it off sharply. If finish lifts with the tape, the adhesion bond has failed and spot repairs won’t hold long-term.
Step 2: Check for tackiness. Press a fingernail firmly into the finish. A mark that doesn’t recover within 30 seconds means the film hasn’t cured. Cabinet paint that feels dry at the surface can remain soft below the skin for weeks in humid conditions; attempting to sand or recoat before full cure creates more damage.
Step 3: Inspect for substrate swelling or mildew. Run your hand along door edges and panel grooves. Swelling or soft spots indicate moisture has reached the substrate. Discoloration under the finish, especially gray or black streaking, suggests mildew.
- Tackiness only, adhesion intact: Improve ventilation and humidity control; wait the full cure window (up to 3–6 weeks in humid climates) before handling or recoating.
- Bubbles or blisters, adhesion still holding: Let the finish fully cure, sand the affected area flat, spot-prime, and recoat under controlled conditions.
- Adhesion failure (tape test fails): Strip the affected doors, sand to bare substrate, re-prime, and refinish. Partial repairs over failed adhesion will peel again.
- Mildew or substrate swelling: Full strip and refinish required. Treat the substrate with a mildewcide before priming. If MDF has swollen significantly, replacement may be necessary.
Minimum wait before corrective sanding: 72 hours at controlled RH, even if the surface feels dry. Sanding a film that hasn’t fully hardened clogs sandpaper and creates scratches that telegraph through the topcoat.
What pros know about humidity and long-term cabinet durability
The failure mode most homeowners miss isn’t the obvious one. A finish that bubbles or peels within a week is easy to diagnose. The harder problem is a finish that looks perfect at installation and then wears out in 18 months instead of 10 years.
High humidity is a leading cause of long-term finish failure because a softer cured film scratches and wears sooner, increasing the lifetime cost of a cabinet finish. The chemistry behind this is straightforward: cross-linking reactions that form the hard polymer network in alkyd and waterborne alkyd enamels need stable, low-humidity conditions to complete. When humidity interrupts that process, the network stays partially formed. The film looks normal but has less hardness, less chemical resistance, and less abrasion resistance than the manufacturer’s spec sheet describes.
Humidity is a ‘silent’ project killer. It causes latent failures, blistering, peeling, and mildew, that often appear weeks or months after project completion. Many homeowners focus on color and immediate appearance while underestimating what humidity does to long-term durability.
Professional refinishers address this with protocols most DIYers skip. Acclimation for 48 hours before painting is standard practice, not optional. Controlled-shop curing means the doors stay in a temperature- and humidity-regulated space, not stacked in a garage. Factory-finish workflows use RH logs, controlled shop environments, and multi-stage curing protocols that produce faster, more repeatable results than field spraying under variable conditions.
The measurable checks pros use: hygrometer readings logged at the start and end of each workday, moisture meter readings on the substrate before priming (wood typically needs to read below 15% moisture content, MDF below 10%), and a test-cure patch on a scrap piece of the same material before committing to the full job.
Temperature and humidity together define the painting window. A typical professional cabinet refinish runs 3–5 days from prep to final coat because the shop conditions are held constant. A DIY project under variable home humidity can stretch to two weeks or more, with rework adding cost and time that often exceeds what a professional job would have cost.
Pro Tip: Run a test-cure patch on a scrap piece of the same cabinet material 48 hours before the full job. If the patch feels soft or shows adhesion failure, your conditions aren’t ready, regardless of what the hygrometer reads.
Key Takeaways
Keeping relative humidity in the 40–50% RH range, combined with proper acclimation and thin coats, is the single most effective way to prevent humidity-related cabinet finish failures.
| Point | Details |
|---|---|
| Ideal RH window | Paint cabinets at 40–50% RH; above 60% risks tackiness and adhesion failure. |
| Acclimate before painting | Let doors and parts sit in the work space for at least 48 hours to stabilize before applying any finish. |
| Full cure takes weeks | Cabinet enamels can take 3–6 weeks to fully cure in humid conditions, even when the surface feels dry. |
| Choose the right paint | Waterborne alkyds offer the best balance of humidity tolerance and long-term hardness for cabinet work. |
| Cabinetsrefinishing approach | Cabinetsrefinishing uses controlled-shop environments, RH logs, and factory-finish spray methods to eliminate humidity risk on Denver cabinet projects. |
The part most guides skip
The conventional wisdom on humidity and painting focuses almost entirely on the application day. Check the weather, pick a dry morning, and you’re fine. That’s not wrong, but it misses the bigger risk.
The real damage usually happens during the cure phase, not the spray phase. A cabinet door that gets painted on a perfect 45% RH afternoon can still fail if the humidity climbs to 70% overnight and the film is only 12 hours into a 30-day cure cycle. The cross-linking chemistry doesn’t pause and resume cleanly. It gets disrupted, and the resulting film is permanently softer than it should be.
The workflow change that actually prevents this is treating humidity control as a multi-day commitment, not a single-day check. Run the dehumidifier through the full cure window. Log the readings. Keep the bathroom door closed. These aren’t dramatic interventions; they’re just consistent ones. The homeowners who end up with a finish that still looks sharp after five years of daily use are almost always the ones who controlled conditions for the full cure, not just the application.
If you’re coordinating a cabinet refinish with a broader kitchen update or house renovation, sequence the painting last. Moisture from new drywall, flooring adhesives, and grout can push ambient RH well above safe levels for weeks.
Skip the humidity guesswork with Cabinetsrefinishing
Humidity control is manageable on a DIY project, but it demands consistency over days, not just hours. For homeowners who want a factory-like finish without monitoring a dehumidifier through a three-week cure cycle, Cabinetsrefinishing delivers the controlled-shop advantage directly.

Cabinetsrefinishing completes most Denver-area cabinet refinishing projects in a few days using a spray-applied, multi-coat factory-finish process in a humidity-controlled environment. Every job includes RH-logged curing, proper acclimation, and a finish that’s built to last rather than look good for the first month.
- Projects finished in 3–5 days, not weeks of DIY cure time
- Factory-finish spray application with measured humidity at every stage
- Refinishing costs from $3,000–$8,000 versus $15,000–$40,000 for full cabinet replacement
Get a quote for your Denver cabinet project or call/text 720-219-9716 to talk through your options.
Useful sources and further reading
These resources are worth bookmarking for deeper technical detail and product-specific guidance.
- Cabinet Paint Still Tacky? Humidity Cure Time Guide — Practical triage guide for tacky finishes, with clear go/wait decision steps organized by symptom.
- Impact of Indoor Humidity on Paint Drying Times and Quality — Covers RH thresholds, drying mechanics, and practical controls including dehumidifier use and work-area sealing.
- 5 Painting Mistakes to Avoid in Humid Weather — Focused on the most common field errors, including skipping moisture checks and applying coats too soon.
- Cabinet Paint Cure Time in Florida Humidity — Detailed cure-time data for high-humidity climates; useful for anyone in a humid region or painting during summer.
- How Temperature and Humidity Affect Paint Application — Technical explanation of the temperature/RH interaction and its effect on spray application quality.
- Rust-Oleum Cabinet and Trim Paint Technical Notes — Manufacturer-specified RH and temperature limits for a widely used cabinet enamel; a good model for reading any paint’s tech data sheet.
Search terms for finding local pros: “factory finish cabinet refinishers near me,” “cabinet refinishing Denver humidity control,” “spray cabinet painting Denver,” “professional cabinet refinishing Denver CO.”
Recommended
- How Temperature Affects Cabinet Painting: A DIY Guide – Cabinet Refinishing and Cabinet Painting Denver 720-219-9716
- Best Low-VOC Cabinet Paint Options for Your Kitchen – Cabinet Refinishing and Cabinet Painting Denver 720-219-9716
- Why Cabinet Paint Adhesion Fails (and How to Fix It) – Cabinet Refinishing and Cabinet Painting Denver 720-219-9716
- Kitchen Decor Refresh Ideas: High-Impact, Low-Cost Upgrades.
Pro tip: Understanding how humidity affects cabinet paint application helps Denver DIYers avoid peeling. When how humidity affects cabinet paint application in winter, use a heater to keep 45% humidity.