
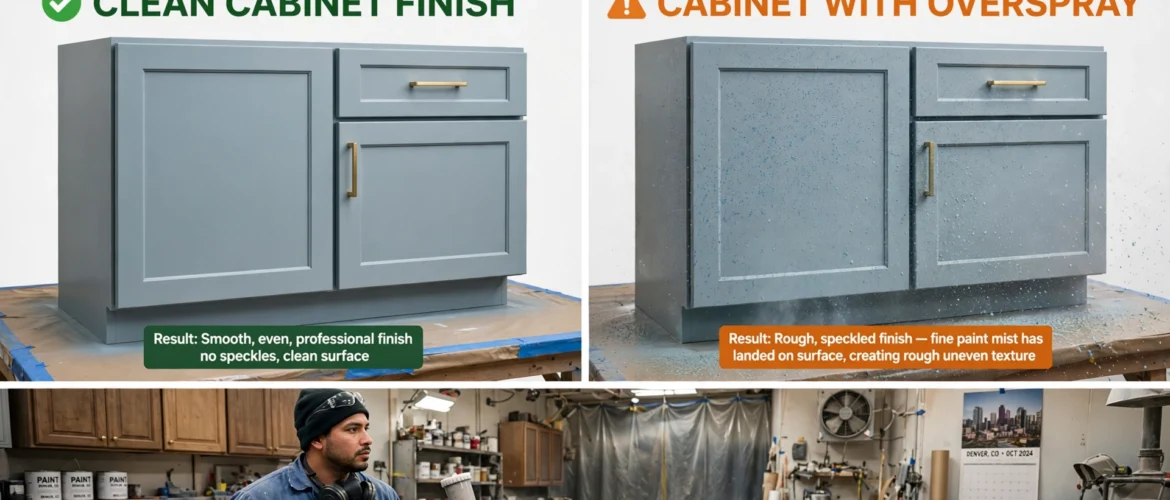
What does overspray mean in cabinet work? Overspray in cabinet work means… In this guide, what does overspray mean in cabinet work is explained with Denver pro tips. Overspray in cabinet work is finish that atomizes into airborne particles, dries partially before landing, and settles on surfaces where you didn’t intend to spray.
The result is a gritty, rough texture rather than a smooth film. If you spot it now: wipe fresh latex immediately with warm water, rub dry lacquer lightly with brown paper, do a solvent spot test on a hidden area before reaching for anything stronger, or scuff-sand and recoat if the grit is set. The industry term you’ll hear alongside “overspray” is dry spray, which describes particles that fully cure mid-air and land as dust rather than merging into the wet film.
Three things separate manageable overspray from a ruined finish: your gun type (an HVLP produces a softer, lower-velocity fan that drifts less than a conventional gun), your finish choice (Conversion Varnish flashes slower, giving airborne particles more time to merge back into the film), and your spray environment. Cabinetsrefinishing uses all three together in a factory-finish workflow, which is why their results look different from a typical DIY spray job.
Table of Contents
- 1. Why overspray happens inside cabinet boxes
- 2. A practical checklist to prevent overspray on cabinet jobs
- 3. Which sprayer and finish combination works best for cabinets
- 4. What professionals do that most DIYers skip
- 5. How to remove or fix overspray on cabinet surfaces
- 6. Fast diagnosis for common overspray mistakes
- Key Takeaways
- The case for controlled environments over clever workarounds
- Professional cabinet refinishing without the overspray risk
- Useful sources
1. Why overspray happens inside cabinet boxes
Cabinets are the worst-case scenario for overspray. You’re spraying into a confined box, which means the finish has nowhere to go but back at you.
When a spray gun atomizes finish, it creates a cone of particles traveling at speed. Inside an open room, most of that cloud dissipates. Inside a cabinet carcass, the back panel acts like a wall, bouncing the cloud back toward the surfaces you just coated. That bounce-back settles as dry spray on the side walls, floor, and ceiling of the box before the film has a chance to flow out.
Bounce-back is the dominant cause of gritty cabinet interiors. The back panel traps overspray that would otherwise drift away, forcing it to settle on surfaces that are already beginning to cure. Minimizing overspray when spraying
Atomization pressure makes it worse. Higher air pressure breaks finish into finer particles that stay airborne longer, giving them more time to dry before they land. Gun distance matters too: hold the gun too far back and particles lose velocity, cool, and arrive partially cured. Too close and you get wet runs instead.
Environmental factors compound all of this. Low humidity speeds flash-off, meaning particles dry faster mid-air. High humidity slows it, but can cause blushing in solvent-based finishes. Temperature swings in an unheated garage can cut your working window in half. Quick-curing waterborne finishes are especially risky in enclosed spaces because the fast flash-off means overspray settles on surfaces that are already beginning to skin over, producing a grit that won’t merge no matter how wet the next pass is.
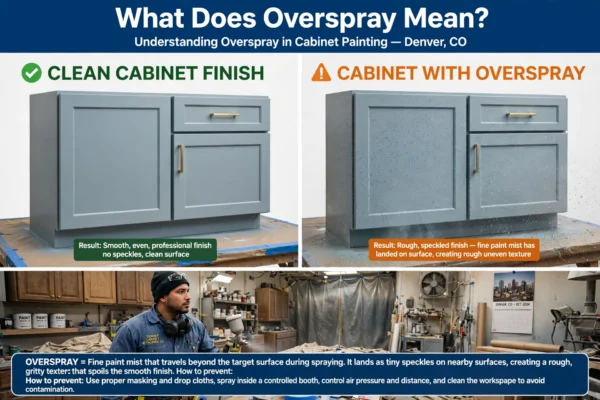
What Does Overspray Mean? Clean cabinet finish vs cabinet with overspray – How Denver pros prevent overspray for flawless results. CabinetsRefinishing.com
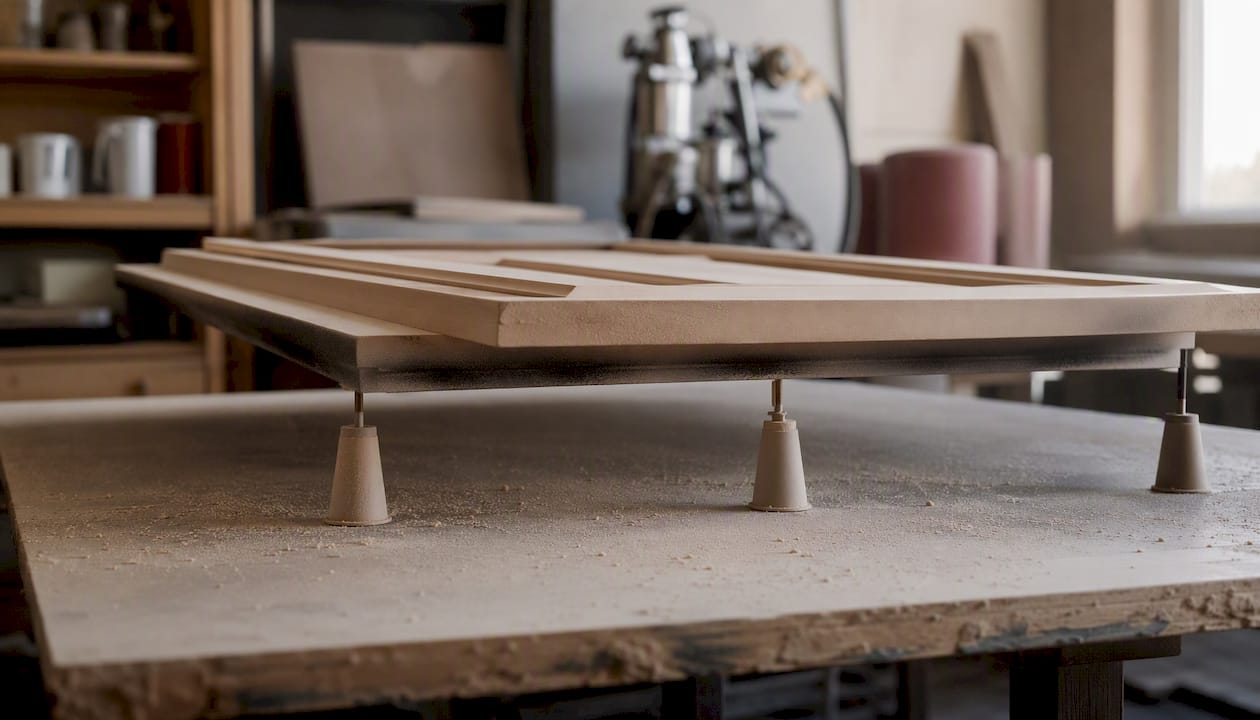
Door backs are a separate problem. When a door sits flat on sawhorses or standoffs, the spray fan hits the surface and bounces off the support beneath, sending a secondary cloud up onto the underside of the door. Elevating doors on screw-boards or spiked standoffs breaks that bounce path.
Pro Tip: Sketch your spray path before you start. Draw the box, mark where the gun enters, and trace where the fan cone will hit. Any surface that’s in the direct rebound path of your first pass is a high-risk zone for dry spray.
2. A practical checklist to prevent overspray on cabinet jobs
Prevention is mostly sequencing and setup. Get these right before you pull the trigger.
- Remove backs if at all possible. A back-less carcass lets overspray pass through instead of bouncing. This step can reduce bounce-back overspray by as much as 90%. Reattach after finishing.
- Disassemble into components. Pull doors, drawer fronts, and shelves. Spray them flat on a cart or sawhorses. Breaking cabinets into components and spraying parts individually is the single biggest efficiency gain in a shop workflow.
- Spray interiors first. Always coat the inside of a box before the face frame or exterior. Spraying interiors first means any overspray that drifts outward lands on an uncoated surface, not a curing one.
- Mask aggressively. Small cubbyholes and tight boxes are high-risk. Use custom-cut cardboard shields to block adjacent surfaces, and magic paper (a lightly adhesive masking paper) to protect countertops and hardware.
Pro Tip: Mount the carcass on a mobile cart at waist height before spraying. You can rotate the piece to keep the gun angle consistent and avoid spraying upward into a box, which is the position most likely to produce runs on the ceiling and dry spray on the floor.
3. Which sprayer and finish combination works best for cabinets
Choosing the right equipment matters, but the finish type often has more impact on overspray behavior than the gun itself.
Sprayer types
| Sprayer type | Transfer efficiency | Overspray risk | Best use in cabinet work |
|---|---|---|---|
| HVLP (turbine or compressor) | High | Low | Interior boxes, detailed profiles, DIY use |
| Air-assisted airless | Very high | Very low | Production shops, large flat doors |
| Conventional (siphon/gravity) | Moderate | High | Not recommended for enclosed cabinet work |
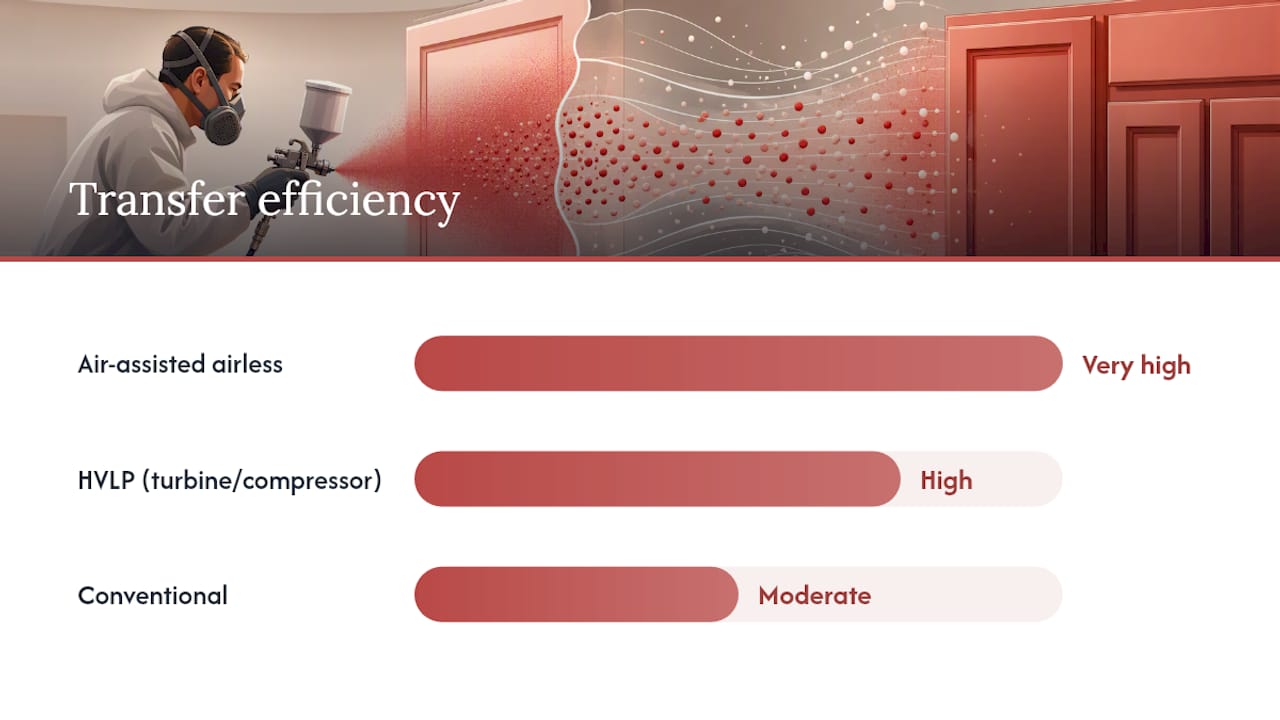
HVLP is the standard recommendation for interior cabinet work because the low-velocity fan produces less bounce-back and gives you more control over film thickness. Air-assisted airless systems, like those made by Kremlin and Graco, reduce coating velocity dramatically compared with conventional guns, which cuts the cloud of bounce-back inside boxes. DeVilbiss makes both HVLP and conventional guns widely used in finishing shops; their HVLP models are a common starting point for serious DIYers. For cabinet spraying techniques beyond HVLP, air-assisted airless is the next step up.
Finish choices
- Conversion Varnish (C-V): Slower flash-off than most waterborne products, which gives overspray more time to merge into the wet film. Harder cure, better chemical resistance. Requires proper ventilation and respirator use. The go-to for production cabinet shops.
- Waterborne lacquers and acrylics: Fast flash-off is the trade-off for low VOC and easy cleanup. In enclosed spaces, that speed works against you. Add a compatible retarder to slow the cure window.
- Mohawk No-Blush: An aerosol retarder/blush remover used in trade finishing to address whitening and grit in lacquer films. Useful as a spot treatment when overspray has caused blushing in a solvent-based finish.
Tip sizes: For most waterborne cabinet finishes, a 1.3–1.5mm tip (HVLP) handles the viscosity without over-atomizing. Conversion Varnish typically runs well at 1.4–1.6mm. Always thin to the manufacturer’s recommended viscosity and verify with a viscosity cup before spraying.
Homeowner-ready kit checklist:
- HVLP gun (gravity feed, 1.3–1.4mm tip)
- Viscosity cup
- Retarder compatible with your finish
- Cardboard shields and magic paper
- Screw-board standoffs for doors
- Respirator (OV/P100 cartridges)
- Test panel (same substrate and sealer as the job)
**Pro Tip: What Does Overspray Mean For DIY vs Pro?**
If you’re wondering what does overspray mean for your project, remember what does overspray mean is extra cleanup and rough texture. When clients ask what does overspray mean, we show them how professional masking prevents overspray. Understanding what does overspray mean saves time and money, and knowing what does overspray mean helps you hire the right contractor.
4. What professionals do that most DIYers skip
The gap between a pro finish and a DIY finish usually isn’t the gun. It’s the workflow.
Professional cabinet finishers spray doors off-site in a controlled spray booth with filtered, directional airflow. That environment eliminates the two biggest variables: cross-drafts and temperature swings. On a production run, doors are hung on a rolling rack, sprayed in sequence, and rotated so the gun always maintains the same angle to the surface. No crouching, no awkward upward passes, no spraying into a corner.
Removing cabinet backs before spraying can reduce bounce-back overspray by as much as 90%. That’s not a marginal improvement. It’s the difference between a gritty interior and a smooth one on the first pass. The mechanism is simple: without a back panel, overspray that would bounce off the wall instead passes through the open carcass and gets drawn away by the exhaust.
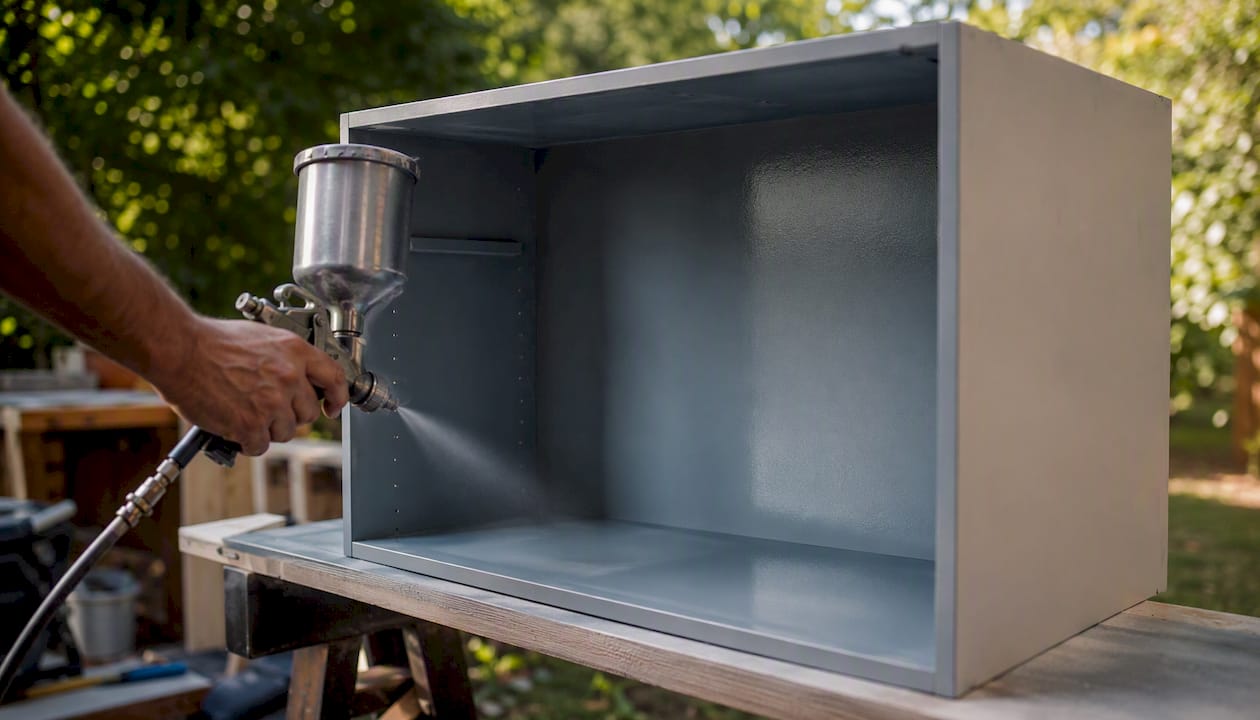
When backs can’t be removed, pros reduce air pressure, switch to a narrower fan pattern, and add retarder to the finish. The goal is to keep the film wet long enough that any particles landing on it can still merge. Conversion Varnish is the preferred finish in this scenario because its slower flash-off gives that merge window naturally.
Air-assisted airless systems from Kremlin or Graco are common in production shops because they move more material per pass at lower velocity, which cuts the airborne cloud significantly compared with a conventional gun running at high pressure.
Pro Tip: If you can’t remove the back, tape a piece of cardboard to the back wall of the box before spraying the sides. It catches the first bounce and you pull it out before the final coat. Cheap, fast, and it works.
| Technique | DIY approach | Pro approach |
|---|---|---|
| Back panel | Usually left in | Removed before spraying |
| Spray environment | Garage or kitchen | Filtered booth, controlled temp |
| Finish type | Waterborne lacquer | Conversion Varnish or slow-flash waterborne |
| Door spraying | On sawhorses in place | Off-site on rolling rack |
| Airflow | Fan pointed at work | Exhaust draws air away from work |
5. How to remove or fix overspray on cabinet surfaces
The severity of the overspray determines your repair path. Identify it first.
Quick identification test: Run your fingertip across the affected surface. Light grit that feels like fine sandpaper is dry spray that landed before fully curing. A rough, pebbled texture that doesn’t compress under finger pressure is fully cured overspray. Wet or tacky areas are a different problem (runs or sags) and need a different fix.
Do a solvent spot test on an inconspicuous area before applying any chemical to a visible surface. Dampen a cotton swab with the appropriate solvent (mineral spirits for oil-based, denatured alcohol for shellac, lacquer thinner for lacquer) and touch it to a hidden spot. If the film softens without lifting, you have a remelt option. If it lifts or whitens, stop and go mechanical instead.
Light overspray
Rub the surface gently with a piece of brown kraft paper. The slight abrasive quality of the paper knocks off dry particles without cutting into the film. For latex or waterborne finishes caught within the first hour, a damp cloth with warm water often removes the grit entirely. Follow with a light polish if the sheen is uneven.
Medium overspray
Scuff-sand with 320-grit, then 400-grit, working with the grain. The goal is to level the grit without cutting through the finish. Feather the edges of the sanded area so the recoat blends. Apply a thin finish coat and let it cure fully before assessing. For guidance on sanding technique before recoating, a progressive-grit approach produces the smoothest base.
Heavy overspray or trapped grit
If the grit is deep in the film or the surface is heavily textured, partial stripping is the most reliable fix. Remove the affected door or panel, strip to bare wood or sealer, and re-spray in a better-controlled environment. Trying to sand through heavy overspray without removing the part usually results in uneven sheen and visible repair lines.
Safety reminders before any solvent repair:
- Wear nitrile gloves and safety glasses.
- Work in a ventilated space; open windows and run an exhaust fan.
- Keep solvent-soaked rags in a metal container with a lid.
- Always test on a hidden area before treating a visible surface.
Avoid common DIY cabinet painting mistakes that turn a minor overspray issue into a full strip-and-recoat job. The most common one: sanding aggressively without testing solvent options first.
6. Fast diagnosis for common overspray mistakes
Most overspray problems on cabinet jobs trace back to one of five setup errors. Here’s how to spot and fix each one quickly.
- Poor masking: Overspray is drifting onto countertops, hardware, or adjacent surfaces. Fix: extend your masking further than you think necessary and use magic paper on horizontal surfaces near the spray zone. For on-site jobs, interior surface protection is worth treating as seriously as the finish work itself.
Technique vs. material issue: If the problem appears consistently across multiple passes regardless of pressure adjustment, it’s likely a flash-off issue with the finish, not a technique problem. Switch to a slower-flashing finish or add retarder. If the problem only appears on certain passes or angles, it’s technique. Shoot a practice panel and adjust before continuing.
Environmental fix: Schedule spraying for lower-humidity periods (below 70% relative humidity if possible) or use a portable dehumidifier in a makeshift spray area. In Denver’s dry climate, the opposite problem can occur: very low humidity accelerates flash-off, so retarder use is often more necessary here than in humid coastal markets.
Key Takeaways
Overspray in cabinet work is a preparation and sequencing problem first, an equipment problem second. Remove backs, sequence interiors first, and control your spray environment before adjusting your gun.
| Point | Details |
|---|---|
| Remove backs first | Removing cabinet backs can reduce bounce-back overspray by as much as 90%, the single highest-impact prevention step. |
| Sequence interiors before exteriors | Spraying box interiors first means overspray drifts onto uncoated surfaces, not curing ones. |
| Match finish to environment | Conversion Varnish or a retarder-extended waterborne finish reduces grit in enclosed or fast-drying conditions. |
| Repair by severity | Light overspray: brown-paper rub or warm water. Medium: scuff-sand and recoat. Heavy: strip the part and re-spray. |
| Cabinetsrefinishing factory method | Cabinetsrefinishing uses off-site spray booths, backs-off finishing, and Conversion Varnish workflows to eliminate overspray at the source. |
The case for controlled environments over clever workarounds
Most DIY overspray advice focuses on fixing the problem after it happens. That’s understandable, but it’s the wrong frame. The real question is why the problem keeps happening despite careful technique.
The answer, almost always, is environment. A garage with the door cracked open is not a spray booth. Temperature swings, cross-drafts from a passing car, and humidity changes between morning and afternoon can all alter flash-off behavior mid-job. No amount of tip-size adjustment compensates for an uncontrolled environment.
Professionals don’t just use better guns. They build or rent controlled spaces where airflow, temperature, and humidity are fixed variables, not unknowns. That’s what makes a factory finish repeatable. When Cabinetsrefinishing sprays cabinet doors off-site, the finish behaves the same way on the first door as it does on the last one. That consistency is nearly impossible to replicate in a home garage, no matter how good the equipment.
The cost math is worth considering. A botched spray job on a full kitchen typically requires stripping and recoating, which can cost more in materials, time, and frustration than hiring a pro from the start. If you’re working on a single cabinet or a small bathroom vanity, DIY is a reasonable call. A full kitchen with 30 or more door faces is a different calculation.
The techniques in this article work. But knowing them and executing them under real conditions are two different things. The gap between those two is where most overspray problems live.
Professional cabinet refinishing without the overspray risk
Cabinetsrefinishing delivers factory-finish results in 3–5 days by taking the spray work off-site. Doors and drawer fronts go to a controlled spray booth where backs-off finishing, directional airflow, and Conversion Varnish workflows eliminate the bounce-back and grit problems that plague on-site DIY jobs. The carcasses stay in your kitchen, masked and protected, while the finish work happens in a clean environment. No overspray on your countertops, no gritty interiors, no rework.

Refinishing costs run $3,000–$8,000 for a full kitchen, compared with $15,000–$40,000 for replacement. If you’ve read through this guide and decided the spray setup, sequencing, and repair work is more than you want to take on, that’s a reasonable conclusion. Get a quote for professional cabinet refinishing in Denver and see what a controlled factory-finish process actually looks like for your kitchen.
Useful sources
The following sources informed this article and are worth reading if you want to go deeper on any specific topic.
- Minimizing overspray when spraying
- Dealing with the Dreaded Overspray – Fuji Spray Systems
- Spraying a cabinet – Fuji Spray Systems
- Spray finish on-site – Fine Homebuilding
- Spraying inside kitchen cabinets w/hvlp – Canadian Woodworking Forum
- Spraying inside cabinet boxes
- Avoiding overspray problems inside small cabinets
- Eliminating overspray on door backs
Recommended
- Types of Cabinet Spraying Techniques for a Pro Finish – Cabinet Refinishing and Cabinet Painting Denver 720-219-9716
- Off-Site Cabinet Door Spray Painting: The Secret to a Factory-Like Finish – Cabinet Refinishing and Cabinet Painting Denver 720-219-9716
- Spray finish cabinet painting in Colorado homes 720-219-9716
- Spray Refinishing, & cabinet painting, in Lakewood Colorado.
### FAQ: What Does Overspray Mean?
**What does overspray mean for my kitchen?**
What does overspray mean is that fine mist lands on your counters, walls, and appliances if not masked properly.
**What does overspray mean in cost?**
What does overspray mean in cost is extra sanding and repainting – Denver pros prevent it with proper booth spraying.
**What does overspray mean vs orange peel?**
Many ask what does overspray mean vs orange peel – overspray is speckles from mist, orange peel is bumpy texture from spray gun settings.