
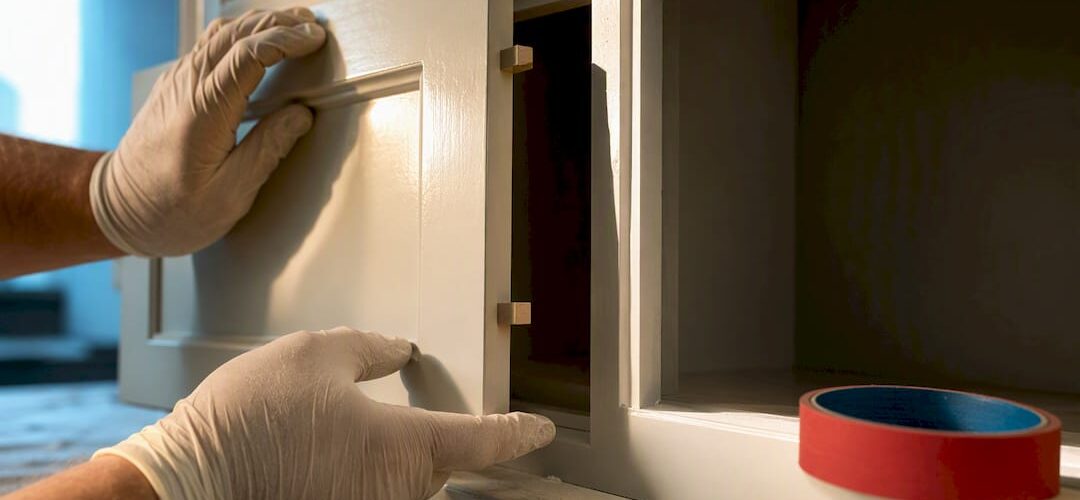
Yes, painting the inside of your kitchen cabinets is generally worth it if the interiors are stained, worn, or visible through glass doors. The right approach is a set sequence, not a shortcut: remove doors, degrease, scuff-sand, prime with a bonding primer where needed, then cut in with a brush and roll flats with a 4-inch mini roller. Skip the sequence, and you get peeling. Follow it, then let the paint fully cure before you load shelves back up.
TL;DR:
- Proper preparation, including deep cleaning, sanding, and priming, is essential to prevent peeling and ensure long-lasting cabinet paint.
- Painted cabinet interiors can take up to 30 days to fully cure, requiring patience before reassembling and loading shelves.
- Using the right primer and paint for different materials like laminate, MDF, or solid wood is crucial to avoid early chipping and peeling.
- DIY painting is feasible for small projects but often less reliable for full kitchens due to uncontrollable variables like humidity and cure times.
- Hiring a professional for factory spray finishes guarantees a durable, high-quality, evenly coated result, especially for large or complex kitchens.
Table of Contents
- What You Need to Paint Inside Cabinets
- Should You Paint the Inside of Your Cabinets?
- How to Paint Cabinet Interiors Step by Step
- Which Paint and Sheen Work Best for Cabinet Interiors
- Pro Tips and Mistakes That Ruin Cabinet Paint Jobs
- Protecting Your Kitchen While You Paint
- Painting Cabinets With Mixed Materials
- Putting Cabinets Back Together the Right Way
- Keeping Painted Cabinet Interiors Looking Good for Years
- When It Makes More Sense to Call a Pro
- Get a Factory-Finish Interior Without the DIY Guesswork
- The Honest Trade-Off Nobody Tells You Upfront
- Sources
What You Need to Paint Inside Cabinets
Before you open a paint can, get everything on the counter. Running to the hardware store mid project usually means painting with a half dry roller while you wait.
- A 4-inch mini foam roller with a ¾-inch nap, for flat interior panels
- An angled trim brush, for corners and edges where the roller can’t reach
- Foam sanding sponges and 100 to 220 grit sandpaper for scuffing the surface
- Tack cloth and a shop vacuum to pull dust before priming
- A degreaser or TSP substitute, since kitchen grease sits on cabinet interiors even when you can’t see it
- Bonding primer (something like Stix or BIN) for laminate or factory finishes, and a stain-blocking primer if the wood shows tannin bleed
- Cabinet enamel, urethane enamel, or an alkyd hybrid paint, depending on your timeline and durability needs
- A NIOSH-rated respirator for sanding and solvent use, plus gloves, eye protection, and drop cloths
Ventilation matters here more than people expect. You’re working in an enclosed box for hours, so crack a window and run a fan the whole time.
Should You Paint the Inside of Your Cabinets?
Glass-front and open-shelf cabinets are the easiest yes; for advice on coordinating your interior paint choices, check out the best color to paint interior doors. If the inside is visible, designers treat it as part of the room, and a mismatched or stained interior undercuts the whole kitchen. Closed cabinets are more of a judgment call. Painting them hides old stains and adds a layer of protection against moisture, but it also means longer cure times, tighter tolerances for dust, and a real risk of paint chipping when pots and pans scrape the walls.
If you’re on the fence, you’ve got cheaper options:
- Paint only the back panel for a pop of contrast without committing to the whole box
- Add shelf liners over an interior that’s structurally fine but cosmetically tired
- Just deep clean and reorganize, since a lot of “dingy cabinet” complaints are really grease buildup
- Hire a pro for a sprayed factory finish if you want interiors and exteriors to match perfectly
Pro Tip: If you’re only painting the back panel, tape off the sides before you touch a brush. A crisp masked line reads as an intentional design choice; a sloppy one reads as an unfinished job.
How to Paint Cabinet Interiors Step by Step
This is the order that actually holds up over time. Skipping ahead, especially on prep, is where most DIY cabinet jobs go wrong.
-
Empty everything out. Pull all the contents, then label doors and drawers with tape (masking tape on the hinge side works well) so you know exactly where each piece goes back.
-
Remove doors, drawers, and shelves. Bag the screws and hinges by cabinet. Leave the boxes mounted on the wall, and mask around the face frame with painter’s tape so wall paint or trim doesn’t get hit by accident.
-
Deep clean with a degreaser. A degreaser or TSP substitute cuts through kitchen grime that plain soap and water won’t touch. Let everything dry completely, since thorough cleaning is the foundation of paint adhesion, and skipping it is the single biggest reason cabinet paint fails early.
-
Scuff-sand the surface. Work through 100 to 220 grit sandpaper, or use a liquid deglosser on factory finishes where sanding isn’t practical. Vacuum the dust, then wipe with a tack cloth before you touch a primer can.
-
Prime for the substrate you’re working with. Laminate and factory-sealed finishes need a bonding primer, since paint applied straight to a slick factory coat peels within months. Raw wood with knots needs a stain-blocking primer to stop tannin bleed from showing through your topcoat.
-
Cut in, then roll. Use the angled brush for corners and edges, then switch to the 4-inch mini roller for flat panels. Apply thin, even coats and don’t go back over a wet edge. Sherwin-Williams recommends brush and mini roller over spraying for interior boxes, since overspray in an enclosed space is hard to control and even harder to clean up.
-
Sand lightly between coats, then wait for full cure. Scuff each dried coat with 220 grit before the next one goes on. Apply a second finish coat, and then leave everything alone.
Cure time is where DIYers lose patience. Some cabinet enamels, Benjamin Moore Advance among them, can take up to 30 days to reach full hardness, even though they feel dry to the touch within hours. Reassembling too early causes blocking, which is when a shelf or stacked plate sticks to the paint film and pulls it apart when you move it. Recoat time and cure time are two different clocks. Respect both. For a breakdown of how long specific products take, our cure time guide covers what to expect week by week.
Which Paint and Sheen Work Best for Cabinet Interiors
The paint you choose sets the timeline for the whole project, not just the finish quality.
- Alkyd or hybrid enamel self-levels beautifully and dries to a hard, furniture-grade finish, but it takes the longest to fully cure. Good if you’re patient and not rushing to restock the pantry.
- Urethane enamel recoats faster and cures into one of the hardest films available, which suits a kitchen you can’t take offline for weeks.
- Standard cabinet enamels are the budget middle ground. You give up some self-leveling and hardness, but you save money and time.
Sheen matters as much as the product name. Semi-gloss or satin wipes clean and hides brush marks better than flat paint, so stick with one of those for anything that gets touched daily. Save high-gloss for sprayed finishes, since brush and roller texture shows up badly under a glossy sheen.
Contractors and independent paint tests point to a consistent trade-off: the self-leveling alkyd enamels deliver the smoothest look but ask for the most patience, while urethane enamels sacrifice a little of that glass-smooth finish for a faster path back to a working kitchen.
Primer pairing follows the substrate, not personal preference. Raw wood wants a basic wood primer, MDF wants something that seals the edges so they don’t swell, laminate and factory-sealed finishes need a true bonding primer, and skipping that step on laminate is the fastest way to watch paint lift off in sheets within a year. Our durable cabinet paint guide walks through product picks by cabinet material in more depth.
Pro Tips and Mistakes That Ruin Cabinet Paint Jobs
Most cabinet paint disasters trace back to one of a handful of repeat mistakes.
- Spraying inside a closed box without proper containment, which sends overspray onto walls, floors, and everything nearby
- Reassembling doors and shelves before the paint has actually cured, not just dried to the touch
- Skipping the scuff-sand step on factory finishes because the surface “looks fine”
- Overloading the roller, which causes runs and drips in the corners of the box
- Rushing the tape job on back-panel-only projects, leaving a visible ragged line
Spraying does produce a smoother film than brush and roller, and pros use it constantly. The difference is containment: a sprayed booth or plastic enclosure keeps overspray from landing on cabinets you’re not painting, something most home setups can’t replicate. For a DIY interior, brush and mini roller stay the safer call.
Pro Tip: If you spot a dust nib or a small run after the paint has dried, don’t repaint the whole panel. Sand it flat with fine grit, wipe with a tack cloth, and touch up just that spot with a small brush.
Protecting Your Kitchen While You Paint
An open kitchen with wet paint drying is a magnet for dust, pet hair, and stray fingerprints. Lay drop cloths across the floor and counters before you remove a single door, not after you’ve already started sanding.
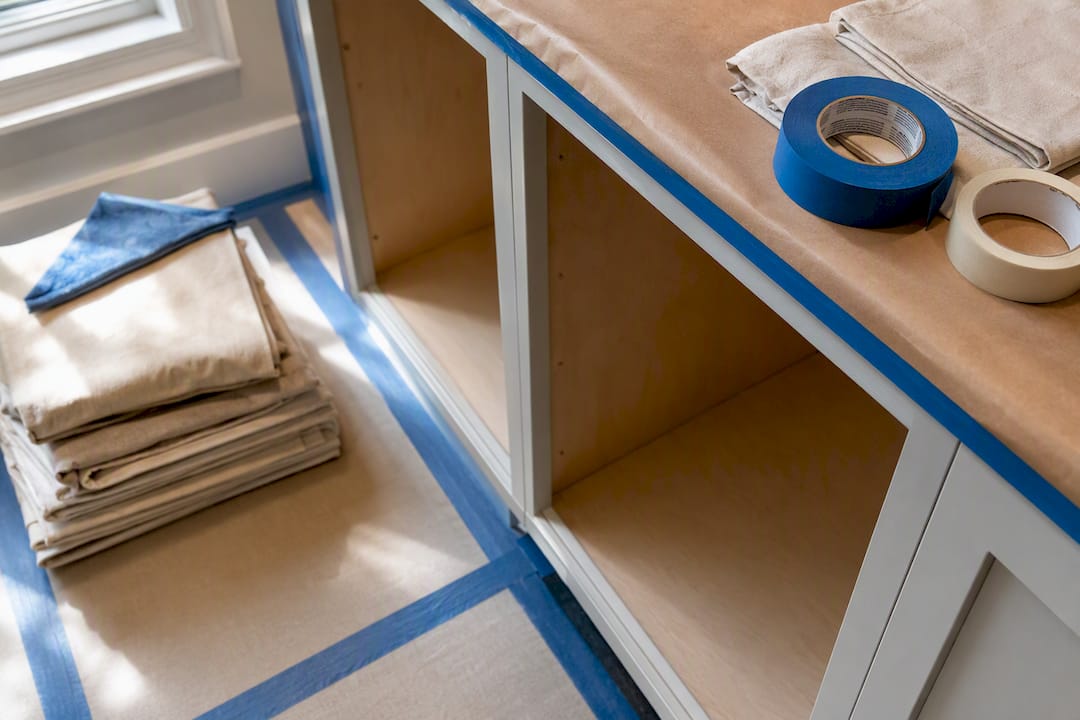
Tape off the face frame and the wall around each cabinet opening, since a roller loaded with primer will bump the frame more often than you’d think. Painter’s tape holds fine for a day or two, but pull it before the paint fully sets, or you risk peeling up your own fresh finish along with the tape.
Inside the box itself, cover the top and bottom panels you’re not painting yet with cardboard or extra drop cloth scraps. This matters most when you’re doing one shelf or panel at a time and moving around the kitchen. A stray brush stroke on an unmasked surface is easy to avoid and annoying to fix.
Ventilation doubles as protection for your kitchen and your lungs. Open a window, run a box fan pointed outward, and keep the range hood on if it vents outside. Fumes from alkyd and urethane enamels linger, and they settle into fabric, upholstery, and anything porous nearby, so close doors to adjoining rooms while you work.
Finally, keep pets and kids out of the kitchen entirely during application and for the first day of drying. Wet paint attracts curious hands and wagging tails faster than almost anything else in a house, and a knocked-over paint tray undoes hours of careful masking in seconds.
Painting Cabinets With Mixed Materials
Kitchens rarely have one material throughout. Original cabinet boxes might be solid wood, while a previous owner swapped in laminate doors, or a builder-grade kitchen mixes MDF panels with real wood face frames. Treat each material on its own terms rather than assuming one primer and one paint schedule works everywhere.
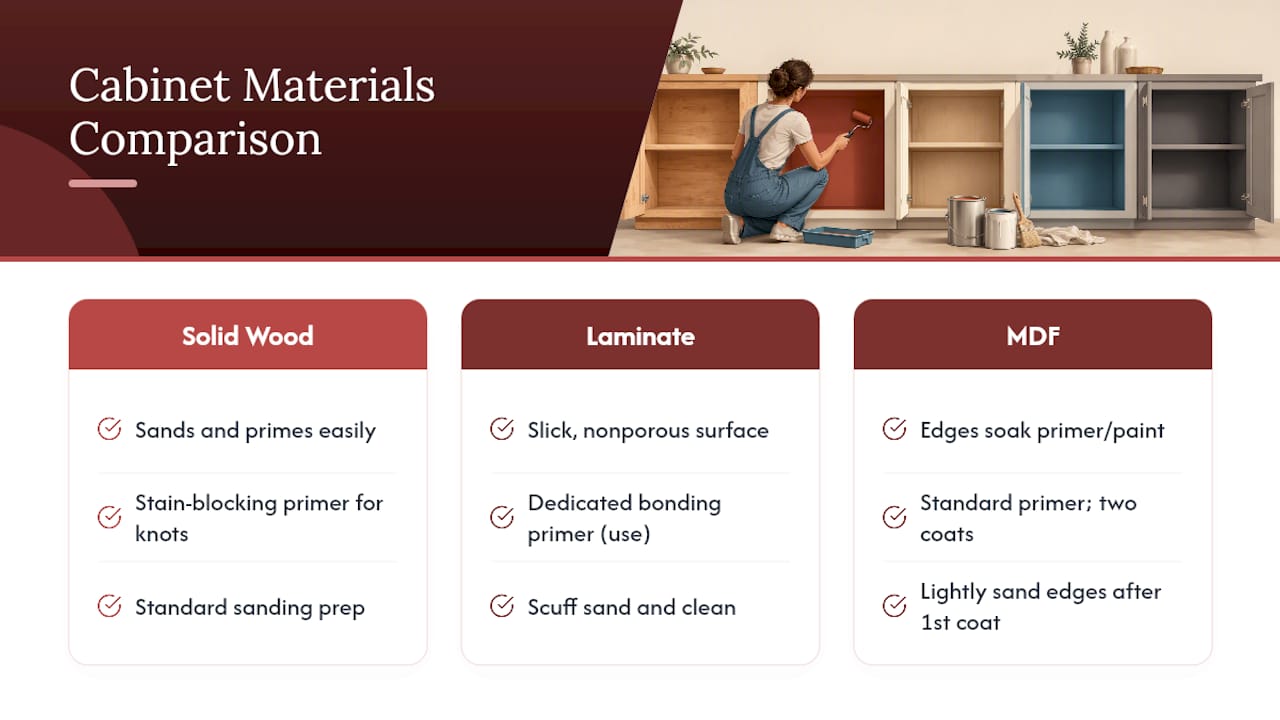
Solid wood takes standard sanding and primer without much fuss. Watch for knots and grain patterns that bleed tannins through light paint colors, and use a stain-blocking primer on those spots specifically rather than the whole cabinet.
Laminate is the material that trips people up. It’s a slick, nonporous surface, and standard primer beads up and slides right off it. A dedicated bonding primer is close to mandatory here, since skipping it is one of the most common reasons painted laminate peels within the first year.
MDF (medium-density fiberboard) behaves differently again. The edges soak up primer and paint like a sponge, which can leave them looking rough or fuzzy compared to the flat faces. A light sanding pass on just the edges after the first primer coat, followed by a second coat, usually evens things out.
If your kitchen has all three, work through each material with its own matched primer before you ever open the finish coat. Mixing schedules, priming everything the same way regardless of substrate, is how you end up with some doors that look flawless and others that chip within months. A sanding guide built around cabinet refinishing breaks down grit selection by material if you want more specifics before you start.
Putting Cabinets Back Together the Right Way
Reassembly is where patience pays off or gets punished. Confirm the paint has hit its full cure window, not just its recoat time, before hardware goes back on. Touching or hanging anything against a paint film that’s cured on the surface but still soft underneath is exactly how blocking happens.
Start with hinges. Attach them to the doors first on a clean, flat surface, then hang the doors on the boxes rather than trying to align hinge and door at the same time while holding everything up. Use your labels from the removal step, since doors and drawers are almost never perfectly interchangeable even when they look identical.
Rehang doors slightly loose at first, check the gaps against the face frame, then snug the screws once everything lines up evenly. Shelves go back in after doors, since it’s easier to adjust shelf pins without a door swinging in your way.
Give hardware, pulls, and knobs one more pass before you attach them permanently. Fresh paint sometimes films over the screw holes slightly, and forcing a screw through can crack the surrounding paint. A quick check with an awl or the tip of a screwdriver clears that without drama.
Load the cabinets back up gradually over the following week rather than all at once, especially with heavier items like stacked plates or cast iron. Full cure means the paint can handle daily use, but easing into it for the first several days gives the finish a buffer while it settles completely.
Keeping Painted Cabinet Interiors Looking Good for Years
A painted interior needs gentler handling than the raw wood or laminate it replaced, at least for the first month. After that, care is mostly about consistency rather than effort.
Wipe spills and grease immediately rather than letting them sit, since enamel finishes resist staining far better when grime doesn’t get the chance to bake in over weeks. A damp microfiber cloth with a mild dish soap handles almost everything; skip abrasive scrubbers, which dull sheen and create fine scratches over time.
Avoid stacking heavy cookware directly against freshly painted walls inside the box for at least a few weeks past your final coat, even after the manufacturer’s stated cure window. Add a thin shelf liner or felt pads under heavier items as a buffer, which protects the finish without hiding the color underneath.
Check hinges and hardware every few months for grease buildup, since kitchen air carries more airborne oil than people assume, and it settles fastest right around hinge points and handles. A quick wipe there keeps both the hardware and the surrounding paint looking fresh.
If a chip or scratch does show up, don’t panic and repaint the whole cabinet. Lightly sand the spot, prime if you hit bare material, and touch up with leftover paint from the original batch. Keeping a labeled jar of your exact cabinet paint on a shelf somewhere makes this a five-minute fix instead of a weekend project.
When It Makes More Sense to Call a Pro
DIY makes sense for a single cabinet, a back panel accent, or a small kitchen where a mismatched coat won’t stand out. Full-kitchen jobs are a different calculation. Cabinet Refinishing Denver’s factory-finish process uses spray equipment and multiple protective coats to get a uniform, furniture-grade result across every door and interior at once, something brush and roller work struggles to match at scale. Projects typically run a few days start to finish, with refinishing costs generally landing well under the range full replacement usually costs. If your timeline is tight or the whole kitchen needs to match, that’s the point where hiring out beats grinding through it yourself.
Get a Factory-Finish Interior Without the DIY Guesswork
If reading through cure times, primer pairings, and blocking risks made a full-kitchen repaint feel like more than a weekend can handle, that instinct is correct. Cabinetsrefinishing exists for exactly that gap. Instead of juggling brush marks, dust nibs, and a month-long cure window on your own, our factory-finish process sprays every door, drawer, and interior panel with the same even film in a controlled setting, then wraps the whole job in 3 to 5 days.

This fits Denver-area homeowners who want the interiors and exteriors to match perfectly, who have a full kitchen rather than one accent cabinet, or who simply don’t want their kitchen out of commission for weeks while paint cures in stages. It also suits anyone who read the blocking warnings above and decided that risk isn’t worth taking on a $40,000 kitchen’s worth of cabinets. If that sounds like your situation, get a quote on cabinet refinishing and find out what a factory finish costs for your kitchen specifically.
The Honest Trade-Off Nobody Tells You Upfront
Every cabinet painting guide, including this one, makes the process sound more linear than it actually feels at 9 PM on a Tuesday with primer drying faster than you can roll it. The steps are correct. What gets glossed over is how much the timeline depends on things you can’t fully control: humidity swings that stretch cure time past the can’s label, a laminate surface that turns out to need two primer coats instead of one, a kitchen you can’t function in for longer than planned.
That’s not a reason to skip painting interiors. Stained, dated cabinet boxes drag down a kitchen’s whole feel, and a clean coat of the right enamel fixes that for a fraction of replacement cost. But the DIYers who end up disappointed are almost never the ones who chose the wrong paint. They’re the ones who underestimated the clock, reassembled on day three instead of waiting the full cure, and ended up with a shelf welded to a cabinet floor.
If you’ve got the patience for that clock, brush and roller will get you a genuinely good result. If your schedule doesn’t bend that far, or your kitchen has enough mixed materials and finishes that DIY prep starts feeling like a second job, that’s not a failure of effort. It’s just the point where a factory-spray process earns its cost. Painting cabinet interiors rewards patience more than skill, and knowing which one you’re actually short on is the real decision here.
— Jesse
Sources
- How to Paint Inside Kitchen Cabinets in 7 steps – Benjamin Moore
- How to Paint the Inside of Your Cabinets | Sherwin-Williams
- How to Paint Inside Cabinets | TheHomeFixes
- Benjamin Moore Advance paint review — cure time and performance
- Best Paint for Kitchen Cabinets in 2026 — CompositePaint
Recommended
- Homeowners: Paint Cabinets After Countertops, or Get a Factory Finish in 3–5 Days
- Avoid Touch Ups, Homeowners: Paint Cabinets Before or After Backsplash?
- How to Avoid Brush Marks When Painting Cabinets: A Pro’s Guide
- Common Kitchen Cabinet Painting Mistakes: How to Avoid a Remodeling Disaster in 2026