
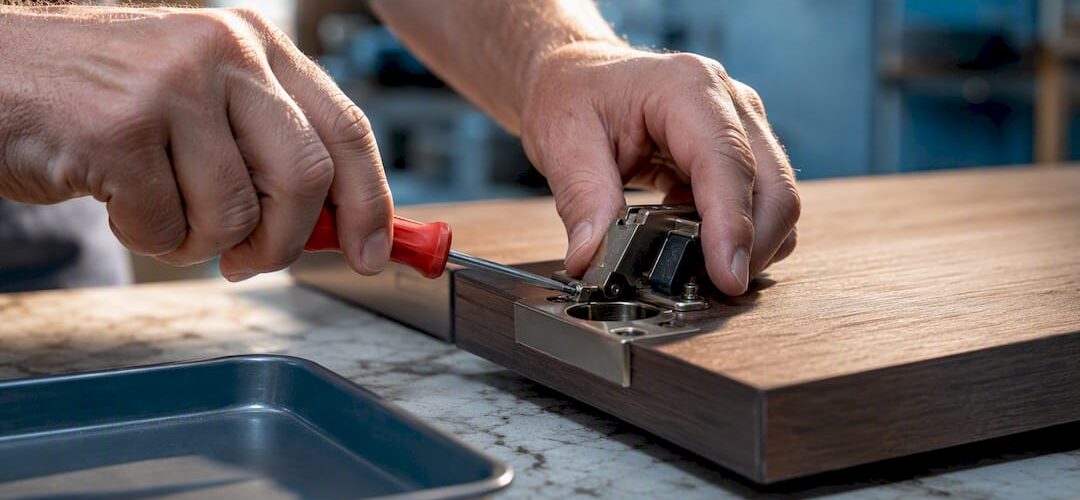
Don’t paint soft-close hinge mechanisms in place. Remove them or mask them carefully, and if you’re already refinishing your cabinets, use that window to install or upgrade to soft-close hinges while doors are off. Doing hinge work during refinishing protects your new finish, saves labor, and gets you cleanly aligned doors without a second round of handling later.
TL;DR:
- Removing hinges before finishing is the safest way to prevent finish gumming and ensure proper hinge alignment during cabinet refinishing.
- Most cabinet doors with a 35mm round cup hole can accept soft-close hinges without modification, while T-slot doors usually require replacing the door.
- When painting hinges, remove them completely for best results, and mask or protect damper and pivot points if hinges remain mounted during finishing.
- Correct installation of soft-close hinges involves precise placement, using a 35mm Forstner bit, and adjusting depth, side-to-side, and height in that order.
- Lubricate and clean dampers regularly to fix common soft-close issues, but for extensive upgrades or factory-grade finishes, hiring a professional is recommended.
Table of Contents
- Should You Paint Soft-Close Hinges or Remove and Protect Them?
- Why Upgrade or Add Soft-Close Hinges During a Refinishing Job?
- How Do You Know if Your Doors Accept Soft-Close Hardware?
- Step-by-Step: Remove, Clean, Protect, and Paint Hinge Hardware
- How to Install or Retrofit Soft-Close Hinges and Adjust Them
- Troubleshooting Common Soft-Close Problems and Quick Fixes
- Tools, Supplies, and Safe Lubricants to Use
- Why Professionals Pair Hinge Work With Refinishing
- When to Hire a Cabinet Refinishing Denver Professional
- Sources
Should You Paint Soft-Close Hinges or Remove and Protect Them?
Paint and hinge mechanisms don’t mix well. Spray or brush finish that gets into the pivot points or damper housing can gum up the moving parts, change how the hinge seats, or throw off the soft-close action entirely. Removing hinges before finishing is almost always the safer call.
If you want the hinge faces themselves painted to match a new cabinet color, take them off the door completely and paint them separately with a metal primer and a compatible topcoat. That keeps overspray away from the damper and pivot mechanism.
Masking can work, but only on hinges you’re leaving mounted and only if you protect every moving joint:
- Cover the damper housing and pivot arm with tape before spraying, not just the visible hinge plate.
- Test the soft-close action after masking to confirm nothing is bound up.
- Remove masking as soon as the finish sets to avoid tape residue bonding to the metal.
When in doubt, pull the hardware. It’s faster than fixing a gummed-up hinge later.
Why Upgrade or Add Soft-Close Hinges During a Refinishing Job?
Refinishing gives you a rare window where every door and drawer is already off the box. That’s the moment to deal with hinges, not after everything’s reassembled and freshly painted.
- Installation is faster because you’re not working around a finished surface you have to protect from every drill bit and screwdriver.
- You can standardize hinge finish and hardware brand across the whole kitchen instead of mixing whatever came with the cabinets.
- Reveals and door alignment get set once, correctly, instead of adjusted twice.
- Contractors handling both jobs at once avoid the extra risk of chipping or scratching a cured finish when hardware goes back on.
Adding soft-close hinges while cabinets are already being painted is genuinely efficient. Labor overlaps, and the finish avoids extra handling that risks damage. It’s the reason most experienced painters bring up hinge upgrades before they even start prepping doors.
How Do You Know if Your Doors Accept Soft-Close Hardware?
Not every cabinet door can take a soft-close hinge without modification. Check the hardware before you buy anything.
- Look for a round cup hole, roughly 35mm across, bored into the back of the door. This is the European or concealed-hinge style, and it almost always retrofits to soft-close without touching the door itself.
- Look for a narrow slot cut into the door edge instead. That’s a T-slot or “wraparound” hinge setup, and it usually can’t accept a standard soft-close cup hinge without replacing the door.
- Check whether your current hinge has a separate, snap-in damper module on the hinge arm. Some concealed hinges, including several Blum lines, use a replaceable clip-on damper that adds soft-close function without swapping the whole hinge.
Most cabinets with modern concealed hinges upgrade easily. T-slot doors are the exception, and they typically mean new doors, not just new hardware.
Step-by-Step: Remove, Clean, Protect, and Paint Hinge Hardware
Work methodically here. Skipping the labeling step is the single most common reason DIYers end up with doors on the wrong cabinets.
- Photograph every door in place, then label each door and its matching hinge location with masking tape and a marker before removing anything.
- Remove the hinges and set screws aside in labeled bags, one per door, so nothing gets mixed up during the project.
- Clean hinge bodies with compressed air first, blowing out dust and debris from the pivot and damper areas.
- Follow with a soft brush and a mild degreaser, never a harsh solvent that can eat into rubber seals or plastic damper housings.
- If you’re painting the hinge itself, apply a metal primer, let it cure, then topcoat, and give the paint full cure time before reinstalling. Rushing this step is how you end up with paint transferring to the cabinet box on day one.
- If you’re leaving hinges mounted during finishing, mask the damper and pivot points completely and check for overspray before it dries.
Pro Tip: Keep every screw with its matching hinge bag, even if they look identical. Soft-close hinges are surprisingly sensitive to screw length, and grabbing the wrong one can strip out a fresh cabinet box.
Refinishing your doors at the same time? Our sanding guide for cabinet doors walks through the prep work that pairs directly with this hinge removal sequence.
How to Install or Retrofit Soft-Close Hinges and Adjust Them
Mounting a new soft-close hinge is straightforward, but the placement matters more than most DIYers expect. A contractor troubleshooting log found that most soft-close failures trace back to installation errors, not defective hardware.
- Prefer screw-in hinge cups over press-in types. They hold up far better over years of daily use.
- If you’re drilling new cup holes, use a 35mm Forstner bit and clamp the door to a sacrificial backing board to stop tear-out on the back face.
- Center the cup at the distance recommended by the hinge manufacturer for most European-style systems. A typical spacing avoids premature wear and misalignment without guessing the exact measurement.
- For a low-cost retrofit, check whether your existing hinge accepts a clip-on soft-close damper before buying full replacement hinges.
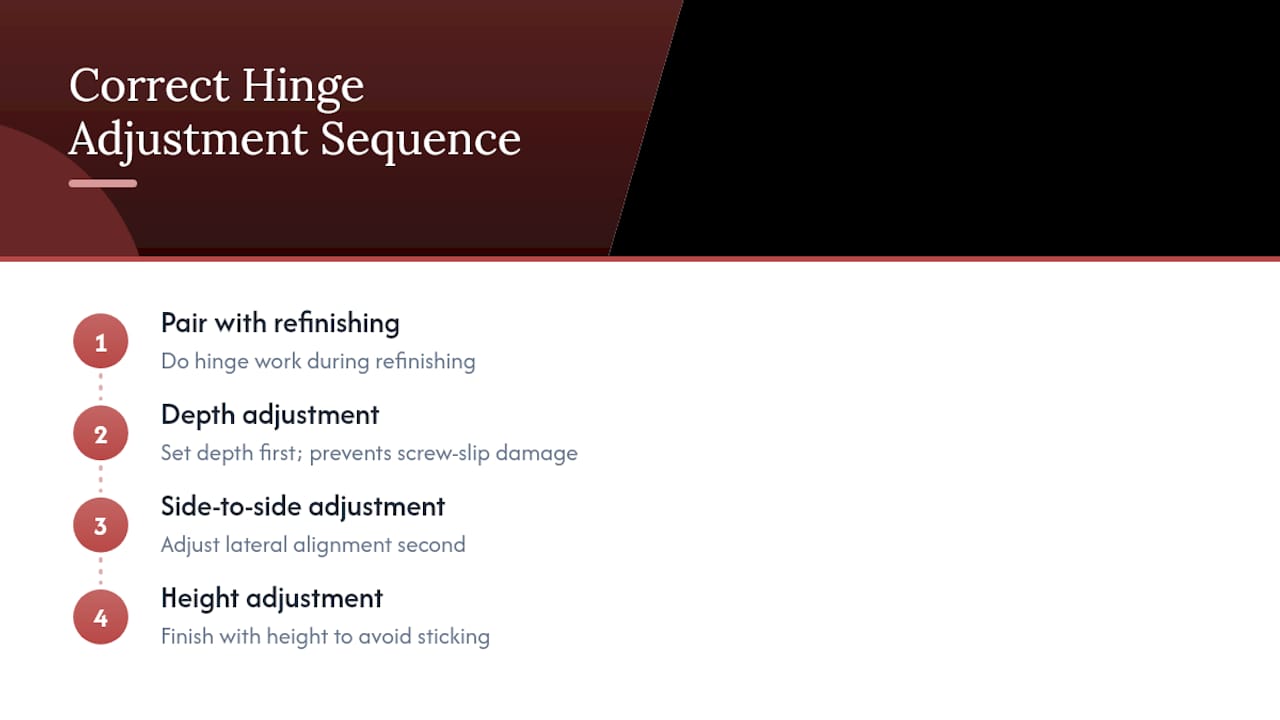
Once mounted, adjust in this order: depth first, then side-to-side, then up-and-down. Test the door swing and close after each adjustment rather than tweaking all three screws at once.
Pro Tip: Add a third hinge on any door wider than about 24 inches or noticeably heavy. Two hinges on a big panel is one of the most common reasons soft-close mechanisms wear out early.
Troubleshooting Common Soft-Close Problems and Quick Fixes
Most soft-close complaints are cheap fixes, not hinge failures. Work through this checklist before you order replacement parts.
- Check the soft-close toggle or module position first, as these switches can become disengaged accidentally and cause soft-close issues.
- Tighten every mounting screw. Loose screws are behind more “broken” hinges than any other single cause.
- Clean out debris around the damper and apply a silicone-based lubricant to restore smooth action.
- Look for a gray, oily film on the hinge arm. That’s usually a sign of a hydraulic leak in the damper, and lubrication won’t fix it.
- If the damping is gone and the module isn’t a replaceable type, plan on a full hinge swap rather than repeated cleaning attempts.
A cleaning and lubrication pass solves the majority of “stiff hinge” complaints, according to Home Depot’s cabinetry advice. One contractor’s long-term service records put installation error, not hinge quality, behind 99% of the soft-close failures they’ve seen in the field. That’s worth remembering before you assume your hardware is simply worn out.
Tools, Supplies, and Safe Lubricants to Use
You don’t need a shop full of specialty gear for this project, but a few items make the difference between a clean job and a frustrating one.
- Screwdrivers (Phillips and flathead), a drill, and a 35mm Forstner bit for new cup holes.
- A can of compressed air and soft-bristle brushes for cleaning hinge mechanisms.
- Masking tape, metal primer, and metal-compatible paint if you’re finishing hinges off the door.
- A silicone-based lubricant for the damper and pivot points. Avoid petroleum-based solvents, which can degrade rubber seals over time.
- Gloves, eye protection, and a soft surface or blanket to set freshly refinished doors on while you work.
Why Professionals Pair Hinge Work With Refinishing
Homeowners often treat hinges as an afterthought, something to deal with once the paint is dry. That backward thinking costs time and money.
When a professional crew handles both jobs together, they’re not removing doors twice or risking a fresh coat with a screwdriver slip. Real refinishing projects, including documented contractor work upgrading old hinges to concealed soft-close during a finish job, show why this sequencing matters: alignment gets set once, correctly, and the finish never gets touched by hardware again.
The adjustment screws are unforgiving if you rush them. Depth first, then side-to-side, then height. Skip that order and you’ll chase a sticking door for weeks instead of minutes.
— Jesse
When to Hire a Cabinet Refinishing Denver Professional
Some jobs are worth doing yourself. A single stiff hinge that needs a squirt of silicone lubricant doesn’t need a contractor. But if you’ve got a full kitchen of doors, T-slot hinges that need conversion, or a factory-grade finish you don’t want to risk, hiring a pro changes the outcome.
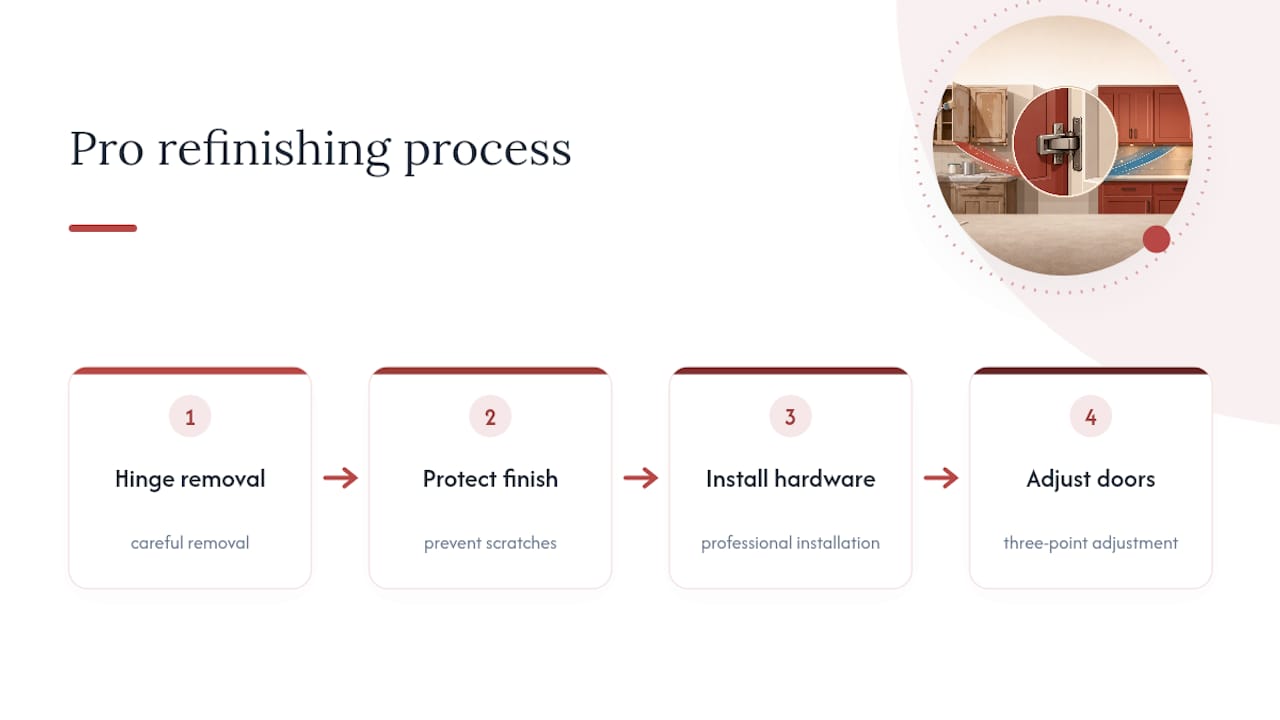
Professional cabinet refinishing services can handle the whole sequence: careful hinge removal, protected finish work, professional installation, and precise three-point adjustment on every door. That coordination is exactly what keeps a fresh coat from getting scratched during reassembly, and it’s the difference between a kitchen that looks factory-finished and one that shows every fingerprint of a rushed weekend project. If your project covers more than a handful of doors or you want soft-close hardware added without redoing your own installation twice, get a quote for cabinet refinishing in Denver and find out what a coordinated hinge-and-finish job actually costs for your kitchen.
Sources
The troubleshooting steps and hinge-spec guidance in this article draw on contractor field data on soft-close failure causes, retrofit instructions for modular Blum-style dampers, and practical maintenance advice from Home Depot’s cabinetry blog. For readers weighing new doors alongside hinge upgrades, One Day Doors & Closets offers a useful comparison point on door replacement scope and cost.
- Why Your Cabinet Soft-Close Hinges Keep Breaking (And the Fix) – The Cabinet Craftsmen LLC
- Rapidrepair
- Can You Add Soft-Close Hinges To Old Cabinets? – Brush & Roll Painting
- Soft-close cabinet hinges – HomeDecorators Cabinetry (Home Depot blog)