
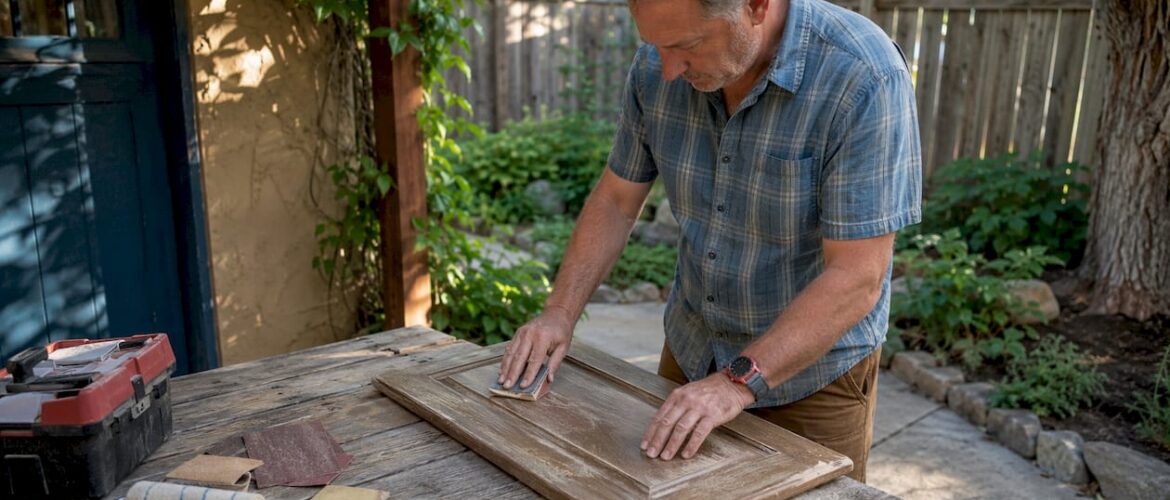
Yes, you can refinish factory-finish cabinets and get results that look — and perform — close to what came out of the factory. The key word is close. With proper prep, the right primer, and a durable topcoat chemistry, many homeowners achieve a finish that holds up for 3–5 years before touch-ups are needed, while a catalyzed factory finish can last 15–20 years. Start right now by running your fingernail across an inconspicuous spot: if the existing finish flakes or lifts, you have a structural problem that changes everything.
Quick decision checklist — do this before buying a single can of primer:
- Inspect every door and frame for peeling, bubbling, or large chips. Small chips are fine; widespread peeling is not.
- Dampen a rag with rubbing alcohol and rub a hidden spot firmly. If the finish dissolves or lifts, it’s a solvent-sensitive lacquer that needs special handling.
- Check every edge and corner for veneer delamination or lifting. Delaminated veneer cannot be primed over.
- Press a strip of blue painter’s tape firmly onto a sanded spot, then pull it fast. If finish comes with it, adhesion is compromised and you need a stronger bonding strategy.
DIY is reasonable when: the finish is structurally sound, damage is limited to small chips, and the substrate is solid wood, MDF, or a cured factory paint that sands cleanly without gumming up your paper.
Stop and call a pro when: bubbling or peeling covers large areas, veneers are lifting at edges, or you need catalyzed two-part systems but cannot safely spray and cure them in your space.
Table of Contents
- What does the full refinishing workflow look like from start to finish?
- How should you prepare surfaces so new coatings actually stick?
- Which primers actually bond to factory finishes?
- Which topcoat chemistry gets you closest to factory durability?
- Spraying vs. brushing: what application method should you use?
- How do you sand between coats for a truly smooth surface?
- Should you repair chips in place or strip the whole finish?
- What does a realistic timeline and budget look like for this project?
- How do you maintain a refinished cabinet finish for the long term?
- When should you hire a professional refinisher instead of doing it yourself?
- Key Takeaways
- The honest case for knowing your limits
- Ready for a factory finish without the DIY risk?
- Useful sources and technical references
What does the full refinishing workflow look like from start to finish?
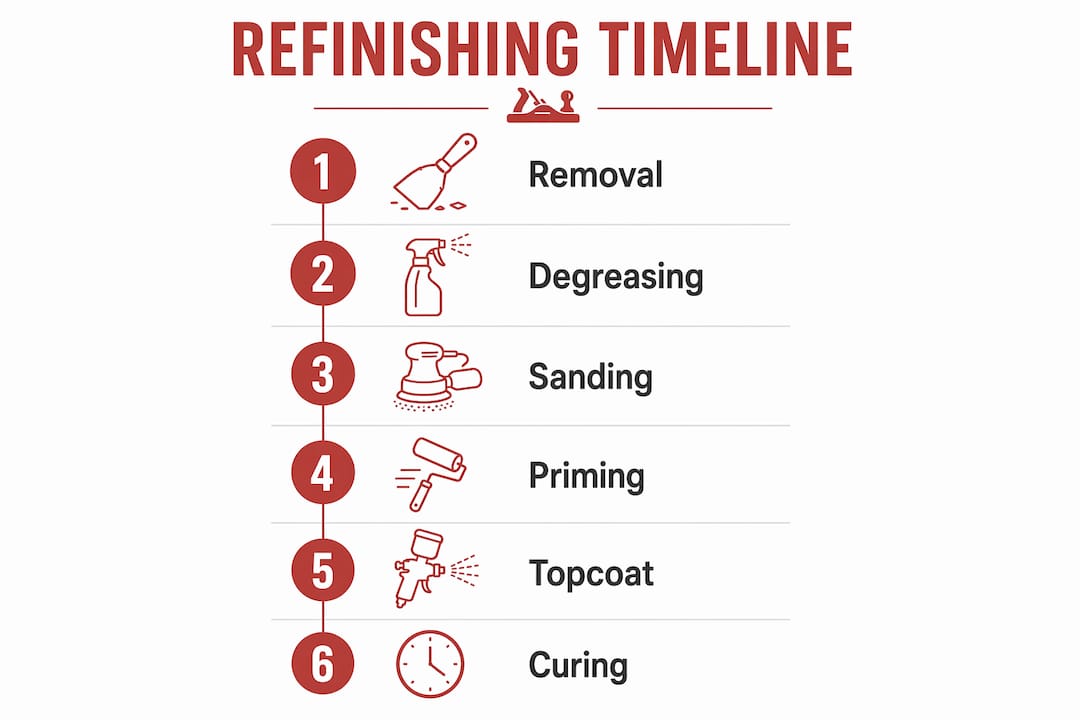
Refinishing old cabinets to a factory finish is an ordered process. Skipping or rushing any phase is the single most common reason a DIY project ends up looking like a DIY project.
The phases in order
- Inspect and photograph every door, drawer front, and frame. Note damage locations.
- Remove doors and hardware. Label each door with a numbered piece of tape on the back and photograph the hinge positions before pulling screws.
- Degrease all surfaces with a TSP substitute or dedicated cabinet cleaner. Rinse with clean water and let dry fully — at least two hours.
- Degloss and scuff-sand with 180–220 grit. Wipe with a tack cloth.
- Repair chips and fills. Apply wood filler or grain filler, let cure per the manufacturer’s instructions, then sand flush.
- Apply bonding primer in one to two thin coats. Sand lightly with 220–320 grit between coats.
- Spray or hand-apply topcoats in multiple thin passes. Allow proper flash-off time between each coat (check the product’s technical data sheet).
- Sand/level between topcoats with 320–400 grit, or wet-sand with 600 grit for a glassier result.
- Apply final topcoat. Do not sand after the last coat unless you plan to polish.
- Cure fully before reinstalling. Most waterborne enamels reach handling hardness in 24–48 hours but need 2–4 weeks for full chemical resistance.
- Reinstall doors and hardware. Adjust hinges, check alignment, and protect fresh finish from cleaning products for at least 30 days.
Tools and materials: rent vs. buy
For a typical 10–15 door kitchen, renting an HVLP sprayer from a home improvement store makes more sense than buying one. HVLP sprayers can be rented and, with practice panels, produce a far smoother surface than brushing. Beyond the sprayer, buy rather than rent: a random orbital sander, bonding primer, your chosen topcoat, tack cloths, a quality respirator rated for organic vapors, and plastic sheeting for containment.
Realistic timing for a 10–15 door kitchen
| Phase | Realistic time |
|---|---|
| Removal, labeling, photography | 2–4 hours |
| Degreasing and drying | 3–5 hours (including dry time) |
| Scuff-sanding all surfaces | 4–6 hours |
| Repairs and filler cure | 2–4 hours work + overnight cure |
| Priming (2 coats + sanding) | 4–6 hours work + dry time |
| Topcoats (3 coats + intercoat sanding) | 6–10 hours work spread over 2–3 days |
| Final cure before reinstall | 24–48 hours minimum |
| Reinstallation | 3–5 hours |
Total elapsed time: 4–7 days minimum. The chemistry forces multi-day waits, not the labor.
Pro Tip: Label every door with a numbered piece of tape on the hinge side and snap a photo of each cabinet opening before removal. Reinstallation goes twice as fast, and you’ll avoid the frustrating discovery that door #7 doesn’t quite fit opening #8.
How should you prepare surfaces so new coatings actually stick?
Surface preparation is where factory-like results are won or lost. A structurally sound existing finish that has been properly degreased, deglossed, and scuff-sanded will bond reliably to a new coating. One that was wiped down and primed the same afternoon often peels within months.
Degreasing protocols
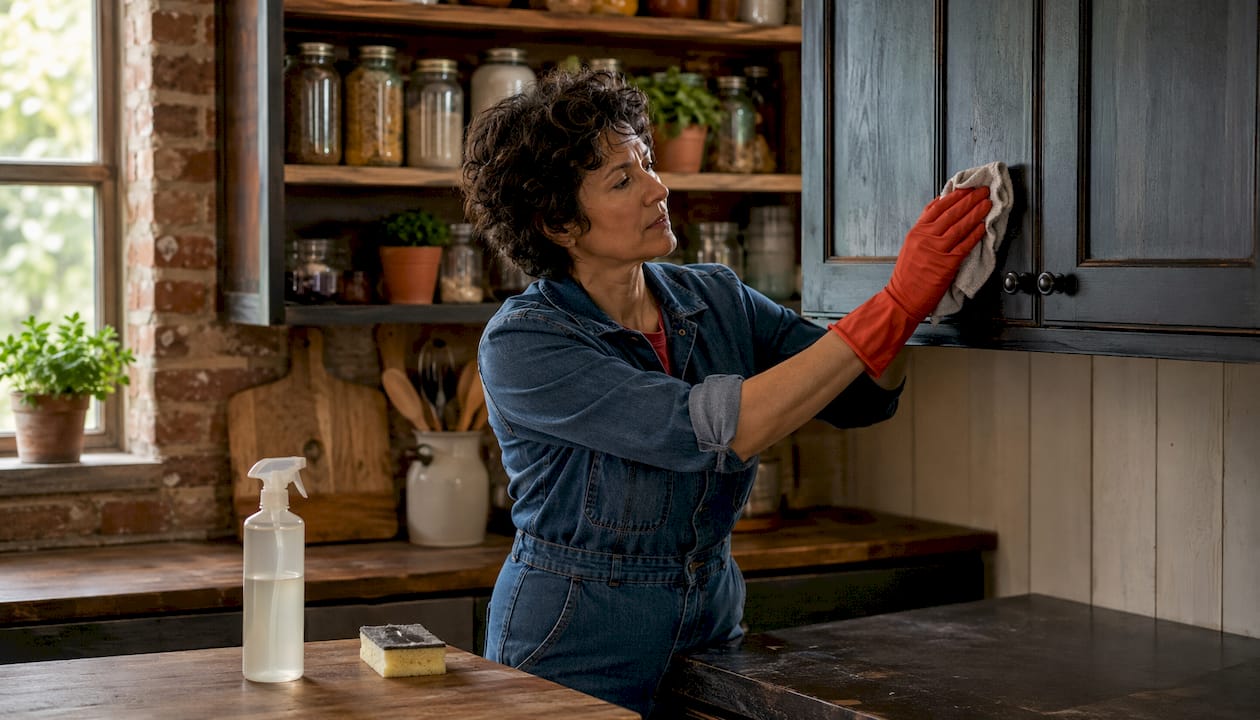
Kitchen cabinets accumulate cooking grease, silicone from furniture polishes, and hand oils — all of which prevent adhesion. TSP (trisodium phosphate) substitutes like Dirtex or Krud Kutter work well and are safer than straight TSP. Apply with a sponge, scrub, rinse with clean water, and let the surface dry completely. If you’ve ever used a spray-on furniture polish on these cabinets, wipe them down with a naphtha-dampened rag first. Silicone is invisible and will cause fisheye in your finish if you miss it.
When to degloss vs. strip
Scuff-sanding is enough when the existing finish is intact, well-bonded, and shows no peeling. Run the tape test described in the opening checklist. If the finish passes, 180–220 grit scuffing creates the mechanical tooth new coatings need. Chemical stripping is reserved for finishes that are failing across large areas, or for very old cabinets where you suspect lead paint (more on that in the repair section).
Sanding grit guide by substrate
| Surface | Starting grit | Final prep grit | Notes |
|---|---|---|---|
| Solid wood (painted) | 120–150 | 180–220 | Sand with grain; avoid cross-grain scratches |
| MDF door cores | 150 | 220 | Light pressure only; MDF raises with moisture |
| Veneer faces | 180 | 220 | Never go below 150; veneer is thin |
| Veneer edges | 220 by hand | 320 by hand | Machine sanding here risks burning through |
| Thermofoil/laminate | 220 (scuff only) | 320 | Goal is tooth, not material removal |
Dust control and safety
Sanding generates fine particles that settle into wet finish and ruin a smooth surface. Use a random orbital sander with a HEPA-rated dust bag or hook it to a shop vac with a HEPA filter. Wear an N95 at minimum for sanding dust; switch to a half-face respirator with organic vapor cartridges when you move to primers and topcoats. Seal off the work area with plastic sheeting so dust from adjacent rooms can’t drift in.
What to avoid: sanding through veneer at edges (it happens fast with a machine), using aggressive chemical strippers on veneered doors without a small test patch first, and over-abrading a factory topcoat to the point where you’re cutting into the substrate.
Pro Tip: After your final sanding pass, wipe every surface with a tack cloth, then wait 20 minutes and wipe again. Dust you missed on the first pass will have settled by then. This two-pass tack is one of the simplest ways to eliminate dust nibs in your finish.
For a deeper look at sanding technique, Cabinetsrefinishing’s DIY sanding success guide walks through grit selection and common mistakes in detail.
Which primers actually bond to factory finishes?
Not every primer bonds reliably to the slick, cured surfaces that factory finishes produce. Choosing the wrong one is the most expensive mistake in cabinet refinishing — you won’t know it failed until the topcoat starts peeling six months later.
Primer types that work
- High-solids bonding primers (waterborne or solvent-based): designed specifically for previously painted or coated surfaces. Brands like Zinsser Bulls Eye 1-2-3 or Stix Waterborne Bonding Primer work well on most factory-painted surfaces.
- Shellac-based primers (Zinsser BIN): excellent adhesion to nearly any substrate, outstanding stain blocking, and they dry fast. The tradeoff is strong alcohol fumes — ventilation is non-negotiable.
- Specialty adhesion primers for plastics and thermofoil: if your doors are thermofoil-wrapped or laminate, use a primer explicitly rated for plastics. Standard bonding primers sometimes fail on these surfaces.
- Two-component (2K) primer systems: the most durable option, used by professional shops. They require mixing a hardener and have a limited pot life, but the adhesion and hardness they provide are in a different class from single-component products.
Choosing by substrate
- Laminate or thermofoil: plastic-rated adhesion primer, scuffed first with 320 grit
- Painted factory finish (solid wood or MDF): high-solids bonding primer or shellac-based
- Stained or conversion-varnish surface: shellac-based primer to seal tannins and promote adhesion
- MDF door cores: seal the edges with shellac-based primer first (MDF edges absorb heavily), then apply bonding primer to faces
Application tips
Apply primer in thin coats. A heavy first coat sags, obscures routed details, and takes far longer to sand flat. Feather primer carefully into edges and profiles rather than building it up there. Tinting your primer to a mid-tone between the substrate color and your topcoat color improves coverage and reduces the number of topcoats needed.
Always run a small test patch and tape test before committing to the full project. Apply primer to a 6-inch square in a hidden spot, let it cure 24 hours, then pull blue tape fast. Any lift means you need a different primer or more aggressive surface prep.
Pro Tip: Strong-solvent primers — shellac-based and 2K systems — off-gas significantly. Work outdoors or in a garage with cross-ventilation, wear organic vapor respirator cartridges, and keep ignition sources away. Read the product SDS before you open the can, not after.
Which topcoat chemistry gets you closest to factory durability?
Factory finishes are sprayed in a controlled environment using catalyzed two-part chemistries — conversion varnish, post-catalyzed lacquer, or UV-cured acrylic. These systems cross-link chemically as they cure, producing a film that resists grease, steam, and repeated cleaning far better than anything you can roll on from a hardware store shelf. That chemistry difference is the main reason factory-finished cabinets last much longer while site-applied finishes typically need more frequent touch-ups.
For a more detailed breakdown of topcoat options, Cabinetsrefinishing’s guide to durable cabinet paint covers the chemistry in plain language.
The main coating options compared
- Conversion varnish / catalyzed lacquer (2K systems): the closest DIY-accessible match to factory chemistry. Requires a hardener, has a pot life of 4–8 hours after mixing, and needs proper ventilation and a spray setup. Chemical resistance is excellent. Not available at big-box stores — source from a finishing supplier.
- Pre-catalyzed lacquer: a step up from standard lacquer. The catalyst is already blended in at the factory, so there’s no mixing. Dries fast (multiple coats in a day), builds a hard film, and offers good chemical resistance. Solvent-based, so strong fumes require a respirator and ventilation.
- Waterborne cabinet enamel / alkyd-modified enamel: the most DIY-friendly option. Lower VOCs, easier cleanup, and modern formulations (Benjamin Moore Advance, Sherwin-Williams Emerald Urethane) level well and harden to a respectable surface. Chemical resistance is lower than catalyzed systems, but for a homeowner willing to be careful with cleaners, they perform well.
- Standard latex or wall paint: avoid entirely for cabinets. It stays soft, scratches easily, and won’t survive kitchen abuse.
Cure vs. dry time — the distinction that matters most
“Dry to touch” means the solvent has flashed off enough that the surface won’t smear. Full cure — when the film reaches maximum hardness and chemical resistance — takes much longer. For waterborne enamels, that’s typically 2–4 weeks. For catalyzed systems, 7–14 days. Test cure with an isopropyl alcohol spot test: dampen a rag with 91% isopropyl, press it on the surface for 60 seconds, then check for softening or lifting. A fully cured film won’t be affected. If it softens, give it more time before putting dishes back.
Always consult the manufacturer’s technical data sheet (TDS) for your chosen coating. The TDS lists exact dry times, recoat windows, pot life for 2K systems, and recommended film thickness — information that no blog post can substitute for.
Spraying vs. brushing: what application method should you use?
The application method determines surface texture more than almost any other variable. A factory finish is sprayed, and replicating that smoothness by hand is genuinely difficult — but not impossible with the right technique.
Method comparison
- HVLP sprayer (rented or purchased): produces the smoothest result for a DIYer. Atomizes finish into fine droplets with low overspray. Requires thinning most finishes to the right viscosity and practicing on scrap panels first. Rental units from home improvement stores are adequate for most cabinet projects.
- Airless sprayer: faster and better for large volumes, but harder to control on small cabinet surfaces. Higher pressure means more overspray and a greater risk of runs on vertical surfaces. Better suited to experienced users.
- Brush and foam roller with tip-off: a quality synthetic brush or foam roller followed by a light tip-off pass with a fine brush can produce a smooth result on flat faces. Profiles and routed details are harder. Expect some texture — not orange peel, but not glass-smooth either. Using a self-leveling enamel like Benjamin Moore Advance reduces brush marks significantly.
Equipment essentials
- HVLP gun with a 1.3–1.5mm fluid tip for most cabinet finishes
- Compressor rated at 3–4 CFM at 40 PSI (or a turbine HVLP unit)
- Fine-mesh strainer for filtering finish before loading the cup
- Masking tape, plastic sheeting, and drop cloths for containment
- Spray shelter or dedicated spray area with cross-ventilation
Containment matters more than the gun
A clean, dust-free spray environment is the variable most DIYers underestimate. Dust that settles into wet finish creates nibs that require sanding and respraying. Set up in a garage with the door partially open for airflow, dampen the floor to trap dust, and let the space settle for 30 minutes after any sweeping before you spray.
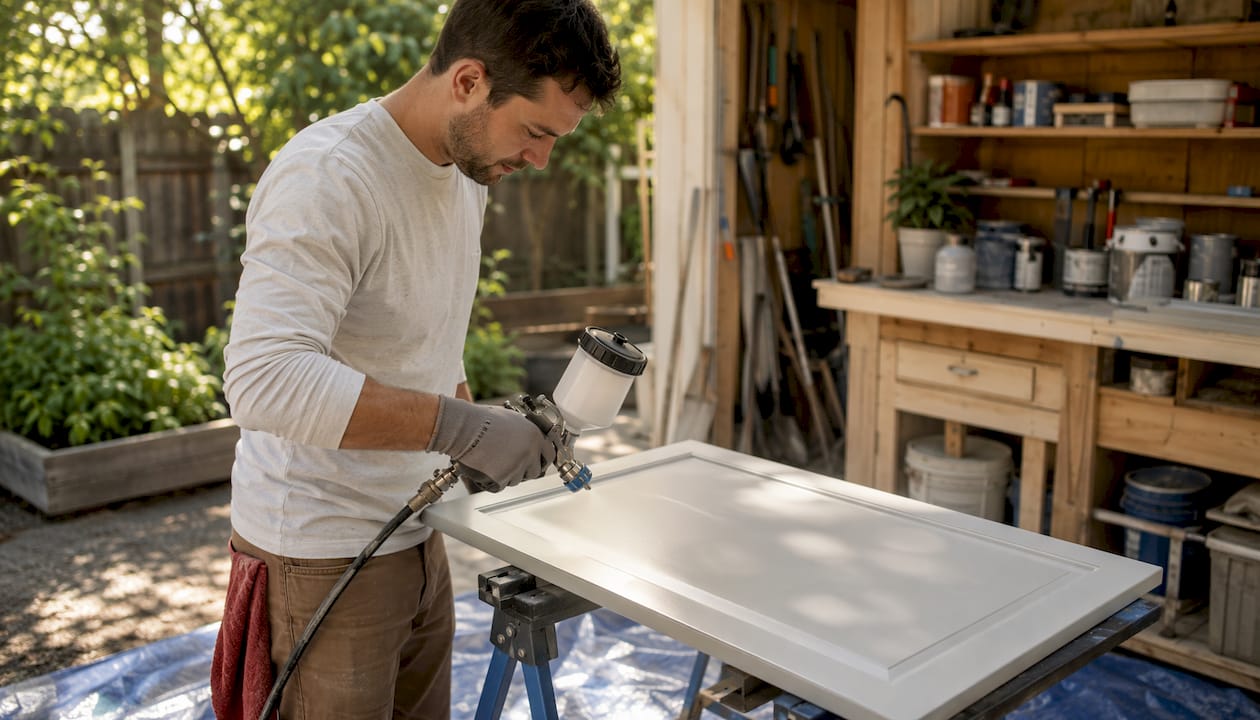
Pro Tip: Before spraying a single cabinet door, spray two or three practice passes on a piece of cardboard or an old door panel. Adjust your distance (10–12 inches from the surface), speed, and overlap until you get an even, wet coat with no dry spots or runs. Five minutes of practice prevents hours of sanding.
How do you sand between coats for a truly smooth surface?
Intercoat sanding is what separates a finish that looks painted from one that looks factory-applied. The goal at each stage is slightly different: early sanding levels the surface, later sanding removes dust nibs, and final wet-sanding (if you go that far) produces a near-glass result.
The sanding rhythm
Start with 120–150 grit on bare wood to remove the old finish and level the surface. Move to 180–220 grit to erase the coarser scratches. Before primer, finish with 320 grit for a smooth, uniform base. After each primer coat, sand with 220–320 grit. Between topcoats, use 320–400 grit — you’re removing dust nibs and creating tooth for the next coat, not leveling the film. For a truly factory-smooth final surface, wet-sand the penultimate topcoat with 600 grit on a sanding block, clean thoroughly, then apply the final coat.
Grit progression by stage
| Stage | Grit | Method | Notes |
|---|---|---|---|
| Bare wood leveling | 120–150 | Random orbital | Sand with grain on solid wood |
| Pre-primer smoothing | 180–220 | Random orbital | Remove 120-grit scratches |
| Final bare-surface prep | 320 | Hand block | Uniform, fine scratch pattern |
| Between primer coats | 220–320 | Hand block or orbital | Light pressure; remove nibs only |
| Between topcoats | 320–400 | Hand block | Scuff, don’t cut through |
| Wet-sand (optional) | 600 | Hand block, wet | Before final topcoat only |
Protecting veneer edges and profiles
Veneer faces are often 1/32 to 1/16 inch thick. A random orbital sander on a veneer edge for ten seconds too long burns through to the substrate. Sand edges and profiles by hand only, with 220 grit wrapped around a small block. On routed profiles, use a folded piece of sandpaper and follow the contour — never a flat block, which bridges the profile and misses the low spots.
Abrasive pads (gray or white Scotch-Brite) are useful for scuffing profiles and curved surfaces between coats without the risk of cutting through. They’re not aggressive enough for leveling, but for light intercoat scuffing on detailed areas, they’re the right tool.
Pro Tip: After wet-sanding, the surface will look dull and hazy. That’s correct. Apply your final topcoat over that hazy surface and the finish will clear and level as it dries. Don’t panic and add more sanding — you’ll undo the work.
Should you repair chips in place or strip the whole finish?
The answer depends on scale and substrate condition, not on how bad a single chip looks.
Decision checklist
- Repair in place when: chips are isolated (fewer than 5–6 spots per door), veneer is fully bonded, edges are tight, and the surrounding finish passes the tape test.
- Strip and refinish when: peeling covers more than 20–30% of a surface, veneer is lifting at edges, or the existing finish is so thick and uneven that sanding it flat would take more time than stripping.
Repair steps for chips and small damage
- Clean and degrease the damaged area thoroughly.
- Sand the chip edges to a feathered, smooth transition with 180 grit.
- Apply a lightweight wood filler or grain filler for deeper gouges; let cure fully per the manufacturer’s instructions.
- Sand flush with 220 grit, then 320 grit.
- Apply bonding primer to the repaired spot, feathering it 2–3 inches beyond the repair.
- Sand primer with 320 grit and apply topcoat in thin passes, blending into the surrounding finish.
For minor surface wear on wood cabinets, a product like Restor-A-Finish applied with fine steel wool can renew the surface without full refinishing — a useful option when the damage is cosmetic and the finish is otherwise sound.
When stripping is required
Chemical stripping is a last resort. It’s messy, time-consuming, and introduces serious safety considerations. If you’re stripping cabinets built before 1978, test for lead paint first with a 3M LeadCheck swab or similar kit before sanding or stripping anything. Lead-containing finishes require specific containment, PPE (Tyvek suit, P100 respirator, gloves), and proper disposal per your local regulations — not a standard trash bag.
When using chemical strippers, work outdoors or with maximum ventilation. Wear chemical-resistant gloves (nitrile is not enough for strong methylene-chloride-free strippers — use neoprene or butyl rubber). Collect solvent-soaked rags in a metal container with a lid and dispose of them as hazardous waste, not in a household bin.
Pro Tip: Before committing to full chemical stripping, try a heat gun on a small section. Heat softens most factory finishes enough to scrape cleanly without the chemical hazard. It’s slower than stripper but far safer on veneered doors where chemical penetration can dissolve the adhesive.
What does a realistic timeline and budget look like for this project?
Setting honest expectations before you start prevents the most common DIY frustration: a kitchen that’s out of commission for two weeks because the project took longer than planned.
Typical timeline for a 10–15 door kitchen
- Day 1: Remove doors and hardware, degrease all surfaces, let dry. (6–8 hours of work)
- Day 2: Scuff-sand, repair chips, apply first primer coat. (6–8 hours of work, then overnight dry)
- Day 3: Sand primer, apply second primer coat, let dry. (4–5 hours of work)
- Day 4: First and second topcoats on doors (with flash-off time between). (6–8 hours)
- Day 5: Third topcoat, begin frame/box painting on-site. (5–7 hours)
- Day 6–7: Final cure window, reinstallation. (3–5 hours reinstall)
- Weeks 2–4: Full chemical cure. Use cabinets gently; avoid harsh cleaners.
Professional refinishing projects typically complete in 3–5 days because doors are sprayed off-site in a controlled environment while on-site work continues simultaneously.
Ballpark costs: DIY vs. professional
A DIY supply and rental budget for a 10–15 door kitchen typically runs $400–$900, covering primer, topcoat, sandpaper, tack cloths, HVLP rental, and masking supplies. That figure assumes no major repairs and no specialty 2K coatings (which add cost and require sourcing from a finishing supplier).
Professional refinishing, by contrast, ranges from roughly $3,000 to $8,000 for a typical kitchen — a significant number until you compare it to full cabinet replacement, which commonly runs $15,000 to $40,000. The ROI on refinishing is hard to argue with, especially when a catalyzed professional finish can last 15–20 years, while site-applied finishes typically need touch-ups within 3–5 years.
Budget an additional 10–20% contingency on top of your material estimate for unexpected repairs, patching, or a second round of primer if adhesion testing reveals problems.
How do you maintain a refinished cabinet finish for the long term?
A factory-like finish that’s properly applied and cured will hold up for years — but only with the right maintenance habits. The wrong cleaner can dull or soften even a well-cured topcoat.
Maintenance checklist
- Weekly cleaning: warm water with a few drops of dish soap on a soft microfiber cloth. Wipe, then dry immediately. Never let water sit on cabinet surfaces.
- Avoid: abrasive scrub pads (even “soft” ones), ammonia-based cleaners (Windex), bleach sprays, and any solvent-based cleaner. These degrade most topcoats over time.
- Around the stove: wipe grease splatter as soon as it cools. Baked-on grease requires more aggressive cleaning that can damage the finish.
- Hardware areas: hinge points and pull areas wear first. Check these spots every six months and touch up early before wear spreads.
Testing chemical resistance after cure
At the 30-day mark, run the isopropyl alcohol spot test again (described in the topcoat section). A fully cured waterborne enamel should show no softening. If it does, the finish needs more time or was applied too thick. Note the result and retest at 60 days.
Storing finish for touch-ups
Pour a small amount of leftover primer and topcoat into labeled glass jars with tight lids. Write the product name, color formula, sheen level, and batch code on the label. Store in a temperature-stable location (not an unheated garage in a cold climate). A well-sealed jar of waterborne finish stays usable for 1–2 years. When you need a touch-up, the exact product match is the difference between a seamless repair and a visible patch.
Pro Tip: Photograph the product label of every coating you use — primer, topcoat, and any tinted base — and save the photos in a dedicated folder on your phone. When a hinge area chips two years from now, you’ll have the exact formula ready without digging through a garage shelf.
When should you hire a professional refinisher instead of doing it yourself?
Some projects are genuinely beyond what a careful DIYer can replicate at home, and knowing the line before you start saves money and frustration.
The pro workflow that DIY can’t easily match
Professional refinishers operate differently from the start. Doors are removed and transported to an off-site spray facility where temperature, humidity, and dust are controlled. The pro workflow includes HEPA-filtered sanding containment, catalyzed 2K topcoats mixed to manufacturer spec, and curing in a controlled environment — conditions that produce the chemical cross-linking that makes factory finishes last.
Key elements of a professional process:
- Off-site door spraying in a temperature- and humidity-controlled environment
- Catalyzed 2K polyurethane or conversion varnish topcoats, sourced from professional finishing suppliers
- HEPA containment during all sanding phases to prevent dust contamination
- Product selection based on manufacturer TDS data, not retail availability
- Written warranty covering finish adhesion and durability
Questions to ask any refinisher before hiring
Ask these before signing anything:
- What coating chemistry do you use, and can you provide the TDS and SDS?
- Do you spray doors off-site in a controlled environment?
- What is your dust-control and containment process during on-site sanding?
- Can you provide chemical-resistance documentation for your topcoat?
- What warranty do you offer, and what does it cover?
A refinisher who can’t answer the chemistry question or won’t share a TDS is a red flag. As one industry resource puts it:
Ask a finisher for chemical-resistance documentation or a Chemical Resistance Evaluation for their topcoat. Lack of this evidence is a red flag that the finish won’t stand up to kitchen abuse.
Cabinetsrefinishing’s factory-finish methodology is built around exactly these standards: meticulous preparation, multiple protective layers, and catalyzed chemistry that delivers durability a brush-and-roller job simply can’t match.
A professional estimate should be itemized: door removal and off-site finishing, on-site frame prep, reinstallation, and hardware alignment listed separately. Vague lump-sum quotes make it impossible to compare providers fairly.
Key Takeaways
Refinishing factory-finish cabinets to a durable, factory-like result is achievable for most DIYers when the existing finish is structurally sound, preparation is thorough, and the topcoat chemistry matches the demands of a kitchen environment.
| Point | Details |
|---|---|
| Inspect before anything else | Check for peeling, veneer delamination, and run a tape test before buying materials. |
| Prep is most of the result | Degreasing, scuff-sanding, and bonding primer determine whether the finish lasts or peels. |
| Chemistry drives durability | Factory finishes last 15–20 years; site-applied finishes typically need touch-ups within 3–5 years. |
| Cure time is not dry time | Wait 2–4 weeks for full chemical resistance; test with an isopropyl alcohol spot test at 30 days. |
| Cabinetsrefinishing for pro results | When DIY isn’t enough, Cabinetsrefinishing delivers catalyzed factory-finish results in 3–5 days at a fraction of replacement cost. |
Next step for DIYers: run the tape test and adhesion check described in the opening before buying a single product.
Next step if you’re leaning toward hiring: ask any pro for their TDS and a chemical-resistance demonstration before signing a contract.
The honest case for knowing your limits
Most DIYers can achieve a finish that looks genuinely impressive — smooth, clean, and far better than the tired original. Careful prep, a rented HVLP sprayer, and a quality waterborne enamel get you most of the way there. The gap between “looks great” and “performs like a factory finish” is almost entirely a chemistry problem, not a skill problem.
Catalyzed two-part systems cross-link in ways that single-component retail paints simply don’t. You can apply them as a DIYer if you source them from a finishing supplier, mix them correctly, and spray them in a clean environment — but that’s a significant step up from a weekend project. If your workspace is a dusty garage, if you can’t tolerate a kitchen being out of commission for a full week, or if the cabinets have structural issues that need professional assessment, the math on hiring a pro changes quickly.
The non-technical factors matter as much as the technical ones. Time, workspace, and risk tolerance are real constraints. A $500 DIY project that peels in 18 months costs more in the long run than a $5,000 professional job that holds for 15 years. Be honest with yourself about which situation you’re actually in.
Ready for a factory finish without the DIY risk?
Refinishing delivers the look and durability of new cabinets at a fraction of replacement cost — but only when the chemistry and process are right. Cabinetsrefinishing applies the same catalyzed topcoat systems used in factory production, with off-site door spraying, HEPA-filtered sanding containment, and a process built around manufacturer TDS specifications. The result is a finish that holds up to kitchen grease, steam, and daily cleaning in ways that brush-and-roller jobs can’t match.

Projects typically complete in 3–5 days, and refinishing costs a fraction of the $15,000–$40,000 that full cabinet replacement typically runs. If you’ve done the inspection and decided the DIY route isn’t the right fit, the next step is straightforward: get a professional quote that’s itemized by phase, ask for TDS documentation on the topcoat, and confirm off-site spraying is part of the process.
Get a professional refinishing quote from Cabinetsrefinishing, or explore what a flawless factory finish looks like on a real kitchen before you decide.
Useful sources and technical references
Before you buy a primer or topcoat, pull the manufacturer’s TDS and SDS for every product you plan to use. The TDS gives you recoat windows, pot life for 2K systems, recommended film thickness, and cure schedules. The SDS tells you what PPE you need and how to dispose of waste safely. No blog post — including this one — substitutes for that documentation.
Recommended references:
- OSHA’s chemical hazard communication standard covers SDS requirements and worker protection when using solvent-based coatings and strippers.
- EPA guidelines on lead paint are the authoritative source for testing, containment, and disposal requirements for pre-1978 finishes.
- The Sawmill Creek woodworking forum has detailed practitioner discussions on refinishing factory lacquer finishes, including solvent compatibility and adhesion testing.
- For understanding what separates a bespoke professional finish from site-applied paint, this resource explains the process distinctions clearly.
- Manufacturer finishing suppliers — Sherwin-Williams, ML Campbell, Gemini Coatings — publish TDS documents for their professional cabinet coatings online. Search the product name plus “TDS PDF” to find them.
Save product information for future touch-ups: write down the product name, color formula, sheen level, and batch code for every coating you use. Store a small labeled jar of each. When a chip appears two years from now, that information is the difference between a seamless repair and a mismatched patch.
Recommended
- How to Batch Kitchen Cabinet Refinishing Project Efficiently
- Kitchen Cabinet Refinishing in Lakewood, CO: The Ultimate Guide to a Factory Finish
- Cabinet Refinishing Process Explained: A Denver Homeowner’s Guide to Factory-Like Results – Cabinet Refinishing and Cabinet Painting Denver 720-219-9716
- Cabinet Refinishing, Painting Preparation Steps: A DIY Guide